简介
跟上一篇文章一样,AudioVideoRecordingSample 也是音视频项目里面 一个非常有学习,有参考意义的项目,此项目的侧重点在于Android音视频相关API的使用,尤其是在录制和编码方面,该项目能够将Camera采集的视频和音频内容编码成一个Mp4文件,其中用到了MediaCodec做编码,用到了MediaMuxer将音频和视频混合,这样的一个完整示例对于掌握Android上音视频相关API帮忙非常大,而且项目的性能远高于 GpuImage,所以接下来就大概的看下此项目 AudioVideoRecordingSample Github地址
预览显示
预览画面的显示控件是 CameraGLView
public final class CameraGLView extends GLSurfaceView {
    ...
    public CameraGLView(final Context context, final AttributeSet attrs, final int defStyle) {
        super(context, attrs);
        if (DEBUG) Log.v(TAG, "CameraGLView:");
        //创建一个渲染的对象
        mRenderer = new CameraSurfaceRenderer(this);
        //设置 EGL 上下文的版本号
        setEGLContextClientVersion(2);    // GLES 2.0, API >= 8
        //将渲染对象跟 GLSurfaceView关联起来
        setRenderer(mRenderer);
    }

    /**
     * GLSurfaceViewのRenderer  GLSurfaceView真正用于显示的 对象,要实现 GLSurfaceView.Renderer接口
    */
    private static final class CameraSurfaceRenderer implements GLSurfaceView.Renderer, SurfaceTexture.OnFrameAvailableListener {    // API >
        ...
        public CameraSurfaceRenderer(final CameraGLView parent) {
            if (DEBUG) Log.v(TAG, "CameraSurfaceRenderer:");
            mWeakParent = new WeakReference<CameraGLView>(parent);
            //创建一个单位矩阵
            Matrix.setIdentityM(mMvpMatrix, 0);
        }

        /**
        * 当 GLSurfaceView 回调执行 onSurfaceCreated 的时候,
        */
        @Override
        public void onSurfaceCreated(final GL10 unused, final EGLConfig config) {
            // This renderer required OES_EGL_image_external extension  内部会检查当前 EGL 是否支持  OES_EGL_image_external 纹理,如果不支持抛出异常
            final String extensions = GLES20.glGetString(GLES20.GL_EXTENSIONS);    // API >= 8
            if (DEBUG) Log.i(TAG, "onSurfaceCreated:Gl extensions: " + extensions);
            if (!extensions.contains("OES_EGL_image_external"))
                throw new RuntimeException("This system does not support OES_EGL_image_external.");

            // create textur ID 创建 OES_EGL_image_external 对应的纹理对象
            hTex = GLDrawer2D.initTex();
            // create SurfaceTexture with texture ID.  根据 OES_EGL_image_external 创建的纹理,再次封装成 SurfaceTexture,设置数据发生改变的回调
            mSTexture = new SurfaceTexture(hTex);
            mSTexture.setOnFrameAvailableListener(this);

            // clear screen with yellow color so that you can see rendering rectangle
            GLES20.glClearColor(1.0f, 1.0f, 0.0f, 1.0f);
            final CameraGLView parent = mWeakParent.get();
            if (parent != null) {
                parent.mHasSurface = true;
            }
            // create object for preview display 创建一个对象用于渲染显示 GLSL的内容
            mDrawer = new GLDrawer2D();
            mDrawer.setMatrix(mMvpMatrix, 0);
        }

        /**
        * 当界面发生改变的时候
        */
        @Override
        public void onSurfaceChanged(final GL10 unused, final int width, final int height) {
            if (DEBUG) Log.v(TAG, String.format("onSurfaceChanged:(%d,%d)", width, height));
            // if at least with or height is zero, initialization of this view is still progress.
            if ((width == 0) || (height == 0)) return;
            //预览的视图大小发生改变的时候,改变视图的显示
            updateViewport();
            //重新设置预览的大小,开启预览
            final CameraGLView parent = mWeakParent.get();
            if (parent != null) {
                parent.startPreview(width, height);
            }
        }

        //用来标识数据是否发生了变化
        private volatile boolean requesrUpdateTex = false;
        private boolean flip = true;
        /**
        * drawing to GLSurface  GLSurfaceView 执行绘制的回调函数
        *
        */
        @Override
        public void onDrawFrame(final GL10 unused) {
            GLES20.glClear(GLES20.GL_COLOR_BUFFER_BIT);
            //如果数据发生了变化
            if (requesrUpdateTex) {
                requesrUpdateTex = false;
                mSTexture.updateTexImage();
                mSTexture.getTransformMatrix(mStMatrix);
            }
            //执行绘制操作
            mDrawer.draw(hTex, mStMatrix);
            //执行编码操作
            flip = !flip;
            if (flip) {    // ~30fps
                //加锁
                synchronized (this) {
                    if (mVideoEncoder != null) {
                        //通知界面发生了改变,可以编码当前的画面了
                        mVideoEncoder.frameAvailableSoon(mStMatrix, mMvpMatrix);
                    }
                }
            }
        }

        /**
         * 数据发生改变的回调
         * @param st
         */
        @Override
        public void onFrameAvailable(final SurfaceTexture st) {
            //标识 相机的界面已经发生了更新了
            requesrUpdateTex = true;
        }
        ...
    }
}

可以看到这个  CameraGLView 继承自 GLSurfaceView,而且设置了 对应的Render对象,那么主要的操作就在 Render接口那几个方法了,首先是 onSurfaceCreated的时候,
执行了 hTex = GLDrawer2D.initTex();这个对象是 OES_EGL_image_external 纹理对象,这个纹理可以将YUV的数据直接转成RBGA,接着使用了SurfaceTexture进行封装
设置数据的监听回调 mSTexture.setOnFrameAvailableListener(this); 接着创建 mDrawer = new GLDrawer2D(); 这是 一个用来执行渲染的对象,这个后面再来看
在 onSurfaceChanged 方法中 会执行 parent.startPreview(width, height); 开启相机线程


/**
 * 开始预览
*/
private synchronized void startPreview(final int width, final int height) {
    if (mCameraHandler == null) {
        //启动相机预览线程
        final CameraThread thread = new CameraThread(this);
        //启动预览线程
        thread.start();
        //获取到子线程的handle
        mCameraHandler = thread.getHandler();
    }
    //开启预览
    mCameraHandler.startPreview(1280, 720/*width, height*/);
}

/**
 * Thread for asynchronous operation of camera preview  预览的相机线程  这里开启线程的原因是想将相机的操作都转移到线程中执行
 */
private static final class CameraThread extends Thread {
    private final Object mReadyFence = new Object();
    //通过虚引用持有外部类的引用
    private final WeakReference<CameraGLView>mWeakParent;
    private CameraHandler mHandler;
    private volatile boolean mIsRunning = false;
    private Camera mCamera;

    //标识是否为前置摄像头
    private boolean mIsFrontFace;

    public CameraThread(final CameraGLView parent) {
        super("Camera thread");
        mWeakParent = new WeakReference<CameraGLView>(parent);
    }

    /**
    * message loop
    * prepare Looper and create Handler for this thread
    */
    @Override
    public void run() {
        if (DEBUG) Log.d(TAG, "Camera thread start");
        //创建子线程的Loop对象
        Looper.prepare();
        //确保 mHandler创建成功
        synchronized (mReadyFence) {
            mHandler = new CameraHandler(this);
            mIsRunning = true;
            mReadyFence.notify();
        }
        //执行loop的循环
        Looper.loop();
        if (DEBUG) Log.d(TAG, "Camera thread finish");
        synchronized (mReadyFence) {
            mHandler = null;
            mIsRunning = false;
        }
    }

    @Override
    public void handleMessage(final Message msg) {
        switch (msg.what) {
        case MSG_PREVIEW_START:
            //开启预览
            mThread.startPreview(msg.arg1, msg.arg2);
            break;
        case MSG_PREVIEW_STOP:
            mThread.stopPreview();
            synchronized (this) {
                notifyAll();
            }
            Looper.myLooper().quit();
            mThread = null;
            break;
        default:
            throw new RuntimeException("unknown message:what=" + msg.what);
        }
    }
    ...
}
其实这就是一个类似HandleThread对象,内部就是一个子线程,里面执行了Loop.loop一直处于轮询中,这里为什么要开启子线程来打开摄像头等操作,因为这个项目使用的Camera是Camera1,在ApI21之后又出来一个Camer2,俩者最大的区别就是 Camera1是同步的,Camera2是异步的,如果是同步的话,就会阻塞这个渲染的线程,所以这里开启了一个子线程来执行,我们看下这里摄像头的配置
先看下子线程开启摄像头的操作
mThread.startPreview(msg.arg1, msg.arg2);

private final void startPreview(final int width, final int height) {
    ...
    final int[] max_fps = supportedFpsRange.get(supportedFpsRange.size() - 1);
    Log.i(TAG, String.format("fps:%d-%d", max_fps[0], max_fps[1]));
    //设置 预览的Fps帧数,这里设置为最大的
    params.setPreviewFpsRange(max_fps[0], max_fps[1]);

    // rotate camera preview according to the device orientation  设置相机的旋转角度,
    setRotation(params);

    //再次将当前的参数配置设置到摄像机中
    mCamera.setParameters(params);
    ...
    //设置TextureView的缓冲区大小,这个 SurfaceTexture 是我们在外部创建的 SurfaceTexture
    final SurfaceTexture st = parent.getSurfaceTexture();
    st.setDefaultBufferSize(previewSize.width, previewSize.height);
    //开启预览
    mCamera.setPreviewTexture(st);
}

private final void setRotation(final Camera.Parameters params) {
    if (DEBUG) Log.v(TAG, "setRotation:");
    final CameraGLView parent = mWeakParent.get();
    if (parent == null) return;

    //获取到屏幕的旋转角度
    final Display display = ((WindowManager)parent.getContext().getSystemService(Context.WINDOW_SERVICE)).getDefaultDisplay();
    final int rotation = display.getRotation();
    int degrees = 0;
    switch (rotation) {
        case Surface.ROTATION_0: degrees = 0; break;
        case Surface.ROTATION_90: degrees = 90; break;
        case Surface.ROTATION_180: degrees = 180; break;
        case Surface.ROTATION_270: degrees = 270; break;
    }

    // get whether the camera is front camera or back camera 再获取到相机当前的旋转角度
    final Camera.CameraInfo info = new android.hardware.Camera.CameraInfo();android.hardware.Camera.getCameraInfo(CAMERA_ID, info);
    mIsFrontFace = (info.facing == Camera.CameraInfo.CAMERA_FACING_FRONT);
    if (mIsFrontFace) {    // front camera   前置摄像头
        degrees = (info.orientation + degrees) % 360;
        degrees = (360 - degrees) % 360;  // reverse
    }else{  // back camera   后置摄像头
        degrees = (info.orientation - degrees + 360) % 360;
    }
    Log.i(TAG, String.format("rotation12(%d)",degrees));
    // apply rotation setting 设置相机旋转的角度
    mCamera.setDisplayOrientation(degrees);
    parent.mRotation = degrees;
    // XXX This method fails to call and camera stops working on some devices.
    //params.setRotation(degrees);
}

上面主要是设置相机的配置参数,比如设置对焦的模式,选择最适合的预览大小,画面的大小,还有设置旋转的角度,获取到了旋转的角度之后,
设置 mCamera.setDisplayOrientation(degrees);大致可以理解为将相机旋转对应的角度,接着我们使用之前创建的 SurfaceTexture,
设置到 Camera中 mCamera.setPreviewTexture(st); 下面是具体的代码

final SurfaceTexture st = parent.getSurfaceTexture();
st.setDefaultBufferSize(previewSize.width, previewSize.height);
//开启预览
mCamera.setPreviewTexture(st);

最终执行,这样就开启了预览了,
if (mCamera != null) {
    // start camera preview display
    mCamera.startPreview();
}

因为这里将 我们创建的 SurfaceTexture 管理到了 Camera中,而且我们之前有给 SurfaceTexture 设置了监听事件,所以当界面发生改变的时候,会回调执行监听
/**
 * 数据发生改变的回调
* @param st
*/
@Override
public void onFrameAvailable(final SurfaceTexture st) {
    //标识 相机的界面已经发生了更新了
    requesrUpdateTex = true;
}

接着看GLSurfaceView 的 onDrawFrame方法
public void onDrawFrame(final GL10 unused) {
    GLES20.glClear(GLES20.GL_COLOR_BUFFER_BIT);
    //如果据发生了变化
    if (requesrUpdateTex) {
        requesrUpdateTex = false;
        // update texture(came from camera)  调用 SurfaceViewTexture 将相机的内容绘制到 纹理上面,这样我们创建的 OES_EGL_image_external 就能接收到我们的纹理
        //当updateTextImage被调用时,SurfaceTexture对象所关联的OpenGLES中纹理对象的内容将更新为Image Stream最新的图片,SurfaceTexture对象可以在任何线程中创建
        //但是updateTextImage方法只能在包含 OpenGLES 环境的线程里面调用,即Renderer接口所独立创建的线程当中,一般在onDrawFrame中调用updateTextImage()将数据
        //绑定给OpenGLES 对应的纹理对象,注意,必须显示的调用 updateTextImage()将数据更新到 GL_OES_EGL_image_external类型的OpenGL ES纹理对象中后,
        //SurfaceTexture才有空间来获取下一帧的数据,否则下一帧数据一致不会交给SurfaceTexture
        mSTexture.updateTexImage();

        // get texture matrix  获取到 矩阵
        //当从OpenGL ES的纹理对象采样时,首先应该调用glTransformMatrix来转换纹理坐标,每次调用updateTextImage()被调用时,纹理矩阵都可能发生变化,所以每次
        //texture image被更新时,getTransformMatix也应该被调用
        mSTexture.getTransformMatrix(mStMatrix);
    }
    //执行绘制操作
    mDrawer.draw(hTex, mStMatrix);
    //执行编码操作
    flip = !flip;
    if (flip) {    // ~30fps
        //加锁
        synchronized (this) {
            if (mVideoEncoder != null) {
                //通知界面发生了改变,可以编码当前的画面了
                mVideoEncoder.frameAvailableSoon(mStMatrix, mMvpMatrix);
            }
        }
    }
}

由于回调执行了 onFrameAvailable 将 requesrUpdateTex 改为了 true,所以这里 onDrawFrame 方法执行的时候,会 调用 mSTexture.updateTexImage();
要注意这个方法只能在渲染线程中被调用,大致就是可以将数据刷新到这个关联的纹理上面,接着调用 mSTexture.getTransformMatrix(mStMatrix);
获取到 纹理的矩阵变化,接着执行  mDrawer.draw(hTex, mStMatrix);

public void draw(final int tex_id, final float[] tex_matrix) {
    GLES20.glUseProgram(hProgram);
    //设置顶点着色器的俩个变量
    if (tex_matrix != null)
        GLES20.glUniformMatrix4fv(muTexMatrixLoc, 1, false, tex_matrix, 0);

    GLES20.glUniformMatrix4fv(muMVPMatrixLoc, 1, false, mMvpMatrix, 0);
    //激活纹理单元,绑定 纹理单元
    GLES20.glActiveTexture(GLES20.GL_TEXTURE0);
    GLES20.glBindTexture(GLES11Ext.GL_TEXTURE_EXTERNAL_OES, tex_id);
    //执行绘制操作
    GLES20.glDrawArrays(GLES20.GL_TRIANGLE_STRIP, 0, VERTEX_NUM);
    //解绑操作
    GLES20.glBindTexture(GLES11Ext.GL_TEXTURE_EXTERNAL_OES, 0);
    GLES20.glUseProgram(0);
}

大致就是将我们得到的纹理,直接通过openGL的方式,绘制出来,我们来仔细看下这个类
GLDrawer2D 源码实现
public class GLDrawer2D {
    private static final boolean DEBUG = false; // TODO set false on release
    private static final String TAG = "GLDrawer2D";

    //默认的顶点着色器
    private static final String vss
        = "uniform mat4 uMVPMatrix;\n"
        + "uniform mat4 uTexMatrix;\n"
        + "attribute highp vec4 aPosition;\n"
        + "attribute highp vec4 aTextureCoord;\n"
        + "varying highp vec2 vTextureCoord;\n"
        + "\n"
        + "void main() {\n"
        + "    gl_Position = uMVPMatrix * aPosition;\n"
        + "    vTextureCoord = (uTexMatrix * aTextureCoord).xy;\n"
        + "}\n";
    private static final String fss
        = "#extension GL_OES_EGL_image_external : require\n"
        + "precision mediump float;\n"
        + "uniform samplerExternalOES sTexture;\n"
        + "varying highp vec2 vTextureCoord;\n"
        + "void main() {\n"
        + "  gl_FragColor = texture2D(sTexture, vTextureCoord);\n"
        + "}";


    //这不是默认的顶点数据 ,这是以左上角为原点的顶点坐标,跟正常的来说就是倒置的效果
    private static final float[] VERTICES = { 1.0f, 1.0f, -1.0f, 1.0f, 1.0f, -1.0f, -1.0f, -1.0f };

    //默认的纹理数据,这个纹理数据 是以左下角为远点 ,旋转180得到的纹理坐标
    //这是以左下角为原点,旋转180得到的纹理坐标,效果就是倒置还做了镜像处理
    private static final float[] TEXCOORD = {
        1.0f, 1.0f,
        0.0f, 1.0f,
        1.0f, 0.0f,
        0.0f, 0.0f
    };

    public GLDrawer2D() {
        //创建一个帧缓冲
        pVertex = ByteBuffer.allocateDirect(VERTEX_SZ * FLOAT_SZ).order(ByteOrder.nativeOrder()).asFloatBuffer();
        //添加内容
        pVertex.put(VERTICES);
        //注意:buffer.flip();一定得有,如果没有,就是从文件最后开始读取的,当然读出来的都是byte=0时候的字符。通过buffer.flip();这个语句,
        //就能把buffer的当前位置更改为buffer缓冲区的第一个位置。
        pVertex.flip();

        pTexCoord = ByteBuffer.allocateDirect(VERTEX_SZ * FLOAT_SZ).order(ByteOrder.nativeOrder()).asFloatBuffer();
        pTexCoord.put(TEXCOORD);
        //Log.d(TAG,"GLDrawer2D  texture == " + Arrays.toString(TEXTURE_ROTATED_270));
        //注意:buffer.flip();一定得有,如果没有,就是从文件最后开始读取的,当然读出来的都是byte=0时候的字符。通过buffer.flip();这个语句,
        //就能把buffer的当前位置更改为buffer缓冲区的第一个位置。
        pTexCoord.flip();

        //编译,链接顶点着色器,片段着色器
        hProgram = loadShader(vss, fss);

        //链接着色器程序,然后找到默认,公有的顶点属性或者变量
        GLES20.glUseProgram(hProgram);
        //顶点属性
        maPositionLoc = GLES20.glGetAttribLocation(hProgram, "aPosition");
        //纹理属性
        maTextureCoordLoc = GLES20.glGetAttribLocation(hProgram, "aTextureCoord");
        //顶点着色器的 Uniform变量
        muMVPMatrixLoc = GLES20.glGetUniformLocation(hProgram, "uMVPMatrix");
        muTexMatrixLoc = GLES20.glGetUniformLocation(hProgram, "uTexMatrix");

        //初始一个单位矩阵
        Matrix.setIdentityM(mMvpMatrix, 0);

        //传递默认的变量,这是从 CPU 忘 GPU 传递变量
        GLES20.glUniformMatrix4fv(muMVPMatrixLoc, 1, false, mMvpMatrix, 0);
        GLES20.glUniformMatrix4fv(muTexMatrixLoc, 1, false, mMvpMatrix, 0);
        //设置顶点属性,纹理属性,设置解析的方式,激活顶点属性

        GLES20.glVertexAttribPointer(maPositionLoc, 2, GLES20.GL_FLOAT, false, VERTEX_SZ, pVertex);
        GLES20.glVertexAttribPointer(maTextureCoordLoc, 2, GLES20.GL_FLOAT, false, VERTEX_SZ, pTexCoord);
        GLES20.glEnableVertexAttribArray(maPositionLoc);
        GLES20.glEnableVertexAttribArray(maTextureCoordLoc);
    }

    public void draw(final int tex_id, final float[] tex_matrix) {
        GLES20.glUseProgram(hProgram);
        //设置顶点着色器的俩个变量
        if (tex_matrix != null)
          GLES20.glUniformMatrix4fv(muTexMatrixLoc, 1, false, tex_matrix, 0);

        GLES20.glUniformMatrix4fv(muMVPMatrixLoc, 1, false, mMvpMatrix, 0);
        //激活纹理单元,绑定 纹理单元
        GLES20.glActiveTexture(GLES20.GL_TEXTURE0);
        GLES20.glBindTexture(GLES11Ext.GL_TEXTURE_EXTERNAL_OES, tex_id);
        //执行绘制操作
        GLES20.glDrawArrays(GLES20.GL_TRIANGLE_STRIP, 0, VERTEX_NUM);
        //解绑操作
        GLES20.glBindTexture(GLES11Ext.GL_TEXTURE_EXTERNAL_OES, 0);
        GLES20.glUseProgram(0);
    }

    /**
    * create external texture
    * @return texture ID
    */
    public static int initTex() {
        if (DEBUG) Log.v(TAG, "initTex:");
        final int[] tex = new int[1];
        GLES20.glGenTextures(1, tex, 0);
        GLES20.glBindTexture(GLES11Ext.GL_TEXTURE_EXTERNAL_OES, tex[0]);
        GLES20.glTexParameteri(GLES11Ext.GL_TEXTURE_EXTERNAL_OES, GLES20.GL_TEXTURE_WRAP_S, GLES20.GL_CLAMP_TO_EDGE);
        GLES20.glTexParameteri(GLES11Ext.GL_TEXTURE_EXTERNAL_OES, GLES20.GL_TEXTURE_WRAP_T, GLES20.GL_CLAMP_TO_EDGE);
        GLES20.glTexParameteri(GLES11Ext.GL_TEXTURE_EXTERNAL_OES, GLES20.GL_TEXTURE_MIN_FILTER, GLES20.GL_LINEAR);
        GLES20.glTexParameteri(GLES11Ext.GL_TEXTURE_EXTERNAL_OES, GLES20.GL_TEXTURE_MAG_FILTER, GLES20.GL_LINEAR);
        return tex[0];
    }
    ...
}

这里需要注意下,这里使用的顶点坐标和纹理坐标,都不是默认的,这个要注意,其实这里的变换是一系列的,是有依据的,首先在相机配置设置 旋转的角度
mCamera.setDisplayOrientation(degrees);

接着,在绘制的时候 ,在执行 mDrawer.draw(hTex, mStMatrix); 方法之前会先执行 mSTexture.getTransformMatrix(mStMatrix); 获取到此时的纹理变换矩阵,打印这个mStMatrix
//前置摄像头  [0.0, -1.0, 0.0, 0.0, 1.0, 0.0, 0.0, 0.0, 0.0, 0.0, 1.0, 0.0, 0.0, 1.0, 0.0, 1.0]
//后置摄像头  [0.0, -1.0, 0.0, 0.0, 1.0, 0.0, 0.0, 0.0,0 0.0, 0.0, 1.0, 0.0, 0.0, 1.0, 0.0, 1.0]

之后在绘制的时候,将 传递的变量 设置到 gpu中 GLES20.glUniformMatrix4fv(muTexMatrixLoc, 1, false, tex_matrix, 0);
我们看下这个矩阵变量会有什么作用 vTextureCoord = (uTexMatrix * aTextureCoord).xy;\n"  就是将我们传递的纹理变量和矩阵做个相乘操作,然后取xy,注意这里是相乘不是点乘
首先相机做个旋转处理,然后让顶点数据做个倒置处理,然后让纹理数据做个倒置然后镜像处理,最终显示正确的画面,其实我们可以参考 GPUImage的处理方式,去掉这些多余的操作
比如去掉相机的旋转角度 // mCamera.setDisplayOrientation(degrees); 在执行绘制的 mDrawer.draw(hTex, null); 将mStMatrix 变成null
然后将顶点坐标变成默认的顶点数据  private static final float[] VERTICES_ = {-1.0f,-1.0f,1.0f,-1.0f,-1.0f,1.0f,1.0f,1.0f};
然后纹理数据我们取左上角为原点,然后根据相机的旋转角度,选择合适的值,比如是后置摄像头,正常是90,那我们的纹理坐标就可以取
public static final float TEXTURE_ROTATED_90[] = {
    1.0f, 1.0f,
    1.0f, 0.0f,
    0.0f, 1.0f,
    0.0f, 0.0f,
};
改成这样也是可以实现画面的正常显示,比较俩者的不同就是,如果采用后者,对于前置摄像头,后者摄像头会导致相机的旋转角度不一样,选择不一样的纹理坐标,而如果采用前者的话
因为前面一开始就设置了相机的旋转角度,所以后续的纹理坐标不用变换
上面就是预览画面的正常显示过程,在了解这些纹理,顶点坐标的变换过程中,也对GPUImage 多个特效处理的时候,纹理,顶点坐标产生了疑点
GPUImage 思考
在 GPUImage 中多个特效处理的时候,在GPUImageFilterGroup中有这样的代码
public void onDraw(final int textureId, final FloatBuffer cubeBuffer, final FloatBuffer textureBuffer) {
    ...
    //如果不是最后一个滤镜,绘制到FrameBuffer上,如果是最后一个,就绘制到了屏幕上
    if (isNotLast) {
        GLES20.glBindFramebuffer(GLES20.GL_FRAMEBUFFER, frameBuffers[i]);
        GLES20.glClearColor(0, 0, 0, 0);
    }
    //滤镜绘制代码
    if (i == 0) {
        //第一个滤镜绘制使用相机的原始图像纹理Id和参数传递过来的顶点以及纹理坐标,这个处理之后会得到正确的图片
        filter.onDraw(previousTexture, cubeBuffer, textureBuffer);
    } else if (i == size - 1) {
        //如果是最后一个,并且 size大小可以被2整除,则纹理坐标设置为 glTextureFlipBuffer ,这是做了水平镜像处理的
        filter.onDraw(previousTexture, glCubeBuffer, (size % 2 == 0) ? glTextureFlipBuffer : glTextureBuffer);
    } else {
        //中间的滤镜绘制在之前纹理基础上继续绘制,使用 mGLTextureBuffer纹理坐标
        filter.onDraw(previousTexture, glCubeBuffer, glTextureBuffer);
    }
    if (isNotLast) {
        //如果是最后一个绑定到屏幕上
        GLES20.glBindFramebuffer(GLES20.GL_FRAMEBUFFER, 0);
        previousTexture = frameBufferTextures[i];
    }
    ...
}
这里为什么要判断是不是最后而且是否能被2整除来设置对应的纹理坐标,正常来说不是第一个变换的时候,如果将内容转换过来,后续的操作应该都是可以直接取正规的顶点坐标,纹理坐标
//顶点位置,在-1 到 1之间
public static final float CUBE[] = {
    -1.0f, -1.0f,
     1.0f, -1.0f,
    -1.0f,  1.0f,
     1.0f,  1.0f,
};
public static final float TEXTURE_COORD_NO_ROTATION[] = {
    0.0f,0.0f, //图像的左下角
    1.0f,0.0f, //图像的右下角
    0.0f,1.0f, //图像的左下角
    1.0f,1.0f  //图像的右上角
};
又考虑到 摄像机还有角度的问题存在,为了避免这些干扰,直接在Widdow下面,通过OpenGL来验证,下面是完整的代码演示
//通过定义STB_IMAGE_IMPLEMENTATION,预处理器会修改头文件,让其只包含相关的函数定义源码,等于是将这个头文件变为一个 .cpp 文件了。现在只需要在你的程序中包含stb_image.h并编译就可以了。
#define STB_IMAGE_IMPLEMENTATION
#include <glad/glad.h>
#include <GLFW/glfw3.h>
#include <stb_image.h>
#include <iostream>
#include <Shader.h>
void framebuffer_size_callback(GLFWwindow* window, int width, int height);
void processInput(GLFWwindow* window);
unsigned int loadTexture(const char* path);
// settings
const unsigned int SCR_WIDTH = 800;
const unsigned int SCR_HEIGHT = 600;
int main()
{
// glfw: initialize and configure
// ------------------------------
glfwInit();
glfwWindowHint(GLFW_CONTEXT_VERSION_MAJOR, 3);
glfwWindowHint(GLFW_CONTEXT_VERSION_MINOR, 3);
glfwWindowHint(GLFW_OPENGL_PROFILE, GLFW_OPENGL_CORE_PROFILE);
#ifdef __APPLE__
glfwWindowHint(GLFW_OPENGL_FORWARD_COMPAT, GL_TRUE); // uncomment this statement to fix compilation on OS X
#endif
// glfw window creation
// --------------------
GLFWwindow* window = glfwCreateWindow(SCR_WIDTH, SCR_HEIGHT, "LearnOpenGL", NULL, NULL);
if (window == NULL)
{
std::cout << "Failed to create GLFW window" << std::endl;
glfwTerminate();
return -1;
}
glfwMakeContextCurrent(window);
glfwSetFramebufferSizeCallback(window, framebuffer_size_callback);
// glad: load all OpenGL function pointers
// ---------------------------------------
if (!gladLoadGLLoader((GLADloadproc)glfwGetProcAddress))
{
std::cout << "Failed to initialize GLAD" << std::endl;
return -1;
}
// build and compile our shader zprogram
// ------------------------------------
Shader ourShader("4.1.texture.vs", "4.1.texture.fs");
// set up vertex data (and buffer(s)) and configure vertex attributes
// ------------------------------------------------------------------ 传统的以纹理坐标得到的坐标系,是以左下角为下标远点的
float vertices1[] = {
// positions // texture coords
-1.0f, -1.0f, 0.0f, 0.0f, 0.0f, //图像的左下角
1.0f, -1.0f, 0.0f, 1.0f, 0.0f, //图像的右下角
-1.0f, 1.0f, 0.0f, 0.0f, 1.0f, //图像的左下角
1.0f, 1.0f, 0.0f, 1.0f, 1.0f //图像的右上角
};
/**
* 由于 计算机的坐标系跟 纹理的坐标系是相反的,所以我们可以用 按照左上角为下标原点,这俩者的效果就是翻转过来的样子
*/
float vertices[] = {
// positions // texture coords
-1.0f, -1.0f, 0.0f, 0.0f, 1.0f,
1.0f, -1.0f, 0.0f, 1.0f, 1.0f,
-1.0f, 1.0f, 0.0f, 0.0f, 0.0f,
1.0f, 1.0f, 0.0f, 1.0f, 0.0f
};
//以左上角为远点的坐标
unsigned int VBO, VAO;
glGenVertexArrays(1, &VAO);
glGenBuffers(1, &VBO);
glBindVertexArray(VAO);
glBindBuffer(GL_ARRAY_BUFFER, VBO);
glBufferData(GL_ARRAY_BUFFER, sizeof(vertices), vertices, GL_STATIC_DRAW);
// position attribute
glVertexAttribPointer(0, 3, GL_FLOAT, GL_FALSE, 5 * sizeof(float), (void*)0);
glEnableVertexAttribArray(0);
// color attribute
glVertexAttribPointer(1, 2, GL_FLOAT, GL_FALSE, 5 * sizeof(float), (void*)(3 * sizeof(float)));
glEnableVertexAttribArray(1);
//使用的是以左下角为原点的坐标
unsigned int VBO1, VAO1;
glGenVertexArrays(1, &VAO1);
glGenBuffers(1, &VBO1);
glBindVertexArray(VAO1);
glBindBuffer(GL_ARRAY_BUFFER, VBO1);
glBufferData(GL_ARRAY_BUFFER, sizeof(vertices1), vertices1, GL_STATIC_DRAW);
// position attribute
glVertexAttribPointer(0, 3, GL_FLOAT, GL_FALSE, 5 * sizeof(float), (void*)0);
glEnableVertexAttribArray(0);
// color attribute
glVertexAttribPointer(1, 2, GL_FLOAT, GL_FALSE, 5 * sizeof(float), (void*)(3 * sizeof(float)));
glEnableVertexAttribArray(1);
// framebuffer configuration 创建帧缓冲对象,在绑定到GL_FRAMEBUFFER目标之后,所有的读取和写入帧缓冲的操作将会影响到当前绑定的帧缓冲
// -------------------------
unsigned int framebuffer;
glGenFramebuffers(1, &framebuffer);
glBindFramebuffer(GL_FRAMEBUFFER, framebuffer);
// create a color attachment texture 创建一个纹理附件,当把一个纹理附加到帧缓冲的时候,所有的渲染指令将会写入到这个纹理中,使用纹理操作的结果
//将会被存储在一个纹理图像中,我们之后可以在着色器中很方便的使用它
unsigned int textureColorbuffer;
glGenTextures(1, &textureColorbuffer);
glBindTexture(GL_TEXTURE_2D, textureColorbuffer);
//主要的区别就是,我们将维度设置为了屏幕大小,并且给纹理的data参数传递了NULL,对于这个纹理,我们只是分配了内存而没有填充它,填充这个纹理将会在我们
//渲染到帧缓冲之后来进行
glTexImage2D(GL_TEXTURE_2D, 0, GL_RGB, SCR_WIDTH, SCR_HEIGHT, 0, GL_RGB, GL_UNSIGNED_BYTE, NULL);
glTexParameteri(GL_TEXTURE_2D, GL_TEXTURE_MIN_FILTER, GL_LINEAR);
glTexParameteri(GL_TEXTURE_2D, GL_TEXTURE_MAG_FILTER, GL_LINEAR);
//将这个纹理附件添加到帧缓冲上
glFramebufferTexture2D(GL_FRAMEBUFFER, GL_COLOR_ATTACHMENT0, GL_TEXTURE_2D, textureColorbuffer, 0);
//解绑操作
glBindTexture(GL_TEXTURE_2D, 0);
glBindFramebuffer(GL_FRAMEBUFFER, 0);
// -------------------------
unsigned int texture2;
int width, height, nrChannels;
// texture 2
// ---------
glGenTextures(1, &texture2);
glBindTexture(GL_TEXTURE_2D, texture2);
// set the texture wrapping parameters
glTexParameteri(GL_TEXTURE_2D, GL_TEXTURE_WRAP_S, GL_CLAMP_TO_EDGE); // set texture wrapping to GL_REPEAT (default wrapping method)
glTexParameteri(GL_TEXTURE_2D, GL_TEXTURE_WRAP_T, GL_CLAMP_TO_EDGE);
// set texture filtering parameters
glTexParameteri(GL_TEXTURE_2D, GL_TEXTURE_MIN_FILTER, GL_LINEAR);
glTexParameteri(GL_TEXTURE_2D, GL_TEXTURE_MAG_FILTER, GL_LINEAR);
// load image, create texture and generate mipmaps
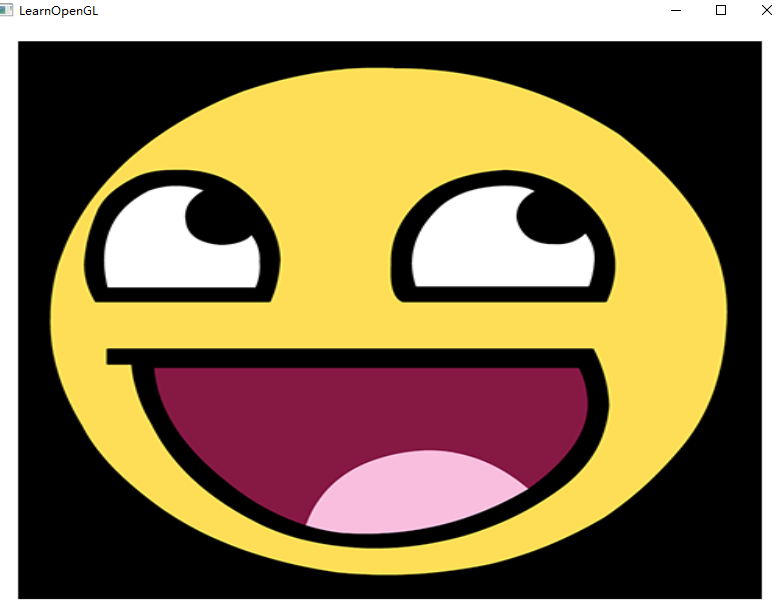
unsigned char* data = stbi_load("awesomeface.png", &width, &height, &nrChannels, 0);
if (data)
{
// note that the awesomeface.png has transparency and thus an alpha channel, so make sure to tell OpenGL the data type is of GL_RGBA
glTexImage2D(GL_TEXTURE_2D, 0, GL_RGBA, width, height, 0, GL_RGBA, GL_UNSIGNED_BYTE, data);
glGenerateMipmap(GL_TEXTURE_2D);
}
else
{
std::cout << "Failed to load texture" << std::endl;
}
stbi_image_free(data);
// 别忘记在激活着色器前先设置uniform!
ourShader.use(); // don't forget to activate/use the shader before setting uniforms!
glUniform1i(glGetUniformLocation(ourShader.ID, "texture1"), 0);
// -----------
while (!glfwWindowShouldClose(window))
{
// input
// -----
processInput(window);
//1.将新的帧缓冲绑定为激活的帧缓冲,和往常一样渲染场景,只是绘制的内容会在帧缓冲绑定的纹理上面
glBindFramebuffer(GL_FRAMEBUFFER, framebuffer);
glClearColor(0.2f, 0.3f, 0.3f, 1.0f);
glClear(GL_COLOR_BUFFER_BIT);
// render container
ourShader.use();
glBindVertexArray(VAO);
glActiveTexture(GL_TEXTURE0);
glBindTexture(GL_TEXTURE_2D, texture2);
//glDrawArrays();
glDrawArrays(GL_TRIANGLE_STRIP, 0, 4);
//解绑操作,下面的内容会绘制到屏幕上
glBindFramebuffer(GL_FRAMEBUFFER, 0);
glClearColor(1.0f, 1.0f, 1.0f, 1.0f); // set clear color to white (not really necessery actually, since we won't be able to see behind the quad anyways)
glClear(GL_COLOR_BUFFER_BIT);
//绘制到屏幕上面,我们此时使用的是以左下角为原点的坐标轴,绘制出来是正常的
ourShader.use();
glBindVertexArray(VAO1);
glActiveTexture(GL_TEXTURE0);
glBindTexture(GL_TEXTURE_2D, textureColorbuffer); // use the color attachment texture as the texture of the quad plane
glDrawArrays(GL_TRIANGLE_STRIP, 0, 4);
glfwSwapBuffers(window);
glfwPollEvents();
}
glDeleteVertexArrays(1, &VAO);
glDeleteBuffers(1, &VBO);
glDeleteVertexArrays(1, &VAO1);
glDeleteBuffers(1, &VBO1);
glfwTerminate();
return 0;
}
void processInput(GLFWwindow* window)
{
if (glfwGetKey(window, GLFW_KEY_ESCAPE) == GLFW_PRESS)
glfwSetWindowShouldClose(window, true);
}
// glfw: whenever the window size changed (by OS or user resize) this callback function executes
// ---------------------------------------------------------------------------------------------
void framebuffer_size_callback(GLFWwindow* window, int width, int height)
{
glViewport(0, 0, width, height);
}
unsigned int loadTexture(char const* path)
{
unsigned int textureID;
glGenTextures(1, &textureID);
int width, height, nrComponents;
unsigned char* data = stbi_load(path, &width, &height, &nrComponents, 0);
if (data)
{
GLenum format;
if (nrComponents == 1)
format = GL_RED;
else if (nrComponents == 3)
format = GL_RGB;
else if (nrComponents == 4)
format = GL_RGBA;
glBindTexture(GL_TEXTURE_2D, textureID);
glTexImage2D(GL_TEXTURE_2D, 0, format, width, height, 0, format, GL_UNSIGNED_BYTE, data);
glGenerateMipmap(GL_TEXTURE_2D);
glTexParameteri(GL_TEXTURE_2D, GL_TEXTURE_WRAP_S, GL_REPEAT);
glTexParameteri(GL_TEXTURE_2D, GL_TEXTURE_WRAP_T, GL_REPEAT);
glTexParameteri(GL_TEXTURE_2D, GL_TEXTURE_MIN_FILTER, GL_LINEAR_MIPMAP_LINEAR);
glTexParameteri(GL_TEXTURE_2D, GL_TEXTURE_MAG_FILTER, GL_LINEAR);
stbi_image_free(data);
}
else
{
std::cout << "Texture failed to load at path: " << path << std::endl;
stbi_image_free(data);
}
return textureID;
}
上面的代码其实很简单就是加载一个图片进来,创建一个帧缓冲对象,首先使用的左上角为原点的纹理坐标,做一层变换,前面一篇文章有说过,经过这层变换之后能正确的显示出来,接下来我们使用帧缓冲挂载的纹理,在这个纹理的基础上面 采用 默认的 左下角为原点的纹理进行绘制,可以看出我们能得到正确显示的图片,也就是说只要第一个纹理做了正确的变换之后,后续的纹理变换没有必要再做过多的操作,所以对于 在GPUImageFilterGroup 完全可以改成下面这种
public void onDraw(final int textureId, final FloatBuffer cubeBuffer, final FloatBuffer textureBuffer) {
    ...
    //如果不是最后一个滤镜,绘制到FrameBuffer上,如果是最后一个,就绘制到了屏幕上
    if (isNotLast) {
        GLES20.glBindFramebuffer(GLES20.GL_FRAMEBUFFER, frameBuffers[i]);
        GLES20.glClearColor(0, 0, 0, 0);
    }
    //滤镜绘制代码
    if (i == 0) {
        //第一个滤镜绘制使用相机的原始图像纹理Id和参数传递过来的顶点以及纹理坐标,这个处理之后会得到正确的图片
        filter.onDraw(previousTexture, cubeBuffer, textureBuffer);
    } else{
        //中间的滤镜绘制在之前纹理基础上继续绘制,使用 mGLTextureBuffer纹理坐标
        filter.onDraw(previousTexture, glCubeBuffer, glTextureBuffer);
    }
    if (isNotLast) {
        //如果是最后一个绑定到屏幕上
        GLES20.glBindFramebuffer(GLES20.GL_FRAMEBUFFER, 0);
        previousTexture = frameBufferTextures[i];
    }
    ...
}
glCubeBuffer,glTextureBuffer 都是默认的纹理坐标,默认的顶点数据,不经过任何的处理,改成这样也能正确的显示
编码视频
由于内容比较多,这里就大致的看下,首先是 关于 MediaCodec的配置选择
视频配置
protected void prepare() throws IOException {
    if (DEBUG) Log.i(TAG, "prepare: ");
    //重置默认值
    mTrackIndex = -1;
    mMuxerStarted = mIsEOS = false;

    //找到视频的对应的 MediaCodecInfo对象,并且这个对象支持的 ColorFormat也是我们项目中所需要的
    final MediaCodecInfo videoCodecInfo = selectVideoCodec(MIME_TYPE);
    //如果没有找到,直接返回
    if (videoCodecInfo == null) {
        Log.e(TAG, "Unable to find an appropriate codec for " + MIME_TYPE);
        return;
    }
    if (DEBUG) Log.i(TAG, "selected codec: " + videoCodecInfo.getName());

    //根据前面一步得到的 MediaCodecInfo 创建对应的 MediaFormat
    final MediaFormat format = MediaFormat.createVideoFormat(MIME_TYPE, mWidth, mHeight);
    ...
}

音频配置
protected void prepare() throws IOException {
    if (DEBUG) Log.v(TAG, "prepare:");
    mTrackIndex = -1;
    mMuxerStarted = mIsEOS = false;

    // prepare MediaCodec for AAC encoding of audio data from inernal mic.  判断是否有我们想要的 音频配置
    final MediaCodecInfo audioCodecInfo = selectAudioCodec(MIME_TYPE);
    //如果没有我们想要的音频配置,直接返回
    if (audioCodecInfo == null) {
        Log.e(TAG, "Unable to find an appropriate codec for " + MIME_TYPE);
        return;
    }
    if (DEBUG) Log.i(TAG, "selected codec: " + audioCodecInfo.getName());
    //根据配置创建音频对应的 MediaCodec
    final MediaFormat audioFormat = MediaFormat.createAudioFormat(MIME_TYPE, SAMPLE_RATE, 1);
    ...
}
视频方面的编码采用了H264在 MediaCodec中是使用 private static final String MIME_TYPE = "video/avc"; 来表示, 音频的编码方面采用AAC来表示,在MediaCodec
中采用 private static final String MIME_TYPE = "audio/mp4a-latm"; 来表示,首先我们根据我们想要的参数配置,尝试的去MediaCodec中查找,如果没有,那么说明不支持,如果存在
在进行创建MediaCodec,这种其实是很不错的,因为MediaCodec存在有很多的兼容问题,如果能提前知道是否支持,那么就能知道是否能采用硬编码
这里简单介绍下,视频的编码原理,首先创建编码的MediaCodec,然后通过createInputSurface()方法,得到输入的Surface,注意如果这里获取到了这个Surface,那么后续就不能获取InputBufferQuque了获取到这个Surface之后,我们将这个对象传递给另一个子线程中,使用EGLSurface进行封装,编码的过程就是将预览的最终画面纹理,传递到这个编码的子线程,在这个子线程中通过共享预览线程的EGL上下文将当前的预览线程的纹理拷贝到编码的子线程中,然后子线程在内部执行绘制,绘制完成之后,通过执行 EGL的swap的操作,内容就到了MediaCodec中,之后就可以直接调用 MedaiCodec的dequeuOutputBuffer获取到编码后的内容,后续就能通过 Muxer将内容写进去,在阅读源码的时候有个疑问
就是怎么样能确保预览的画面能在子线程中执行了渲染,下面是具体的代码

首先 RenderHandler 是一个线程,这个线程负责在子线程中执行绘制操作
public final class RenderHandler implements Runnable {
    ...
    public final void run() {
        if (DEBUG) Log.i(TAG, "RenderHandler thread started:");
        //线程启动完毕,通知外部可以继续往下执行了
        synchronized (mSync) {
            mRequestSetEglContext = mRequestRelease = false;
            mRequestDraw = 0;
            mSync.notifyAll();
        }
        //子线程无限循环
        boolean localRequestDraw;
        for (;;) {
            //加锁
            synchronized (mSync) {
                //如果当前是释放操作,直接返回
                if (mRequestRelease) break;
                //如果已经设置了共享上下文
                if (mRequestSetEglContext) {
                    //防止再次的初始化
                    mRequestSetEglContext = false;
                    //初始化内部的子线程的 egl上下文
                    internalPrepare();
                }

                //获取到当前需要执行绘制的次数
                localRequestDraw = mRequestDraw > 0;
                if (localRequestDraw) {
                    mRequestDraw--;
                }
            }
            //如果当前需要绘制的次数大于0,执行绘制操作
            if (localRequestDraw) {
                if ((mEgl != null) && mTexId >= 0) {
                    //EGL 在执行任务操作之前都需要绑定当前的上下文
                    mInputSurface.makeCurrent();
                    // clear screen with yellow color so that you can see rendering rectangle
                    GLES20.glClearColor(1.0f, 1.0f, 0.0f, 1.0f);
                    GLES20.glClear(GLES20.GL_COLOR_BUFFER_BIT);
                    //设置单位矩阵
                    mDrawer.setMatrix(mMatrix, 16);
                    //执行绘制操作
                    mDrawer.draw(mTexId, mMatrix);
                    //交换缓冲,这样数据就到了 MediaCodec 对应的 Surface中
                    mInputSurface.swap();
                }
            } else {
                //如果绘制的次数没哟大于0,当前线程等待
                synchronized(mSync) {
                    try {
                        mSync.wait();
                    } catch (final InterruptedException e) {
                        break;
                    }
                }
            }
        }
        ...
    }
}

在 CameraSurfaceRenderer 中有这样的操作
public void onDrawFrame(final GL10 unused) {
    ...
    mDrawer.draw(hTex, mStMatrix);

    //执行编码操作
    flip = !flip;
    if (flip) {    // ~30fps
        //加锁
        synchronized (this) {
            if (mVideoEncoder != null) {
                //通知界面发生了改变,可以编码当前的画面了
                mVideoEncoder.frameAvailableSoon(mStMatrix, mMvpMatrix);
            }
        }
    }
}
/**
* 预览界面发生改变可以编码了
* @param tex_matrix
* @param mvp_matrix
* @return
*/
public boolean frameAvailableSoon(final float[] tex_matrix, final float[] mvp_matrix) {
    boolean result;
    //首先执行父类的方法,父类主要完成将 绘制到MediaCodec中 InputSurface 中的内容执行编码操作
    if (result = super.frameAvailableSoon())
        //接着执行子线程的绘制
        mRenderHandler.draw(tex_matrix, mvp_matrix);
    return result;
}

/**
* 执行绘制操作
* @param tex_matrix
* @param mvp_matrix
*/
public final void draw(final float[] tex_matrix, final float[] mvp_matrix) {
    draw(mTexId, tex_matrix, mvp_matrix);
}

public final void draw(final int tex_id, final float[] tex_matrix, final float[] mvp_matrix) {
    //加锁,也就是如果当前正在编码 mTexId 的化,此时会阻塞的,因为拿不到锁
    synchronized (mSync) {
    if (mRequestRelease) return;
        //保存当前我们要渲染的纹理id
        mTexId = tex_id;
        //拷贝俩个 矩阵
        if ((tex_matrix != null) && (tex_matrix.length >= 16)) {
            System.arraycopy(tex_matrix, 0, mMatrix, 0, 16);
        } else {
            Matrix.setIdentityM(mMatrix, 0);
        }
        if ((mvp_matrix != null) && (mvp_matrix.length >= 16)) {
            System.arraycopy(mvp_matrix, 0, mMatrix, 16, 16);
        } else {
            Matrix.setIdentityM(mMatrix, 16);
        }
        //标识当前的请求加一处理
        mRequestDraw++;
        //通知线程继续往下执行,也就是子线程的绘制操作是在子线程中完成的
       mSync.notifyAll();
    }
}
上面大概就是在渲染线程中将当前预览的最终纹理Id传递过来,最终传递到 RenderHandler 中,在RenderHandler 中通过加锁的方式,将这个纹理Id保存起来,然后通过 mSync.notifyAll();方式通知这个渲染的线程继续执行,因为内部完全可能因为没有数据而处于等待中,唤醒之前将 mRequestDraw++;我们来看下这个线程被唤醒后执行的事情
if (localRequestDraw) {
   if ((mEgl != null) && mTexId >= 0) {
        //EGL 在执行任务操作之前都需要绑定当前的上下文
        mInputSurface.makeCurrent();
        // clear screen with yellow color so that you can see rendering rectangle
        GLES20.glClearColor(1.0f, 1.0f, 0.0f, 1.0f);
        GLES20.glClear(GLES20.GL_COLOR_BUFFER_BIT);
        //设置单位矩阵
        mDrawer.setMatrix(mMatrix, 16);
        //执行绘制操作
        mDrawer.draw(mTexId, mMatrix);
        //交换缓冲,这样数据就到了 MediaCodec 对应的 Surface中
        mInputSurface.swap();
    }
}
可以看出这里就直接拿到这个id进行绘制操作了,首先不加锁的情况不说,就算加锁了,因为不是同步的关系,也无法保证当前的预览画面一定会被编码,个人认为这可能是个问题
总结
总体而言,这个项目还是非常不错的,非常有参考,学习的意义