简介
前面分析了Matrix 中 SQLite Lint 模块,了解了对应的检测原理实现,本文继续分析 Matrix Resource Cannary 模块,在分析之前先看检测的原理,官网有这样的介绍,基于 WeakReference 的特性和Square Haha 库开发的 Activity 泄漏和 Bitmap 重复创建检测工具,我们知道 WeakReference 在触发Gc的时候都会被回收掉,所以利用这个特性就能知道是否发生了泄漏,本模块提供的功能有
1.分离了检测和分析部分,便于在不打断自动化测试的前提下持续输出分析后的检测结果
2.对检测部分生成的 Hprof 文件进行了裁剪,移除了大部分无用数据,降低了传输 Hprof 文件的开销
3.增加了重复 Bitmap 对象检测,方便通过减少冗余 Bitmap 数量,降低内存消耗
使用
在demo中有一个这样的选项,RESOURCE_CANNARY,点击之后进入一个测试页面,点击返回键,等待一会,会出现检测的结果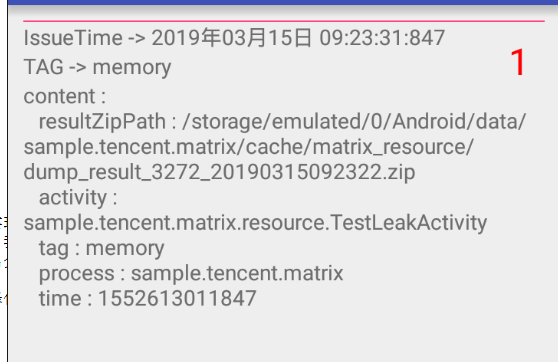
源码分析
先看demo 的调用过程,首先是Application的 初始化
public class MatrixApplication extends Application {
    ...
    @Override
    public void onCreate() {
        super.onCreate();

        //resource 首先 构建一个 ResourceConfig 对象,然后构建一个 ResourcePlugin 对象,最终保存到 Matrix 的build 中的 plug 集合里面
        builder.plugin(new ResourcePlugin(new ResourceConfig.Builder()
                    .dynamicConfig(dynamicConfig)//保存动态的 配置选项
                    .setDumpHprof(true)
                    .setDetectDebuger(true)     //only set true when in sample, not in your app  设置当前为debug 模式
                    .build()));

         //注册一个 Activity 泄漏的修复
         ResourcePlugin.activityLeakFixer(this);
    }
    ...
}

public class TestLeakActivity extends Activity {
    ...
    /**
     * 用来模拟内存泄漏
     */
    private static Set<Activity> testLeaks = new HashSet<>();
    private static ArrayList<Bitmap> bitmaps = new ArrayList<>();

    @Override
    protected void onCreate(@Nullable Bundle savedInstanceState) {
        super.onCreate(savedInstanceState);
        ...
        //模拟内存泄漏
        testLeaks.add(this);
        //获取到 ResourcePlugin 组件
        Plugin plugin = Matrix.with().getPluginByClass(ResourcePlugin.class);
        //如果这个组件没有启动,执行启动
        if (!plugin.isPluginStarted()) {
            MatrixLog.i(TAG, "plugin-resource start");
            plugin.start();
        }

        //获取到Bitmap ,添加到  bitmaps 集合中,模拟内存泄漏
        BitmapFactory.Options options = new BitmapFactory.Options();
        options.inSampleSize = 2;
        bitmaps.add(BitmapFactory.decodeResource(getResources(), R.drawable.welcome_bg, options));
        MatrixLog.i(TAG, "test leak activity size: %d, bitmaps size: %d", testLeaks.size(), bitmaps.size());

        setContentView(R.layout.test_leak);
        IssueFilter.setCurrentFilter(IssueFilter.ISSUE_LEAK);
    }
   ...
}

首先启动  ResourcePlugin
public class ResourcePlugin extends Plugin {
    private static final String TAG = "Matrix.ResourcePlugin";
    private final ResourceConfig mConfig;
    private ActivityRefWatcher mWatcher = null;

    public ResourcePlugin(ResourceConfig config) {
        mConfig = config;
    }

    /**
     * 注册全局的 Activity 生命周期的监控,监控 onActivityDestroyed,用于在销毁的时候,执行一些销毁的操作,比如修复输入法的泄漏
     * @param application
     */
    public static void activityLeakFixer(Application application) {
        // Auto break the path from Views in their holder to gc root when activity is destroyed.
        application.registerActivityLifecycleCallbacks(new ActivityLifeCycleCallbacksAdapter() {
            @Override
            public void onActivityDestroyed(Activity activity) {
                //修复输入法的泄漏
                ActivityLeakFixer.fixInputMethodManagerLeak(activity);
                //修复Drawable 的泄漏
                ActivityLeakFixer.unbindDrawables(activity);
            }
        });
    }

    @Override
    public void init(Application app, PluginListener listener) {
        super.init(app, listener);
        //只有SDK 的版本大于 4.0 才能支持
        if (Build.VERSION.SDK_INT < Build.VERSION_CODES.ICE_CREAM_SANDWICH) {
            MatrixLog.e(TAG, "API is low Build.VERSION_CODES.ICE_CREAM_SANDWICH(14), ResourcePlugin is not supported");
            unSupportPlugin();
            return;
        }

        //构建一个 ActivityRefWatcher 对象,由这个对象来完成对 泄漏的监控
        mWatcher = new ActivityRefWatcher(app, this);
    }

    @Override
    public void start() {
        super.start();
        //如果当前插件不支持,直接返回
        if (!isSupported()) {
            MatrixLog.e(TAG, "ResourcePlugin start, ResourcePlugin is not supported, just return");
            return;
        }

        //如果支持,启动
        mWatcher.start();
    }

    @Override
    public void stop() {
        super.stop();
        if (!isSupported()) {
            MatrixLog.e(TAG, "ResourcePlugin stop, ResourcePlugin is not supported, just return");
            return;
        }
        mWatcher.stop();
    }

    @Override
    public void destroy() {
        super.destroy();
        if (!isSupported()) {
            MatrixLog.e(TAG, "ResourcePlugin destroy, ResourcePlugin is not supported, just return");
            return;
        }
        mWatcher.destroy();
    }
    ...
}

对应到上文中,也即是会构建一个 ResourcePlugin 对象,并且调用 activityLeakFixer(),利用application.registerActivityLifecycleCallbacks()监听全局的Activity的生命周期,这里监听
onActivityDestroyed()生命周期的调用,当监听到Activity 销毁的时候,修复键盘,Drawable 泄漏,前面分析过 当 执行 Matrix.init(builder.build());的时候,会触发对应的plugin执行init函数
所以这里就会执行ResourcePlugin 中的 init()函数,在这个函数中 执行了 mWatcher = new ActivityRefWatcher(app, this); ,这个对象就是专门用来检测泄漏的核心类

public class ActivityRefWatcher extends FilePublisher implements Watcher {
   ...
   public static class ComponentFactory {

        protected RetryableTaskExecutor createDetectExecutor(ResourceConfig config, HandlerThread handlerThread) {
            return new RetryableTaskExecutor(config.getScanIntervalMillis(), handlerThread);
        }

        protected DumpStorageManager createDumpStorageManager(Context context) {
            return new DumpStorageManager(context);
        }

        protected AndroidHeapDumper createHeapDumper(Context context, DumpStorageManager dumpStorageManager) {
            return new AndroidHeapDumper(context, dumpStorageManager);
        }

        protected AndroidHeapDumper.HeapDumpHandler createHeapDumpHandler(final Context context, ResourceConfig resourceConfig) {
            return new AndroidHeapDumper.HeapDumpHandler() {
                @Override
                public void process(HeapDump result) {
                    //处理dump 文件 ,这里会在另一个进程中启动 CanaryWorkerService,用来执行分析 Hprof 文件
                    CanaryWorkerService.shrinkHprofAndReport(context, result);
                }
            };
        }
   }
   ...
   public ActivityRefWatcher(Application app,final ResourcePlugin resourcePlugin) {
        this(app, resourcePlugin, new ComponentFactory() {
            @Override
            protected DumpStorageManager createDumpStorageManager(Context context) {
                if (resourcePlugin.getConfig().getDumpHprof()) {
                    return super.createDumpStorageManager(context);
                } else {
                    return null;
                }
            }

            @Override
            protected AndroidHeapDumper createHeapDumper(Context context, DumpStorageManager dumpStorageManager) {
                if (resourcePlugin.getConfig().getDumpHprof()) {
                    return super.createHeapDumper(context, dumpStorageManager);
                } else {
                    return null;
                }
            }

            @Override
            protected AndroidHeapDumper.HeapDumpHandler createHeapDumpHandler(Context context, ResourceConfig resourceConfig) {
                if (resourceConfig.getDumpHprof()) {
                    return super.createHeapDumpHandler(context, resourceConfig);
                } else {
                    return null;
                }
            }
        });
    }
    private ActivityRefWatcher(Application app,ResourcePlugin resourcePlugin,ComponentFactory componentFactory) {
        //初始化 父类 FilePublisher
        super(app, FILE_CONFIG_EXPIRED_TIME, resourcePlugin.getTag(), resourcePlugin);
        this.mResourcePlugin = resourcePlugin;
        final ResourceConfig config = resourcePlugin.getConfig();
        final Context context = app;
        //获取到 子线程的 HandlerThread
        HandlerThread handlerThread = MatrixHandlerThread.getDefaultHandlerThread();
        //获取到重试任务的Executor
        mDetectExecutor = componentFactory.createDetectExecutor(config, handlerThread);
        //获取到最多重试的次数
        mMaxRedetectTimes = config.getMaxRedetectTimes();
        //获取到管理 HPROF文件的管理对象
        mDumpStorageManager = componentFactory.createDumpStorageManager(context);
        //创建Hprof 文件的类
        mHeapDumper = componentFactory.createHeapDumper(context, mDumpStorageManager);
        //创建 HeapDumpHandler 回调
        mHeapDumpHandler = componentFactory.createHeapDumpHandler(context, config);
        //创建一个用来存储 Activity 的并发队列
        mDestroyedActivityInfos = new ConcurrentLinkedQueue<>();
        mCurrentCreatedActivityCount = new AtomicLong(0);
   }
   ...
}
这里的第三个参数为 ComponentFactory 对象,而在构造函数中,直接new 出来一个,接着执行初始化,首先是获取到 HandlerThread,这是一个子线程的Handler,也即是可以用来执行耗时的任务
接着调用  mDetectExecutor = componentFactory.createDetectExecutor(config, handlerThread); 由于我们在构造函数中,没有重写这个函数,所以会执行父类的实现
protected RetryableTaskExecutor createDetectExecutor(ResourceConfig config, HandlerThread handlerThread) {
    return new RetryableTaskExecutor(config.getScanIntervalMillis(), handlerThread);
}
/**
* 获取到资源扫描的时间,这里为一分钟
* @return
*/
public long getScanIntervalMillis() {
    return mDynamicConfig.get(IDynamicConfig.ExptEnum.clicfg_matrix_resource_detect_interval_millis.name(), DEFAULT_DETECT_INTERVAL_MILLIS);
}
首先看看 RetryableTaskExecutor 的实现
public class RetryableTaskExecutor {
    //子线程的 Handler
    private final Handler mBackgroundHandler;
    //主线程的 Handler
    private final Handler mMainHandler;
    //重试延迟的时间
    private final long mDelayMillis;

    public interface RetryableTask {
        enum Status {
            DONE, RETRY
        }
        Status execute();
    }


    public RetryableTaskExecutor(long delayMillis, HandlerThread handleThread) {
        mBackgroundHandler = new Handler(handleThread.getLooper());
        mMainHandler = new Handler(Looper.getMainLooper());
        mDelayMillis = delayMillis;
    }

    /**
     * 在主线程中执行任务, 也即是将当前的任务 提交到  mMainHandler 中执行
     * @param task
     */
    public void executeInMainThread(final RetryableTask task) {
        postToMainThreadWithDelay(task, 0);
    }

    /**
     * 执行后台任务,也即是将当前的任务提交到 mBackgroundHandler 中执行
     * @param task
     */
    public void executeInBackground(final RetryableTask task) {
        postToBackgroundWithDelay(task, 0);
    }

    /**
     * 清除任务
     */
    public void clearTasks() {
        mBackgroundHandler.removeCallbacksAndMessages(null);
        mMainHandler.removeCallbacksAndMessages(null);
    }

    /**
     * 退出
     */
    public void quit() {
        clearTasks();
    }

    /**
     * 提交任务到主线程中执行
     * @param task
     * @param failedAttempts
     */
    private void postToMainThreadWithDelay(final RetryableTask task, final int failedAttempts) {
        mMainHandler.postDelayed(new Runnable() {
            @Override
            public void run() {
                //主线程中执行这个任务,并且得到这个返回的结果,如果结果为  RETRY ,那么再次的添加,下次就会触发
                RetryableTask.Status status = task.execute();
                if (status == RetryableTask.Status.RETRY) {
                    //重试,再次的提交这个任务
                    postToMainThreadWithDelay(task, failedAttempts + 1);
                }
            }
        }, mDelayMillis);
    }

    /**
     * 提交任务到子线程中执行
     * @param task
     * @param failedAttempts
     */
    private void postToBackgroundWithDelay(final RetryableTask task, final int failedAttempts) {
        mBackgroundHandler.postDelayed(new Runnable() {
            @Override
            public void run() {
                //子线程中执行这个任务,并且到这个返回的结果,如果结果为  RETRY ,那么再次的添加,下次就会触发
                RetryableTask.Status status = task.execute();
                //重试,再次的提交这个任务
                if (status == RetryableTask.Status.RETRY) {
                    postToBackgroundWithDelay(task, failedAttempts + 1);
                }
            }
        }, mDelayMillis);
    }
}

首先我们在构造这个类的时候,传递进来的Handler,为子线程的Looper对象,所以这里会存在俩个Handelr,一个是代表子线程的mBackgroundHandler,可以用来执行耗时的任务,一个是代表主线程的
mMainHandler,同时 mDelayMillis 为1分钟,实际上这个类主要是用来重试的,当提交任务执行的时候,会判断这个任务的执行结果,当结果为 RETRY的时候,又会post一个任务到对应的Handler中,下次
再触发执行

接着构造函数继续往下执行,下面有这样的内容
mMaxRedetectTimes = config.getMaxRedetectTimes(); //获取到最多重试的次数
/**
 * 获取到默认的重试次数,这里为三次
 * @return
 */
public int getMaxRedetectTimes() {
   return mDynamicConfig.get(IDynamicConfig.ExptEnum.clicfg_matrix_resource_max_detect_times.name(), DEFAULT_MAX_REDETECT_TIMES);
}
为了防止我们误测,我们应该重试检测的次数

ActivityRefWatcher 构造函数,继续执行
mDumpStorageManager = componentFactory.createDumpStorageManager(context); //获取到管理 HPROF文件的管理对象 ,由于我们重写了这个方法
@Override
protected DumpStorageManager createDumpStorageManager(Context context) {
     if (resourcePlugin.getConfig().getDumpHprof()) {
           return super.createDumpStorageManager(context);
     } else {
           return null;
     }
}

这里假设当前我们允许Dump hprof文件,那么就会执行 super.createDumpStorageManager(context);
protected DumpStorageManager createDumpStorageManager(Context context) {
     return new DumpStorageManager(context);
}
下面看看DumpStorageManager 的定义
public class DumpStorageManager {
    private static final String TAG = "Matrix.DumpStorageManager";

    public static final String HPROF_EXT = ".hprof";

    /**
     * 默认最多存储HPROF 文件的个数
     */
    public static final int DEFAULT_MAX_STORED_HPROF_FILECOUNT = 5;

    protected final Context mContext;
    protected final int mMaxStoredHprofFileCount;

    public DumpStorageManager(Context context) {
        this(context, DEFAULT_MAX_STORED_HPROF_FILECOUNT);
    }

    public DumpStorageManager(Context context, int maxStoredHprofFileCount) {
        if (maxStoredHprofFileCount <= 0) {
            throw new IllegalArgumentException("illegal max stored hprof file count: " + maxStoredHprofFileCount);
        }
        mContext = context;
        mMaxStoredHprofFileCount = maxStoredHprofFileCount;
    }

    /**
     * 创建一个Hpro 文件,指定生成的目录
     * @return
     */
    public File newHprofFile() {
        final File storageDir = prepareStorageDirectory();
        if (storageDir == null) {
            return null;
        }
        final UUID uuid = UUID.randomUUID();
        final String hprofFileName = "dump_"
                + Long.toHexString(uuid.getMostSignificantBits())
                + Long.toHexString(uuid.getLeastSignificantBits()) + HPROF_EXT;
        return new File(storageDir, hprofFileName);
    }

    private File prepareStorageDirectory() {
        final File storageDir = getStorageDirectory();
        if (!storageDir.exists() && (!storageDir.mkdirs() || !storageDir.canWrite())) {
            MatrixLog.w(TAG, "failed to allocate new hprof file since path: %s is not writable.",
                    storageDir.getAbsolutePath());
            return null;
        }
        final File[] hprofFiles = storageDir.listFiles(new FilenameFilter() {
            @Override
            public boolean accept(File dir, String name) {
                return name.endsWith(HPROF_EXT);
            }
        });
        if (hprofFiles != null && hprofFiles.length > mMaxStoredHprofFileCount) {
            for (File file : hprofFiles) {
                if (file.exists() && !file.delete()) {
                    MatrixLog.w(TAG, "faile to delete hprof file: " + file.getAbsolutePath());
                }
            }
        }
        return storageDir;
    }

    private File getStorageDirectory() {
        final String sdcardState = Environment.getExternalStorageState();
        File root = null;
        if (Environment.MEDIA_MOUNTED.equals(sdcardState)) {
            root = mContext.getExternalCacheDir();
        } else {
            root = mContext.getCacheDir();
        }
        final File result = new File(root, "matrix_resource");

        MatrixLog.i(TAG, "path to store hprof and result: %s", result.getAbsolutePath());

        return result;
    }
}
其实这个类也很简单,只是负责返回一个hprof 文件的路径,并且限制最多存储5个hprof文件

接着执行初始化
mHeapDumper = componentFactory.createHeapDumper(context, mDumpStorageManager); 创建Hprof 文件的类 ,假设当前允许dump hprof文件,那么就会执行 父类的
protected AndroidHeapDumper createHeapDumper(Context context, DumpStorageManager dumpStorageManager) {
    return new AndroidHeapDumper(context, dumpStorageManager);
}
首先来看看AndroidHeapDumper定义
public class AndroidHeapDumper {
    private static final String TAG = "Matrix.AndroidHeapDumper";

    private final Context mContext;

    //用来创建,管理 Hprof 文件
    private final DumpStorageManager mDumpStorageManager;

    //主线程的Handler
    private final Handler mMainHandler;

    public interface HeapDumpHandler {
        void process(HeapDump result);
    }

    public AndroidHeapDumper(Context context, DumpStorageManager dumpStorageManager) {
        this(context, dumpStorageManager, new Handler(Looper.getMainLooper()));
    }

    public AndroidHeapDumper(Context context, DumpStorageManager dumpStorageManager, Handler mainHandler) {
        mContext = context;
        mDumpStorageManager = dumpStorageManager;
        mMainHandler = mainHandler;
    }

    /**
     * 执行文件的dump
     * @return
     */
    public File dumpHeap() {
        //创建一个 hpro 文件路径
        final File hprofFile = mDumpStorageManager.newHprofFile();

        if (null == hprofFile) {
            MatrixLog.w(TAG, "hprof file is null.");
            return null;
        }

        //确保父类是可以写的路径
        if (!hprofFile.getParentFile().canWrite()) {
            MatrixLog.w(TAG, "hprof file path: %s cannot be written.", hprofFile.getAbsolutePath());
            return null;
        }

        //创建一个 FutureResult 对象
        final FutureResult<Toast> waitingForToast = new FutureResult<>();
        //显示toast
        showToast(waitingForToast);

        //如果toast 在5秒中之内都么有显示完成,那么就放弃当前 dump 文件
        if (!waitingForToast.wait(5, TimeUnit.SECONDS)) {
            MatrixLog.w(TAG, "give up dumping heap, waiting for toast too long.");
            return null;
        }

        //如果到了这里,那说明5 秒钟之内显示出来了,执行dump
        try {
            Debug.dumpHprofData(hprofFile.getAbsolutePath());
            //dump 成功显示,取消toast
            cancelToast(waitingForToast.get());
            return hprofFile;
        } catch (IOException e) {
            MatrixLog.printErrStackTrace(TAG, e, "failed to dump heap into file: %s.", hprofFile.getAbsolutePath());
            return null;
        }
    }

    /**
     * 显示toast
     * @param waitingForToast
     */
    private void showToast(final FutureResult<Toast> waitingForToast) {
        //使用 mMainHandler 执行任务
        mMainHandler.post(new Runnable() {
            @Override
            public void run() {
                //主线程里面执行,构建一个toast ,执行显示
                final Toast toast = new Toast(mContext);
                toast.setDuration(Toast.LENGTH_LONG);
                toast.setGravity(Gravity.CENTER_VERTICAL, 0, 0);
                LayoutInflater inflater = LayoutInflater.from(mContext);
                toast.setView(inflater.inflate(R.layout.resource_canary_toast_wait_for_heapdump, null));
                toast.show();

                // Waiting for Idle to make sure Toast gets rendered.  然后添加一个 addIdleHandler 确保这个toast 能显示完成
                Looper.myQueue().addIdleHandler(new MessageQueue.IdleHandler() {
                    @Override
                    public boolean queueIdle() {
                        //如果执行到了这里,那能确保toast 肯定显示完成
                        waitingForToast.set(toast);
                        return false;
                    }
                });
            }
        });
    }

    private void cancelToast(final Toast toast) {
        mMainHandler.post(new Runnable() {
            @Override
            public void run() {
                toast.cancel();
            }
        });
    }
}

其实这个类也很简单,只是负责生成一个hprof 文件,而具体的生成方法是调用 Debug.dumpHprofData(hprofFile.getAbsolutePath()); 这里在执行dump 文件的时候还考虑到了频繁触发dump文件的
操作,因为dump  hprof文件是一个很耗时的任务,虽然这个任务是放在子线程中执行的,但是也不能频繁的触发,这里的做法是在 dump之前,创建了一个 FutureResult 对象
final FutureResult<Toast> waitingForToast = new FutureResult<>();

这里先分析下FutureResult 的定义
public final class FutureResult<T> {

    /**
     * AtomicReference 对象的原子操作,也即是在多线程的环境下修改了这个对象,其他的线程也能获取到最新的结果
     */
    private final AtomicReference<T> resultHolder;

    /**
     *CountDownLatch类位于java.util.concurrent包下,利用它可以实现类似计数器的功能。比如有一个任务A,它要等待其他4个任务执行完毕之后才能执行,此时就可以利用CountDownLatch来实现这种功能了。
     */
    private final CountDownLatch latch;

    public FutureResult() {
        resultHolder = new AtomicReference<>();

        //指定长度 为1
        latch = new CountDownLatch(1);
    }

    /**
     * 判断是否需要等待,如果调用这个函数的时候,刚好  CountDownLatch 为0,不用等待,如果不为0 需要等待子任务结束
     * @param timeout
     * @param unit
     * @return
     */
    public boolean wait(long timeout, TimeUnit unit) {
        try {
            return latch.await(timeout, unit);
        } catch (InterruptedException e) {
            throw new RuntimeException("Did not expect thread to be interrupted", e);
        }
    }

    /**
     * 获取到结果
     * @return
     */
    public T get() {
        if (latch.getCount() > 0) {
            throw new IllegalStateException("Call wait() and check its result");
        }
        return resultHolder.get();
    }

    /**
     * 填充结果
     * @param result
     */
    public void set(T result) {
        //填充结果
        resultHolder.set(result);
        //让 CountDownLatch 减一处理,本文中就变成0 ,下次调用wait 方法的时候,就不用等待了
        latch.countDown();
    }
}
可以看到内部使用了 AtomicReference 来保证对象的原子性,同时使用 CountDownLatch,在构造函数的 new CountDownLatch(1); 将这个长度指定为 1,由于CountDownLatch 的特性,当调用
CountDownLatch.wait的时候,如果当前的长度不为1,就会阻塞,如果为0了,就会立刻返回,这个可以用在多线程同步上,可以看到在FutureResult 上,当调用set(T result)的时候,会将当前的结果
存储到AtomicReference 中保证原子性,同时将latch.countDown(); 让长度为0, 相应的提供了get,wait函数,在get函数的时候,如果不为0,就会返回异常,在wait的时候就利用了CountDownLatch
的wait的特性

接着看这里的逻辑

//创建一个 FutureResult 对象
final FutureResult<Toast> waitingForToast = new FutureResult<>();
//显示toast
showToast(waitingForToast);

//如果toast 在5秒中之内都么有显示完成,那么就放弃当前 dump 文件
if (!waitingForToast.wait(5, TimeUnit.SECONDS)) {
     MatrixLog.w(TAG, "give up dumping heap, waiting for toast too long.");
     return null;
}
//如果到了这里,那说明5 秒钟之内显示出来了,执行dump
try {
       Debug.dumpHprofData(hprofFile.getAbsolutePath());
       //dump 成功显示,取消toast
       cancelToast(waitingForToast.get());
       return hprofFile;
   } catch (IOException e) {
       MatrixLog.printErrStackTrace(TAG, e, "failed to dump heap into file: %s.", hprofFile.getAbsolutePath());
       return null;
}

首先显示Toast,使用主线程的Handler提交了一个显示的任务,当这个显示的任务被执行的时候,又通过  Looper.myQueue().addIdleHandler()设置了一个监听
这是一个空闲的监听,当主线程的Looper对应的MessageQuque中没有消息的时候,就会触发这个回调,当你有设置这个回调的化,同时返回值为false的化,代表下次不会再次的触发,现在假设主线程
没有消息要处理了,那么就会执行这个回调,调用 waitingForToast.set(toast);,前面分析过 FutureResult的set函数,内部会将这个对象使用AtomicReference 原子封装起来,同时让latch.countDown();
等到Dump hprof 文件成功之后,就调用cancelToast(waitingForToast.get());让toast取消显示,现在来看看他是怎么样做到当主线程处于繁忙状态的时候,不执行dump操作的,如果主线程处于繁忙状态
那Looper.myQueue().addIdleHandler()的监听就不会立刻的回调,那就不会调用FutureResult.set()函数,就不会调用latch.countDown(),那么接下来的waitingForToast.wait(5, TimeUnit.SECONDS)
就会因为CountDownLatch 没有达到0,而导致等待了5秒之后超时返回,此时直接返回null,日志也显示出来了放弃当前的dump 操作,
继续回到ActivityRefWatcher 构造函数初始化的过程,接着往下执行
mHeapDumpHandler = componentFactory.createHeapDumpHandler(context, config); 创建 HeapDumpHandler 回调,最终会调用到 父类的实现
protected AndroidHeapDumper.HeapDumpHandler createHeapDumpHandler(final Context context, ResourceConfig resourceConfig) {
     return new AndroidHeapDumper.HeapDumpHandler() {
         @Override
         public void process(HeapDump result) {
               //处理dump 文件 ,这里会在另一个进程中启动 CanaryWorkerService,用来执行分析 Hprof 文件
               CanaryWorkerService.shrinkHprofAndReport(context, result);
         }
     };
}
可以看到这里直接创建了一个这样的对象,继续往下执行
//创建一个用来存储 Activity 的并发队列
mDestroyedActivityInfos = new ConcurrentLinkedQueue<>();
mCurrentCreatedActivityCount = new AtomicLong(0);

这样 ResourcePlugin 的init过程结束,接着会执行start函数
@Override
public void start() {
    super.start();
    //如果当前插件不支持,直接返回
    if (!isSupported()) {
        MatrixLog.e(TAG, "ResourcePlugin start, ResourcePlugin is not supported, just return");
        return;
    }
    //如果支持,启动
    mWatcher.start();
}

@Override
public void start() {
     stopDetect();
     final Application app = mResourcePlugin.getApplication();
     if (app != null) {
         //注册全局的 Activity 生命周期的监听,监听 ActivityCreate 以及 ActivityDestroy,
         app.registerActivityLifecycleCallbacks(mRemovedActivityMonitor);
         scheduleDetectProcedure();
         MatrixLog.i(TAG, "watcher is started.");
    }
}
可以看到start的时候,调用app.registerActivityLifecycleCallbacks(mRemovedActivityMonitor);这是一个监控Activity生命周期的回调
/**
* 全局的Activity 创建 销毁的监听
*/
private final Application.ActivityLifecycleCallbacks mRemovedActivityMonitor = new ActivityLifeCycleCallbacksAdapter() {
    @Override
    public void onActivityCreated(Activity activity, Bundle savedInstanceState) {
        //创建的时候,使用cas 加一处理
        mCurrentCreatedActivityCount.incrementAndGet();
    }

    @Override
    public void onActivityDestroyed(Activity activity) {
        //捕捉到 Activity 销毁的时机点
        pushDestroyedActivityInfo(activity);
    }
};
可以看到这里监控的是Activity的创建以及销毁的时间点,当创建的时候就让mCurrentCreatedActivityCount 加一处理,前面分析到在初始化的时候值为0,这是一个使用cas操作的并发类,当Activity
销毁的时候就会执行 pushDestroyedActivityInfo(activity);

private void pushDestroyedActivityInfo(Activity activity) {
    //获取到当前Activity的名字
    final String activityName = activity.getClass().getName();
    //如果当前的 activity 已经在 泄漏的集合中,直接返回
    ....
    final UUID uuid = UUID.randomUUID();
    final StringBuilder keyBuilder = new StringBuilder();
    keyBuilder.append(ACTIVITY_REFKEY_PREFIX).append(activityName).append('_').append(Long.toHexString(uuid.getMostSignificantBits())).append(Long.toHexString(uuid.getLeastSignificantBits()));
    final String key = keyBuilder.toString();
    //构建一个 DestroyedActivityInfo,然后添加到 mDestroyedActivityInfos 集合中
    final DestroyedActivityInfo destroyedActivityInfo = new DestroyedActivityInfo(key, activity, activityName, mCurrentCreatedActivityCount.get());
    mDestroyedActivityInfos.add(destroyedActivityInfo);
}

public class DestroyedActivityInfo {
    //唯一的key
    public final String mKey;
    //当前对应的 Activity 类名
    public final String mActivityName;

    //Activity 的虚引用对象
    public final WeakReference<Activity> mActivityRef;
    //上一次Activity 的数量
    public final long mLastCreatedActivityCount;

    //表示回收的次数
    public int mDetectedCount = 0;

    public DestroyedActivityInfo(String key, Activity activity, String activityName, long lastCreatedActivityCount) {
        mKey = key;
        mActivityName = activityName;
        //这里创建了一个 WeakReference 来持有这个Activity ,WeakReference的特点就是当触发Gc的时候,就会销毁掉
        mActivityRef = new WeakReference<>(activity);
        mLastCreatedActivityCount = lastCreatedActivityCount;
    }
}
可以看到当监控到Activity 销毁的时候,就会将当前的Activity信息保存起来,使用DestroyedActivityInfo封装,其中有一个成员变量mActivityRef ,这是一个使用了WeakReference 特性的封装的对象
最后将DestroyedActivityInfo存储到mDestroyedActivityInfos队列中,
接着执行 scheduleDetectProcedure();,
public class ActivityRefWatcher extends FilePublisher implements Watcher {
    ....
    /**
     * 安排扫描 任务
     */
    private void scheduleDetectProcedure() {
        mDetectExecutor.executeInBackground(mScanDestroyedActivitiesTask);
    }

    /**
     * 用于扫描Activity 销毁的任务,execute 会在子线程中执行
     */
    private final RetryableTask mScanDestroyedActivitiesTask = new RetryableTask() {

        @Override
        public Status execute() {
            // Fake leaks will be generated when debugger is attached.
            if (Debug.isDebuggerConnected() && !mResourcePlugin.getConfig().getDetectDebugger()) {
                MatrixLog.w(TAG, "debugger is connected, to avoid fake result, detection was delayed.");
                return Status.RETRY;
            }

            //如果这个集合为空,说明当前并没有收集到 销毁的Activity 信息,返回 重试,下次再来检查
            if (mDestroyedActivityInfos.isEmpty()) {
                return Status.RETRY;
            }

            //首先测试下 系统的Gc 是否能够响应,如果不能够响应,下次再来触发
            final WeakReference<Object> sentinelRef = new WeakReference<>(new Object());
            triggerGc();
            if (sentinelRef.get() != null) {
                // System ignored our gc request, we will retry later.
                MatrixLog.d(TAG, "system ignore our gc request, wait for next detection.");
                return Status.RETRY;
            }

            //遍历 mDestroyedActivityInfos 集合中的内容
            final Iterator<DestroyedActivityInfo> infoIt = mDestroyedActivityInfos.iterator();

            while (infoIt.hasNext()) {
                final DestroyedActivityInfo destroyedActivityInfo = infoIt.next();
                //如果当前已经发布过,从集合中移除,并且跳过
                if (isPublished(destroyedActivityInfo.mActivityName)) {
                    MatrixLog.v(TAG, "activity with key [%s] was already published.", destroyedActivityInfo.mActivityName);
                    infoIt.remove();
                    continue;
                }
                //如果当前要销毁的 mActivityRef 为空,说明对应的Activity 已经被回收了,从集合中移除,并且跳过
                if (destroyedActivityInfo.mActivityRef.get() == null) {
                    // The activity was recycled by a gc triggered outside.
                    MatrixLog.v(TAG, "activity with key [%s] was already recycled.", destroyedActivityInfo.mKey);
                    infoIt.remove();
                    continue;
                }

                //到了这里说明,mActivityRef 中的Activity 没有被释放掉,有可能发生了内存泄漏了
                //标识当前的Activity 经历过了一次的Gc 回收
                ++destroyedActivityInfo.mDetectedCount;

                long createdActivityCountFromDestroy = mCurrentCreatedActivityCount.get() - destroyedActivityInfo.mLastCreatedActivityCount;
                //判断单钱的Activity 是否已经经历过了三次的回收操作
                if (destroyedActivityInfo.mDetectedCount < mMaxRedetectTimes
                    || (createdActivityCountFromDestroy < CREATED_ACTIVITY_COUNT_THRESHOLD && !mResourcePlugin.getConfig().getDetectDebugger())) {
                    // Although the sentinel tell us the activity should have been recycled,
                    // system may still ignore it, so try again until we reach max retry times.
                    MatrixLog.i(TAG, "activity with key [%s] should be recycled but actually still \n"
                            + "exists in %s times detection with %s created activities during destroy, wait for next detection to confirm.",
                        destroyedActivityInfo.mKey, destroyedActivityInfo.mDetectedCount, createdActivityCountFromDestroy);
                    continue;
                }

                //如果到了这里说明经历过了三次的回收操作,这个Activity还是没有被释放到,说明泄漏了
                MatrixLog.i(TAG, "activity with key [%s] was suspected to be a leaked instance.", destroyedActivityInfo.mKey);
                if (mHeapDumper != null) {
                    //生成对应的dump文件
                    final File hprofFile = mHeapDumper.dumpHeap();
                    //dump文件生成成功
                    if (hprofFile != null) {
                        //标记当前的Activity 执行发布,添加到map中,并且保存到 sp中
                        markPublished(destroyedActivityInfo.mActivityName);

                        //处理Dump文件
                        final HeapDump heapDump = new HeapDump(hprofFile, destroyedActivityInfo.mKey, destroyedActivityInfo.mActivityName);
                        mHeapDumpHandler.process(heapDump);
                        infoIt.remove();
                    } else {
                        //生成失败,直接从集合中移除当前的元素
                        MatrixLog.i(TAG, "heap dump for further analyzing activity with key [%s] was failed, just ignore.", destroyedActivityInfo.mKey);
                        infoIt.remove();
                    }
                } else {
                    // Lightweight mode, just report leaked activity name.
                    MatrixLog.i(TAG, "lightweight mode, just report leaked activity name.");
                    markPublished(destroyedActivityInfo.mActivityName);
                    if (mResourcePlugin != null) {
                        //直接将泄漏的Activity 直接报告
                        final JSONObject resultJson = new JSONObject();
                        try {
                            resultJson.put(SharePluginInfo.ISSUE_ACTIVITY_NAME, destroyedActivityInfo.mActivityName);
                        } catch (JSONException e) {
                            MatrixLog.printErrStackTrace(TAG, e, "unexpected exception.");
                        }
                        mResourcePlugin.onDetectIssue(new Issue(resultJson));
                    }
                }
            }

            return Status.RETRY;
        }
    };

    /**
     * 手动的触发GC的操作
     */
    private void triggerGc() {
        MatrixLog.v(TAG, "triggering gc...");
        Runtime.getRuntime().gc();
        Runtime.getRuntime().runFinalization();
        MatrixLog.v(TAG, "gc was triggered.");
    }
    ....
}
所以通过执行scheduleDetectProcedure()函数就会触发执行mDetectExecutor.executeInBackground(mScanDestroyedActivitiesTask);,前面已经分析过mDetectExecutor的做用,这里就是提交一个扫描的任务
到子线程的Handler中,当这个任务执行的时候,还要根据这个任务的返回值是否为RETRY,继而判断是否有必要再次的检查,

而mScanDestroyedActivitiesTask 做的就是检查内存泄漏的关键了,其实注释已经写的很清楚了,这里再大概的说下,由于 WeakReference的特性,当Gc触发的时候,就会将这个对象销毁,所以我们可以
通过手动的触发Gc的操作,判断由WeakReference 封装的对象是否还存在,如果存在就代表内存泄漏,否则相反,由于系统有时候会忽略掉我们的Gc请求,所以这里在开始的时候,先测试下,当前的gc请求
final WeakReference<Object> sentinelRef = new WeakReference<>(new Object());这里通过构建一个局部的匿名对象,然后调用triggerGc()执行gc的请求,如果此时发现sentinelRef封装的对象不为空
那么直接返回return Status.RETRY,让下次再来触发检查,当然我们并不能简单的通过这个测试就能保证后面我们Gc的时候,一定不会被系统忽略掉,所以这里还有一个参数是mMaxRedetectTimes,前面提到
过,这个代表应该重试的检查的次数,所以如果第一次gc的时候,发现还存在,还要触发俩次的gc的检查,要是还存在,才能判断为内存泄漏,接着就会执行dump hprof的操作,前面已经分析过了dump hprof
的关键点 得到结果之后,会构建一个 HeapDump对象,然后调用mHeapDumpHandler.process(heapDump);,mHeapDumpHandler前面分析过为创建的匿名对象,所以就会执行到对应的函数

protected AndroidHeapDumper.HeapDumpHandler createHeapDumpHandler(final Context context, ResourceConfig resourceConfig) {
    return new AndroidHeapDumper.HeapDumpHandler() {
          @Override
          public void process(HeapDump result) {
               //处理dump 文件 ,这里会在另一个进程中启动 CanaryWorkerService,用来执行分析 Hprof 文件
               CanaryWorkerService.shrinkHprofAndReport(context, result);
          }
    };
}
下面看看 CanaryWorkerService的实现
public class CanaryWorkerService extends MatrixJobIntentService {
    private static final String TAG = "Matrix.CanaryWorkerService";

    private static final int JOB_ID = 0xFAFBFCFD;
    private static final String ACTION_SHRINK_HPROF = "com.tencent.matrix.resource.worker.action.SHRINK_HPROF";
    private static final String EXTRA_PARAM_HEAPDUMP = "com.tencent.matrix.resource.worker.param.HEAPDUMP";

    /**
     * 启动  CanaryWorkerService 服务来分析当前的 dump 文件
     * @param context
     * @param heapDump
     */
    public static void shrinkHprofAndReport(Context context, HeapDump heapDump) {
        //将当前的dump 文件传递过去
        final Intent intent = new Intent(context, CanaryWorkerService.class);
        intent.setAction(ACTION_SHRINK_HPROF);
        intent.putExtra(EXTRA_PARAM_HEAPDUMP, heapDump);
        enqueueWork(context, CanaryWorkerService.class, JOB_ID, intent);
    }

    /**
     * 会在子线程中执行
     * @param intent The intent describing the work to now be processed.
     */
    @Override
    protected void onHandleWork(Intent intent) {
        if (intent != null) {
            final String action = intent.getAction();
            //当前的操作为 分析 hprof 文件
            if (ACTION_SHRINK_HPROF.equals(action)) {
                //获取到传递过来的 HeapDump对象
                final HeapDump heapDump = (HeapDump) intent.getSerializableExtra(EXTRA_PARAM_HEAPDUMP);
                if (heapDump != null) {
                    //执行分析操作
                    doShrinkHprofAndReport(heapDump);
                } else {
                    MatrixLog.e(TAG, "failed to deserialize heap dump, give up shrinking and reporting.");
                }
            }
        }
    }
    ...
}

<service
    android:name=".CanaryWorkerService"
    android:process=":res_can_worker"
    android:permission="android.permission.BIND_JOB_SERVICE"
    android:exported="false">
</service>
其实这里做的事情就是另起一个服务,这个服务在另外一个进程 res_can_worker 为进程名,至于怎么样将这个服务启动起来,内部也是挺有考究的,下面来具体的分析下是怎么做到的
public static void enqueueWork(@NonNull Context context, @NonNull Class cls, int jobId, @NonNull Intent work) {
    enqueueWork(context, new ComponentName(context, cls), jobId, work);
}
首先将我们要启动的Service,封装到ComponentName 中,接着执行
public static void enqueueWork(@NonNull Context context, @NonNull ComponentName component, int jobId, @NonNull Intent work) {
    if (work == null) {
         throw new IllegalArgumentException("work must not be null");
    }
    //线程安全
    synchronized (sLock) {
       //获取到当前的 ComponentName 对应的 WorkEnqueuer
       WorkEnqueuer we = getWorkEnqueuer(context, component, true, jobId);
       //设置对应的jobId
       we.ensureJobId(jobId);
       //执行这个任务
       we.enqueueWork(work);
    }
}
首先通过 getWorkEnqueuer()函数调用,获取到 对应的WorkEnqueuer 对象
static WorkEnqueuer getWorkEnqueuer(Context context, ComponentName cn, boolean hasJobId, int jobId) {
    //首先从集合中获取,如果不为空,直接使用
    WorkEnqueuer we = sClassWorkEnqueuer.get(cn);
    if (we == null) {
        if (Build.VERSION.SDK_INT >= 26) {
             if (!hasJobId) {
                 throw new IllegalArgumentException("Can't be here without a job id");
             }
             //8.0 使用 JobScheduler
             we = new JobWorkEnqueuer(context, cn, jobId);
        } else {
           //低于 8.0 使用
           we = new CompatWorkEnqueuer(context, cn);
        }
        sClassWorkEnqueuer.put(cn, we);
    }
    return we;
}
//这里的sClassWorkEnqueuer 为一个HashMap集合,作用为缓存的功能,下次存在就直接从集合中获取到
static final HashMap<ComponentName, WorkEnqueuer> sClassWorkEnqueuer = new HashMap<>();
如果在集合中不存在以当前 ComponentName 对应的 WorkEnqueuer对象的时候,就会根据当前的SDK 的版本号,创建对应的WorkEnqueuer对象,这里的WorkEnqueuer是我们自己定义的抽象类,为了更好的
封装对于8.0以上跟8.0以下的操作

abstract static class WorkEnqueuer {
        final ComponentName mComponentName;
        //标识是否有JobId
        boolean mHasJobId;
        //对应的JobId 的值
        int mJobId;

        WorkEnqueuer(ComponentName cn) {
            mComponentName = cn;
        }

        /**
         * 设置 对应的JobId
         * @param jobId
         */
        void ensureJobId(int jobId) {
            if (!mHasJobId) {
                mHasJobId = true;
                mJobId = jobId;
            } else if (mJobId != jobId) {
                throw new IllegalArgumentException("Given job ID " + jobId + " is different than previous " + mJobId);
            }
        }
        abstract void enqueueWork(Intent work);
        ...
}
现在假设当前为8.0以上,那么就会执行  we = new JobWorkEnqueuer(context, cn, jobId);
@RequiresApi(26)
static final class JobWorkEnqueuer extends MatrixJobIntentService.WorkEnqueuer {
     private final JobInfo mJobInfo;
     private final JobScheduler mJobScheduler;

     JobWorkEnqueuer(Context context, ComponentName cn, int jobId) {
        super(cn);
        //设置对应的jobId
        ensureJobId(jobId);
        //即每个需要后台的业务处理为一个job,通过系统管理job,来提高资源的利用率,从而提高性能,节省电源。这样又能满足APP开发商的要求,又能满足系统性能的要求。
        //Jobscheduler由此应运而生。
        JobInfo.Builder b = new JobInfo.Builder(jobId, mComponentName);
        mJobInfo = b.setOverrideDeadline(0).build();
        mJobScheduler = (JobScheduler) context.getApplicationContext().getSystemService(Context.JOB_SCHEDULER_SERVICE);
     }

     @Override
     void enqueueWork(Intent work) {
         //执行任务
         mJobScheduler.enqueue(mJobInfo, new JobWorkItem(work));
     }
}
在构造函数的时候,使用了JobScheduler,下面介绍下JobScheduler 这个的作用,以及用法
JobScheduler是安卓5.0版本推出的API,允许开发者在符合某些条件时创建执行在后台的任务。在Android开发中,会存在这些场景:你需要在稍后的某个时间点或者当满足某个特定的条件时执行一个任务,
例如当设备接通电源适配器或者连接到WIFI,此时就可以使用JobScheduler了,当一系列预置的条件被满足时,JobScheduler API为你的应用执行一个操作。与AlarmManager不同的是这个执行时间是不确定的。
除此之外,JobScheduler API允许同时执行多个任务。

JobSchedule的宗旨就是把一些不是特别紧急的任务放到更合适的时机批量处理。这样做有两个好处:避免频繁的唤醒硬件模块,造成不必要的电量消耗以及避免在不合适的时间
(例如低电量情况下、弱网络或者移动网络情况下的)执行过多的任务消耗电量。JobSchedule适用版本为5.0及以上,目前还未发现兼容库支持。

首先 创建一个JobScheduler
mJobScheduler = (JobScheduler) context.getApplicationContext().getSystemService(Context.JOB_SCHEDULER_SERVICE); 实例化一个mJobScheduler的JobScheduler对象。

创建定时任务时,可以使用JobInfo.Builder来构建一个JobInfo对象
JobInfo.Builder b = new JobInfo.Builder(jobId, mComponentName);

开启一个JobScheduler任务:
mJobScheduler.enqueue(mJobInfo, new JobWorkItem(work));
至此,这个任务会由系统在合适的时机点启动起来,至于什么时候启动我们不用关心,当启动的时候,就会将我们的这个CanaryWorkerService 启动起来

现在来介绍下如果在8.0以下,怎么保证创建这个服务肯定会被启动起来,继续回到前面获取到 getWorkEnqueuer() 函数的地方
static WorkEnqueuer getWorkEnqueuer(Context context, ComponentName cn, boolean hasJobId, int jobId) {
    //首先从集合中获取,如果不为空,直接使用
    WorkEnqueuer we = sClassWorkEnqueuer.get(cn);
    if (we == null) {
        if (Build.VERSION.SDK_INT >= 26) {
             if (!hasJobId) {
                 throw new IllegalArgumentException("Can't be here without a job id");
             }
             //8.0 使用 JobScheduler
             we = new JobWorkEnqueuer(context, cn, jobId);
        } else {
           //低于 8.0 使用
           we = new CompatWorkEnqueuer(context, cn);
        }
        sClassWorkEnqueuer.put(cn, we);
    }
    return we;
}

下面是这个类的定义
static final class CompatWorkEnqueuer extends WorkEnqueuer {
        private final Context mContext;
        private final PowerManager.WakeLock mLaunchWakeLock;
        private final PowerManager.WakeLock mRunWakeLock;
        //标识是否启动服务完成
        boolean mLaunchingService;
        //标识当前服务是否正在处理
        boolean mServiceProcessing;

        CompatWorkEnqueuer(Context context, ComponentName cn) {
            super(cn);
            mContext = context.getApplicationContext();
            //WakeLock正是为了解决这类问题,应用只要申请了WakeLock,那么在释放WakeLock之前,系统不会进入休眠,即使在灭屏的状态下,应用要执行的任务依旧不会被系统打断。
            if (mContext.checkPermission(Manifest.permission.WAKE_LOCK, Process.myPid(), Process.myUid()) == PackageManager.PERMISSION_GRANTED) {
                // Make wake locks.  We need two, because the launch wake lock wants to have
                // a timeout, and the system does not do the right thing if you mix timeout and
                // non timeout (or even changing the timeout duration) in one wake lock.
                PowerManager pm = ((PowerManager) context.getSystemService(Context.POWER_SERVICE));
                //PARTIAL_WAKE_LOCK: 灭屏,关闭键盘背光的情况下,CPU依然保持运行。
                mLaunchWakeLock = pm.newWakeLock(PowerManager.PARTIAL_WAKE_LOCK, cn.getClassName() + ":launch");
                //在创建了PowerManager.WakeLock 后,有两种机制,第一种是不计数锁机制,另一种是计数锁机制。这可以通过setReferenceCounted( boolean value) 来指定,默认为计数机制。
                // 这两种机制的区别在于,前者无论acquire() 了多少次,只要通过一次release() 即可解锁。而后者正真解锁是在(--count == 0 )的时候,同样当(count == 0) 的时候才会去申请加锁,
                // 其他情况下isHeld 状态是不会改变的。所以PowerManager.WakeLock 的计数机制并不是正真意义上的对每次请求进行申请/释放每一把锁,它只是对同一把锁被申请/释放的次数进行了统计。
                mLaunchWakeLock.setReferenceCounted(false);

                mRunWakeLock = pm.newWakeLock(PowerManager.PARTIAL_WAKE_LOCK, cn.getClassName() + ":run");
                //指定为 不计数锁机制
                mRunWakeLock.setReferenceCounted(false);
            } else {
                //没有权限
                MatrixLog.w(TAG, "it would be better to grant WAKE_LOCK permission to your app so that tinker can use WakeLock to keep system awake.");
                mLaunchWakeLock = mRunWakeLock = null;
            }
        }
        @Override
        void enqueueWork(Intent work) {
            Intent intent = new Intent(work);
            intent.setComponent(mComponentName);
            //执行任务,启动服务
            if (mContext.startService(intent) != null) {
                synchronized (this) {
                    if (!mLaunchingService) {
                        //标识启动服务完成
                        mLaunchingService = true;
                        //mServiceProcessing 默认为 false
                        if (!mServiceProcessing && mLaunchWakeLock != null) {
                            // If the service is not already holding the wake lock for
                            // itself, acquire it now to keep the system running until
                            // we get this work dispatched.  We use a timeout here to
                            // protect against whatever problem may cause it to not get
                            // the work.

                            //为了保证任务不被系统休眠打断,申请WakeLock,指定了时间,这样就不用手动的调用relese方法了
                            //任务结束后释放,如果不写该句。则可以用wl.acquire(timeout)的方式把释放的工作交给系统
                            //也即是过了60 秒之后会自动的释放
                            mLaunchWakeLock.acquire(60 * 1000);
                        }
                    }
                }
            }
        }
        ...
}
在构造函数中使用了Wakelock,这里介绍下 WakeLock的作用
wakelock是一种锁的机制,只要有应用拿着这个锁,CPU就无法进入休眠状态,一直处于工作状态。比如,手机屏幕在屏幕关闭的时候,有些应用依然可以唤醒屏幕提示用户消息,
这里就是用到了wakelock锁机制,虽然手机屏幕关闭了,但是这些应用依然在运行着。手机耗电的问题,大部分是开发人员没有正确使用这个锁,成为"待机杀手"。
一般手机待机时,AP、LCD、WIFI均进入休眠状态,这时Android中应用程序的代码也会停止执行。
Android为了确保应用程序中关键代码的正确执行,提供了Wake Lock的API,使得应用程序有权限通过代码阻止AP进入休眠状态。但如果不领会Android设计者的意图而滥用Wake Lock API,
为了自身程序在后台的正常工作而长时间阻止AP进入休眠状态,就会成为待机电池杀手。

获取WakeLock实例代码如下:
PowerManager pm = (PowerManager) getSystemService(Context.POWER_SERVICE);
WakeLock wakeLock = pm.newWakeLock(PowerManager.PARTIAL_WAKE_LOCK, "MyWakelockTag");
newWakeLock(int levelAndFlags, String tag)中PowerManager.PARTIIAL_WAKE_LOCK是一个标志位,标志位是用来控制获取的WakeLock对象的类型,主要控制CPU工作时屏幕是否需要亮着以及键盘灯需要亮着
WakeLock类可以用来控制设备的工作状态。使用该类中的acquire可以使CPU一直处于工作的状态,如果不需要使CPU处于工作状态就调用release来关闭。
(1)、自动release
如果我们调用的是acquire(long timeout)那么就无需我们自己手动调用release()来释放锁,系统会帮助我们在timeout时间后释放。
(2)、手动release
如果我们调用的是acquire()那么就需要我们自己手动调用release()来释放锁。

所以这里就是使用了 Wakelock 让这个创建服务的过程,不会因为手机处于待机状态时,导致这个关键的操作没有执行,可以看到,在 enqueueWork()执行的时候,最终还是通过
mContext.startService(intent) 来启动这个服务,至此这个对于8.0以下,这个服务也被启动起来了
接下来再分析 CanaryWorkerService 这个服务启动起来后,是怎么让让耗时的任务转到子线程中执行的
public class CanaryWorkerService extends MatrixJobIntentService {
     ...
    /**
     * 会在子线程中执行
     * @param intent The intent describing the work to now be processed.
     */
    @Override
    protected void onHandleWork(Intent intent) {
        if (intent != null) {
            final String action = intent.getAction();
            //当前的操作为 分析 hprof 文件
            if (ACTION_SHRINK_HPROF.equals(action)) {
                //获取到传递过来的 HeapDump对象
                final HeapDump heapDump = (HeapDump) intent.getSerializableExtra(EXTRA_PARAM_HEAPDUMP);
                if (heapDump != null) {
                    //执行分析操作
                    doShrinkHprofAndReport(heapDump);
                } else {
                    MatrixLog.e(TAG, "failed to deserialize heap dump, give up shrinking and reporting.");
                }
            }
        }
    }
    ...
}
可以看到这个 CanaryWorkerService,继承了 MatrixJobIntentService ,并且这个类中并没有看到任何的service的生命周期,所以对应的操作都是由父类完成的
public abstract class MatrixJobIntentService extends Service {
    ...
    //8.0 使用这个执行耗时的任务
    CompatJobEngine mJobImpl;
    //8.0 以下使用 Workenqueuer,执行耗时的任务
    WorkEnqueuer mCompatWorkEnqueuer;

    //用来执行任务的对象
    CommandProcessor mCurProcessor;
    ...
    //低于 8.0 要使用这个集合
    final ArrayList<CompatWorkItem> mCompatQueue;

    /**
     * 静态的hashMap 用来存储 具体的 ComponentName 对应的 WorkEnqueuer
     */
    static final HashMap<ComponentName, WorkEnqueuer> sClassWorkEnqueuer = new HashMap<>();
    ...

     /**
     * Default empty constructor.  构造函数
     */
    public MatrixJobIntentService() {
        //如果sdk的版本 大于 8.0 直接使用 JobServiceEngine
        if (Build.VERSION.SDK_INT >= 26) {
            mCompatQueue = null;
        } else {
            //如果小于8.0 使用 WorkEnqueuer
            mCompatQueue = new ArrayList<>();
        }
    }

    @Override
    public void onCreate() {
        super.onCreate();
        //如果大于 8.0 则构建一个 JobServiceEngine
        if (Build.VERSION.SDK_INT >= 26) {
            mJobImpl = new JobServiceEngineImpl(this);
            mCompatWorkEnqueuer = null;
        } else {
            mJobImpl = null;
            //构建一个 ComponentName
            ComponentName cn = new ComponentName(this, this.getClass());
            //获取到ComponentName 对应的 WorkEnqueuer
            mCompatWorkEnqueuer = getWorkEnqueuer(this, cn, false, 0);
        }
    }

    /**
     * Processes start commands when running as a pre-O service, enqueueing them to be
     * later dispatched in {@link #onHandleWork(Intent)}.
     */
    @Override
    public int onStartCommand(@Nullable Intent intent, int flags, int startId) {
        //如果 mCompatQueue 不为空 ,说明是8.0 以下的,添加到 mCompatQueue 中
        if (mCompatQueue != null) {
            mCompatWorkEnqueuer.serviceStartReceived();
            synchronized (mCompatQueue) {
                //添加队列
                mCompatQueue.add(new CompatWorkItem(intent != null ? intent : new Intent(), startId));
                //提交任务
                ensureProcessorRunningLocked(true);
            }
            //重传Intent。使用这个返回值时,如果在执行完onStartCommand后,服务被异常kill掉,系统会自动重启该服务,并将Intent的值传入。
            return START_REDELIVER_INTENT;
        } else {
            //非粘性的”。使用这个返回值时,如果在执行完onStartCommand后,服务被异常kill掉,系统不会自动重启该服务。
            return START_NOT_STICKY;
        }
    }
    ...
}
所以看到在父类的构造函数 中就会判断当前的sdk 版本是否大于8.0以上,如果 大于8.0就将 mCompatQueue 赋值为 null,低于8.0以下,则执行 mCompatQueue = new ArrayList<>();初始化
接着在onCeate()函数中,也会判断当前的sdk的版本号,如果为 8.0以上,则执行  mJobImpl = new JobServiceEngineImpl(this);

@RequiresApi(26)
    static final class JobServiceEngineImpl extends JobServiceEngineimplements MatrixJobIntentService.CompatJobEngine {
        static final String TAG = "JobServiceEngineImpl";

        static final boolean DEBUG = false;

        final MatrixJobIntentService mService;
        final Object mLock = new Object();
        JobParameters mParams;

        final class WrapperWorkItem implements MatrixJobIntentService.GenericWorkItem {
            final JobWorkItem mJobWork;

            WrapperWorkItem(JobWorkItem jobWork) {
                mJobWork = jobWork;
            }

            @Override
            public Intent getIntent() {
                return mJobWork.getIntent();
            }

            @Override
            public void complete() {
                synchronized (mLock) {
                    if (mParams != null) {
                        mParams.completeWork(mJobWork);
                    }
                }
            }
        }

        JobServiceEngineImpl(MatrixJobIntentService service) {
            super(service);
            mService = service;
        }

        @Override
        public IBinder compatGetBinder() {
            return getBinder();
        }

        @Override
        public boolean onStartJob(JobParameters params) {
            synchronized (mLock) {
                mParams = params;
            }

            // We can now start dequeuing work!
            mService.ensureProcessorRunningLocked(false);
            return true;
        }

        @Override
        public boolean onStopJob(JobParameters params) {
            boolean result = mService.doStopCurrentWork();
            synchronized (mLock) {
                // Once we return, the job is stopped, so its JobParameters are no
                // longer valid and we should not be doing anything with them.
                mParams = null;
            }
            return result;
        }

        /**
         * Dequeue some work.
         */
        @Override
        public MatrixJobIntentService.GenericWorkItem dequeueWork() {
            JobWorkItem work;
            synchronized (mLock) {
                if (mParams == null) {
                    return null;
                }
                work = mParams.dequeueWork();
            }
            if (work != null) {
                work.getIntent().setExtrasClassLoader(mService.getClassLoader());
                return new WrapperWorkItem(work);
            } else {
                return null;
            }
        }
    }
可以看到这个类继承了 JobServiceEngine,这个是系统的类,并且实现了自定义的接口,下面是这个接口的定义
/**
* Get rid of lint warnings about API levels.
*/
interface CompatJobEngine {
    IBinder compatGetBinder();
    GenericWorkItem dequeueWork();
}
继续回到onCreate() 函数,而是低于8.0的则会执行下面的操作
mJobImpl = null;
//构建一个 ComponentName
ComponentName cn = new ComponentName(this, this.getClass());
//获取到ComponentName 对应的 WorkEnqueuer,对于 getWorkEnqueuer() 函数前面已经介绍过
mCompatWorkEnqueuer = getWorkEnqueuer(this, cn, false, 0);
相比于 8.0以上会执行
mJobImpl = new JobServiceEngineImpl(this);
mCompatWorkEnqueuer = null;
可以看出来 mJobImpl,跟 mCompatWorkEnqueuer 对象是互相排斥的,接着看看onStartCommand()函数,这个每次启动当前服务的时候都会触发,所以我们可以在这里获取到要执行的Intent

public int onStartCommand(@Nullable Intent intent, int flags, int startId) {
    //如果 mCompatQueue 不为空 ,说明是8.0 以下的,添加到 mCompatQueue 中
    if (mCompatQueue != null) {
         mCompatWorkEnqueuer.serviceStartReceived();
         synchronized (mCompatQueue) {
             //添加队列
             mCompatQueue.add(new CompatWorkItem(intent != null ? intent : new Intent(), startId));
             //提交任务
             ensureProcessorRunningLocked(true);
        }
        //重传Intent。使用这个返回值时,如果在执行完onStartCommand后,服务被异常kill掉,系统会自动重启该服务,并将Intent的值传入。
        return START_REDELIVER_INTENT;
    } else {
        //非粘性的”。使用这个返回值时,如果在执行完onStartCommand后,服务被异常kill掉,系统不会自动重启该服务。
        return START_NOT_STICKY;
    }
}

前面说过 mCompatQueue 在Android 版本8.0以下才会不为空,那么我们先分析下  8.0以下的执行逻辑, 由于 mCompatQueue 不为空
final class CompatWorkItem implements GenericWorkItem {
     final Intent mIntent;
     final int mStartId;

     CompatWorkItem(Intent intent, int startId) {
         mIntent = intent;
         mStartId = startId;
    }

    @Override
    public Intent getIntent() {
        return mIntent;
    }

    @Override
    public void complete() {
       stopSelf(mStartId);
    }
}
//统一实现的接口,方便获取
interface GenericWorkItem {
    Intent getIntent();
    void complete();
}
首先将当前获取到Intent,已经startId,封装到 CompatWorkItem ,然后添加到mCompatQueue 队列中,接着执行 ensureProcessorRunningLocked(true);
@TargetApi(11)
void ensureProcessorRunningLocked(boolean reportStarted) {
     //如果  mCurProcessor 为空,则构建一个 CommandProcessor 对象,本质为 AsynTask对象
     if (mCurProcessor == null) {
         mCurProcessor = new CommandProcessor();
         ...
         //利用AsyncTask 执行多线程任务,提交任务
         mCurProcessor.executeOnExecutor(AsyncTask.THREAD_POOL_EXECUTOR);
     }
}
一开始mCurProcessor 为空,所以会执行  mCurProcessor = new CommandProcessor();
final class CommandProcessor extends AsyncTask<Void, Void, Void> {
     @Override
     protected Void doInBackground(Void... params) {
         GenericWorkItem work;
         //遍历执行任务列表中的任务
         while ((work = dequeueWork()) != null) {
             //回调给子线程中执行
             onHandleWork(work.getIntent());
             //标识当前任务执行完成
             work.complete();
         }
        return null;
     }

     /**
     * AsyncTask 取消任务的执行
     * @param aVoid
     */
     @Override
     protected void onCancelled(Void aVoid) {
         processorFinished();
     }

     /**
     * AsyncTask 执行完队列中所有的任务之后,通过执行  processorFinished 告知任务结束的时机
     * @param aVoid
     */
     @Override
     protected void onPostExecute(Void aVoid) {
        processorFinished();
     }
}
可以看出这本质是一个 AsyncTask,接着调用 mCurProcessor.executeOnExecutor(AsyncTask.THREAD_POOL_EXECUTOR);那么这个任务就会提交给 AsycTask执行了,那么当AsyncTask执行的时候
就会触发doInBackground(),我们看看这里所做的操作
while ((work = dequeueWork()) != null) {
      //回调给子线程中执行
      onHandleWork(work.getIntent());
      //标识当前任务执行完成
      work.complete();
}

/**
* 获取到队列的元素
* @return
*/
GenericWorkItem dequeueWork() {
   if (mJobImpl != null) {
       return mJobImpl.dequeueWork();
   } else if (mCompatQueue != null) {
       synchronized (mCompatQueue) {
           if (mCompatQueue != null && !mCompatQueue.isEmpty()) {
               return mCompatQueue.remove(0);
            } else {
               return null;
            }
      }
   } else {
     return null;
   }
}
由于当前我们假设为 8.0以下,所以 mJobImpl 为空,mCompatQueue 不为空,所以下面的逻辑就很简单了,通过从mCompatQueue 队列中移除对首的元素,然后执行这个任务,前面我们在onStartCommand
的时候会将任务添加到这个队列中,所以这里就能获取到添加的任务,接着执行  onHandleWork(work.getIntent());而  protected abstract void onHandleWork(@NonNull Intent intent);
为抽象方法,需要由子类实现,回到前面我们 说过的 CanaryWorkerService定义中,可以看到这个子类就实现了这个方法,


现在我们来分析下那么对于 8.0以上,多次的启动服务,传递任务的时候,是怎么样将任务执行起来的,我们知道多次启动服务会调用onStartCommand
public int onStartCommand(@Nullable Intent intent, int flags, int startId) {
     //如果 mCompatQueue 不为空 ,说明是8.0 以下的,添加到 mCompatQueue 中
     if (mCompatQueue != null) {
          mCompatWorkEnqueuer.serviceStartReceived();
          synchronized (mCompatQueue) {
             //添加队列
             mCompatQueue.add(new CompatWorkItem(intent != null ? intent : new Intent(), startId));
             //提交任务
             ensureProcessorRunningLocked(true);
          }
          //重传Intent。使用这个返回值时,如果在执行完onStartCommand后,服务被异常kill掉,系统会自动重启该服务,并将Intent的值传入。
          return START_REDELIVER_INTENT;
     } else {
         //非粘性的”。使用这个返回值时,如果在执行完onStartCommand后,服务被异常kill掉,系统不会自动重启该服务。
         return START_NOT_STICKY;
     }
}
由于我们这里为 8.0 以上,所以mCompatQueue 为空,所以会直接返回 START_NOT_STICKY,可以看到这里并没有执行任何的操作,还记得我们前面分析过 当我们使用JobScheduler 安排执行任务的时候
会在未来的某一个合适的时间点启动起来,那么系统就要告知我们他启动的时机点,我们在onCreate的时候,在8.0以上,创建了一个JobServiceEngineImpl 对象

static final class JobServiceEngineImpl extends JobServiceEngine
            implements MatrixJobIntentService.CompatJobEngine {
        ...
        @Override
        public boolean onStartJob(JobParameters params) {
            synchronized (mLock) {
                mParams = params;
            }

            // We can now start dequeuing work!
            mService.ensureProcessorRunningLocked(false);
            return true;
        }

        @Override
        public boolean onStopJob(JobParameters params) {
            boolean result = mService.doStopCurrentWork();
            synchronized (mLock) {
                // Once we return, the job is stopped, so its JobParameters are no
                // longer valid and we should not be doing anything with them.
                mParams = null;
            }
            return result;
        }

        /**
         * Dequeue some work.
         */
        @Override
        public MatrixJobIntentService.GenericWorkItem dequeueWork() {
            JobWorkItem work;
            synchronized (mLock) {
                if (mParams == null) {
                    return null;
                }
                work = mParams.dequeueWork();
            }
            if (work != null) {
                work.getIntent().setExtrasClassLoader(mService.getClassLoader());
                return new WrapperWorkItem(work);
            } else {
                return null;
            }
        }
        ...
}
下面来介绍下这些回调函数的作用

当开始一个任务时,onstartjob(jobparameters params) 是必须使用的方法,因为它是系统用来触发已经安排的工作(job)的。从上边的用例代码可以看到,该方法返回一个布尔值。不同的返回值对应了不同的处理方式。
如果返回值是false,该系统假定任何任务运行不需要很长时间并且到方法返回时已经完成。

如果返回值是true,那么系统假设任务是需要一些时间并且是需要在我们自己应用执行的。当给定的任务完成时需要通过调用
jobFinished(JobParameters params, boolean needsRescheduled)告知系统,该任务已经处理完成。如果返回值为true,我们需要手动调用jobFinished来停止该任务

所以onStartJob 就是系统执行任务的时机点,由于这里返回了true,告知系统我们执行的是耗时的任务,我们自己完成任务的执行过程,但是需要手动的调用jobFinished()标记当前任务执行完成,好让
系统继续执行下一个任务,在 onStartJob中有这样的逻辑  mService.ensureProcessorRunningLocked(false);

@TargetApi(11)
void ensureProcessorRunningLocked(boolean reportStarted) {
    //如果  mCurProcessor 为空,则构建一个 CommandProcessor 对象,本质为 AsynTask对象
    if (mCurProcessor == null) {
         mCurProcessor = new CommandProcessor();
         //告知耗时任务执行前的回调
         if (mCompatWorkEnqueuer != null && reportStarted) {
              mCompatWorkEnqueuer.serviceProcessingStarted();
         }

         //利用AsyncTask 执行多线程任务,提交任务
         mCurProcessor.executeOnExecutor(AsyncTask.THREAD_POOL_EXECUTOR);
   }
}

前面我们分析过,这是通过AsycTask来执行耗时的任务,本身通过回调 onStartJob 的时候,只是告诉你这个执行的时机点,至于任务的耗时执行,还是要自己来执行,那么继续看 doInBackground的函数
while ((work = dequeueWork()) != null) {
     //回调给子线程中执行
     onHandleWork(work.getIntent());
     //标识当前任务执行完成
     work.complete();
}
/**
* 获取到队列的元素
* @return
*/
GenericWorkItem dequeueWork() {
    if (mJobImpl != null) {
        return mJobImpl.dequeueWork();
    } else if (mCompatQueue != null) {
       synchronized (mCompatQueue) {
           if (mCompatQueue != null && !mCompatQueue.isEmpty()) {
                return mCompatQueue.remove(0);
            } else {
                return null;
           }
      }
    } else {
       return null;
    }
}
由于此时为 8.0以上,所以会执行  mJobImpl.dequeueWork();,也即是会执行到
public MatrixJobIntentService.GenericWorkItem dequeueWork() {
      JobWorkItem work;
      synchronized (mLock) {
          if (mParams == null) {
              return null;
          }
          work = mParams.dequeueWork();
      }
      if (work != null) {
           work.getIntent().setExtrasClassLoader(mService.getClassLoader());
           return new WrapperWorkItem(work);
      } else {
          return null;
      }
}
mParams 由 onStartJob(JobParameters params)回调的时候,保存下来当前执行的任务参数,所以这里不为空,最终获取到对应的Intent,然后传递给子类onHandleWork()中实现具体的耗时操作
这里的耗时任务主要是执行 doShrinkHprofAndReport()

protected void onHandleWork(Intent intent) {
        if (intent != null) {
            final String action = intent.getAction();
            //当前的操作为 分析 hprof 文件
            if (ACTION_SHRINK_HPROF.equals(action)) {
                //获取到传递过来的 HeapDump对象
                final HeapDump heapDump = (HeapDump) intent.getSerializableExtra(EXTRA_PARAM_HEAPDUMP);
                if (heapDump != null) {
                    //执行分析操作
                    doShrinkHprofAndReport(heapDump);
                } else {
                    MatrixLog.e(TAG, "failed to deserialize heap dump, give up shrinking and reporting.");
                }
            }
        }
}
public class CanaryWorkerService extends MatrixJobIntentService {
    ...
    /**
     * 分析 hprof文件
     * @param heapDump
     */
    private void doShrinkHprofAndReport(HeapDump heapDump) {
        //获取到当前  hprof 上一级
        final File hprofDir = heapDump.getHprofFile().getParentFile();
        //创建一个 文件  _shrink.hprof 文件
        final File shrinkedHProfFile = new File(hprofDir, getShrinkHprofName(heapDump.getHprofFile()));
        //创建一个zip 文件路径
        final File zipResFile = new File(hprofDir, getResultZipName("dump_result_" + android.os.Process.myPid()));
        //获取到原本的 hprof 文件路径
        final File hprofFile = heapDump.getHprofFile();
        ZipOutputStream zos = null;
        try {
            //分析之前获得当前的时间
            long startTime = System.currentTimeMillis();
            //分析原本的 hprof 文件,将有用的信息重新写入到 shrinkedHprofFile 中,也即是所谓的 对检测部分生成的 Hprof 文件进行了裁剪,移除了大部分无用数据
            new HprofBufferShrinker().shrink(hprofFile, shrinkedHProfFile);

            MatrixLog.i(TAG, "shrink hprof file %s, size: %dk to %s, size: %dk, use time:%d",
                    hprofFile.getPath(), hprofFile.length() / 1024, shrinkedHProfFile.getPath(), shrinkedHProfFile.length() / 1024, (System.currentTimeMillis() - startTime));

            //往 zipResFile 压缩包里面填充一个元素为  result.info
            zos = new ZipOutputStream(new BufferedOutputStream(new FileOutputStream(zipResFile)));
            final ZipEntry resultInfoEntry = new ZipEntry("result.info");
            final ZipEntry shrinkedHProfEntry = new ZipEntry(shrinkedHProfFile.getName());
            zos.putNextEntry(resultInfoEntry);

            //接下里 往 result.info 写内容
            final PrintWriter pw = new PrintWriter(new OutputStreamWriter(zos, Charset.forName("UTF-8")));
            pw.println("# Resource Canary Result Infomation. THIS FILE IS IMPORTANT FOR THE ANALYZER !!");
            pw.println("sdkVersion=" + Build.VERSION.SDK_INT);
            pw.println("manufacturer=" + Build.MANUFACTURER);
            //对应的hprof 文件
            pw.println("hprofEntry=" + shrinkedHProfEntry.getName());
            //当前泄漏的类名
            pw.println("leakedActivityKey=" + heapDump.getReferenceKey());
            pw.flush();
            zos.closeEntry();
            zos.putNextEntry(shrinkedHProfEntry);
            copyFileToStream(shrinkedHProfFile, zos);
            zos.closeEntry();

            shrinkedHProfFile.delete();
            hprofFile.delete();
            MatrixLog.i(TAG, "process hprof file use total time:%d", (System.currentTimeMillis() - startTime));

            //将当前分析的结果, 通知出去 ,这个服务 跟当前的应用程序在 同一个进程中
            CanaryResultService.reportHprofResult(this, zipResFile.getAbsolutePath(), heapDump.getActivityName());
        } catch (IOException e) {
            MatrixLog.printErrStackTrace(TAG, e, "");
        } finally {
            closeQuietly(zos);
        }
    }
    ...
}
这个函数会解析当前生成的hprof 文件,按照格式解析出特定有用的内容,比如用来判断Bitmap 重复的内容等,之后将解析之后认为有用的内容重新写到另一个hprof文件,这个官网称为
对检测部分生成的 Hprof 文件进行了裁剪,移除了大部分无用数据,降低了传输 Hprof 文件的开销,之后再创建一个 result.info 文件,里面输入当前检测的泄漏的类名,sdk的版本号,机型的类型
等,最终将这些内容打包成zip包,后面在通过CanaryResultService.reportHprofResult(this, zipResFile.getAbsolutePath(), heapDump.getActivityName()); 将泄漏的Activity信息,显示出来
这里就不分析了,至此流程差不多就是这样的
总结
对于 Resource Cannary的做法是 首先使用registerActivityLifecycleCallbacks 监听onActivityDestroyed 函数,接着在 onActivityDestroyed() 中将当前要销毁的Activity内容封装成一个DestroyedActivityInfo,然后添加到mDestroyedActivityInfos 中,接着开启一个扫描这个队列的任务,如果队列中有元素,为了防止系统忽略掉我们的Gc操作,首先进行测试声明了一个匿名的对象,然后触发Gc的操作,如果看这个对象是否还存在,如果存在,就说明系统忽略了我们的Gc操作,那么下次再来检查,当然假设当前系统没有忽略掉我们的Gc操作,之后的操作还是有可能会忽略的,所以为了防止误判,我们在第一次Gc的时候发现由WeakReference封装的对象还存在,那么还要再多触发俩次,如果达到了三次还是存在,那说明这个对象内存泄漏了,此时执行 Dump hprof的操作,由于这个dump hprof 耗时,所以放在了子线程中执行了,为了防止频繁的dump操作,我们通过在主线程的Handler里面设置了addIdleCallback的监听,当主线程没有消息要处理的时候,就会回调这个函数,将CountDownLatch 减一处理,当子线程调用CountDownLatch.wait的时候,可以判断主线程是否有回调addIdleHandler函数,如果回调了内部会减一处理,如果当前没有回调addIdleHandler函数,那么子线程调用 wait函数等待五秒之后还没有结果,就直接return,终止掉当前的这次dump请求,接着就是分析这个dump 下来的hprof 文件了,这里是启动了服务,这个服务在另一个进程里面,为了让这个服务进程能顺利的启动起来,在8.0以下使用了WakeLock,在8.0以上使用JobScheduler,同时在服务里面 通过AsyncTask 让分析的操作在子线程中执行,这就是大概的逻辑