简介
scrcpy 此应用程序提供USB(或通过TCP / IP)连接的Android设备的显示和控制。 它不需要任何root访问权限。 它适用于GNU / Linux,Windows和MacOS。而且最主要的是他是一个开源的应用,在github的地址为https://github.com/Genymobile/scrcpy start数量达到了9k多算是一个比较优秀的,值得去了解的一个应用
简单的使用
由于是跨平台的,所以针对不同的平台,可能操作不一样,比如针对window下,如果你想要简单的使用的化,可以直接的使用官网提供的压缩包,这里要注意这里是有区分32位或者64位的
压缩包的内容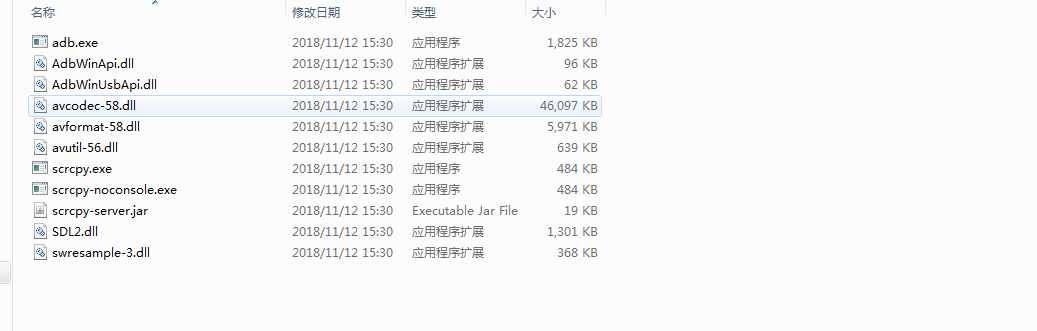
使用之前要先做好这三步
1.手机系统只能在5.0以上
2.手机需要连接usb线
3.手机要确保开启了usb 调试
当这三步确认好之后,点击压缩包里面的scrcpy.exe,如果可以看到类似这样的结果,就说明使用成功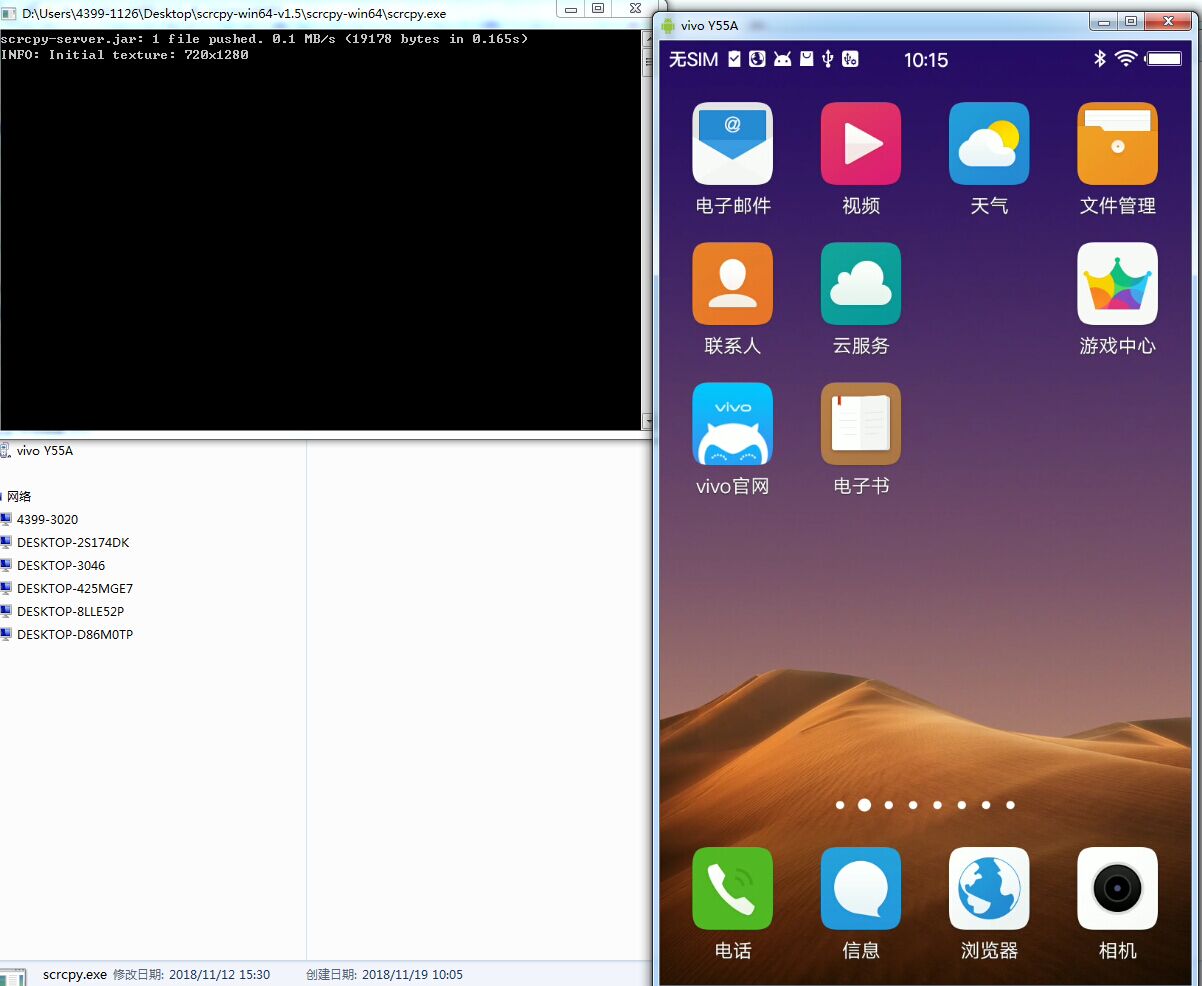
上面只是简单的使用官网人家提供好的压缩包,如果要想自己编译的化,可以参考官网的介绍 https://github.com/Genymobile/scrcpy/blob/master/BUILD.md 这上面会针对不同的平台都有对应的编译过程,不管你想在哪个平台编译,下面的这个操作都是必要的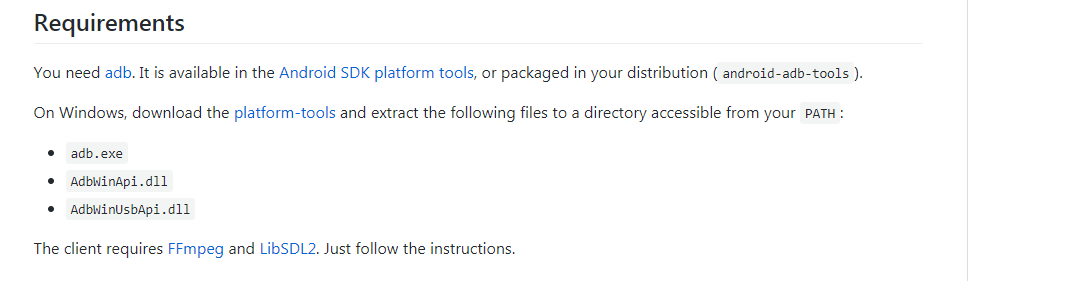
上面的内容大致就是要在对应的平台下面,设置adb环境变量,以及Android sdk 的环境变量,注意这是针对你的当前平台的环境变量,比如如果当前你想在window系统下面的linux 虚拟机编译,那么你需要在window环境配置adb,以及sdk的环境变量,当然在linux环境下面你也得设置adb的环境变量 ,如果是window编译采用 MSY2 也是一样的,下面来看Window编译的过程
首先你需要按照MSY2 ,具体的官网 http://www.msys2.org/ 注意 32位以及64位的区别, 下载安装完之后,启动MSY2的命令行窗口,注意要运行的是这个exe而不是其他的,要不然会出现错误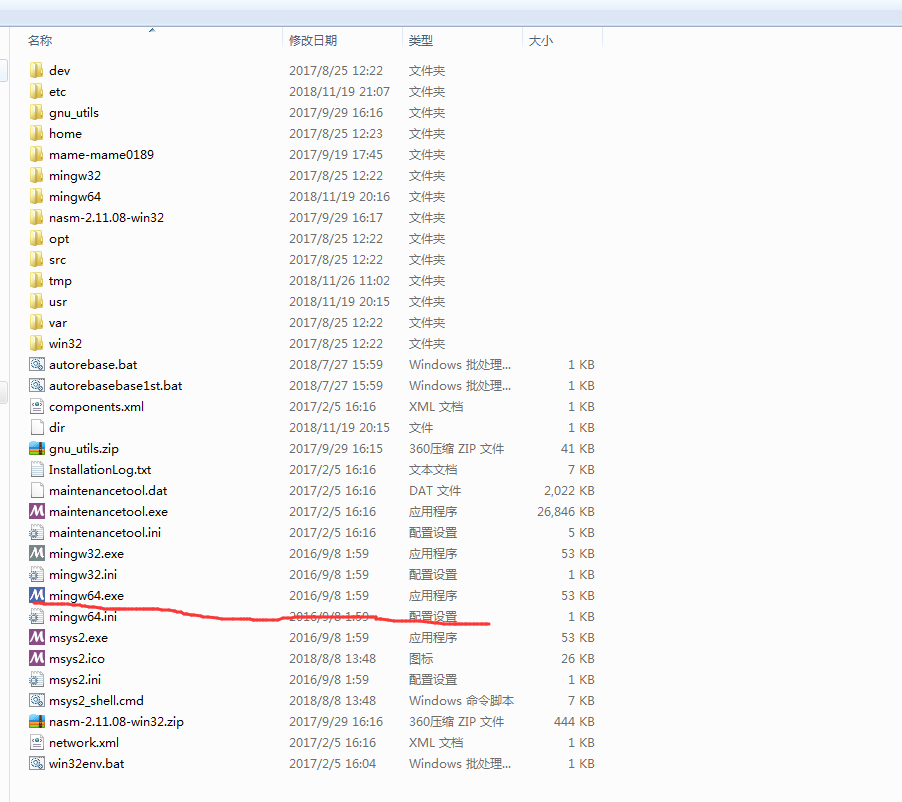
窗口打开之后,运行下面的命令,执行安装环境
//runtime dependencies
pacman -S mingw-w64-x86_64-SDL2 \
          mingw-w64-x86_64-ffmpeg

//client build dependencies
pacman -S mingw-w64-x86_64-make \
          mingw-w64-x86_64-gcc \
          mingw-w64-x86_64-pkg-config \
          mingw-w64-x86_64-meson
之后克隆这个项目
git clone https://github.com/Genymobile/scrcpy
cd scrcpy
之后执行下面的命令
meson x --buildtype release --strip -Db_lto=true
cd x
ninja
编译成功之后,回到上一目录,执行下面的命令
./run x
如果出现了这样的错误
ERROR: 'adb' command not found (make it accessible from your PATH or define its full path in the ADB environment variable)
ERROR: Could not execute "adb push"
Press any key to continue...
那即是你要在MSY2的环境中单独的设置adb的环境变量 ,也即是在/etc/profile文件中,添加你对应的adb环境变量,类似于
export PATH=$PATH:/home/4399-1126/platform-tools_r28.0.1-windows/platform-tools/
注意这里的home是当前MSY2环境下的目录,并不是pc的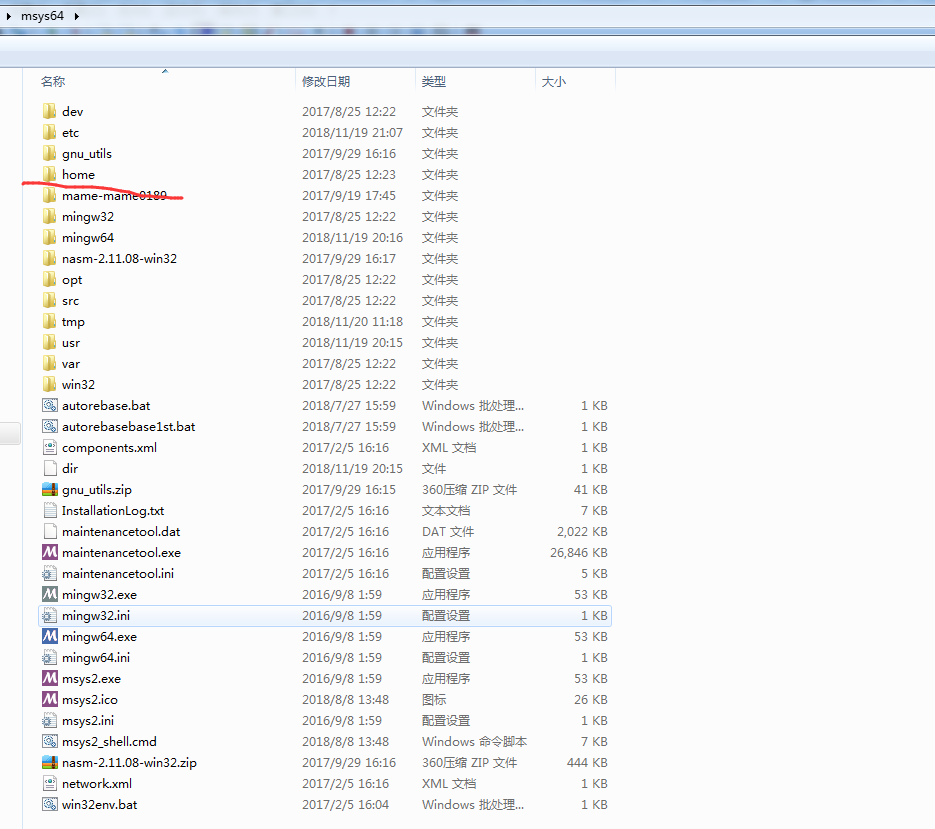
设置好后,再次的执行./run x 既可以看到下面的内容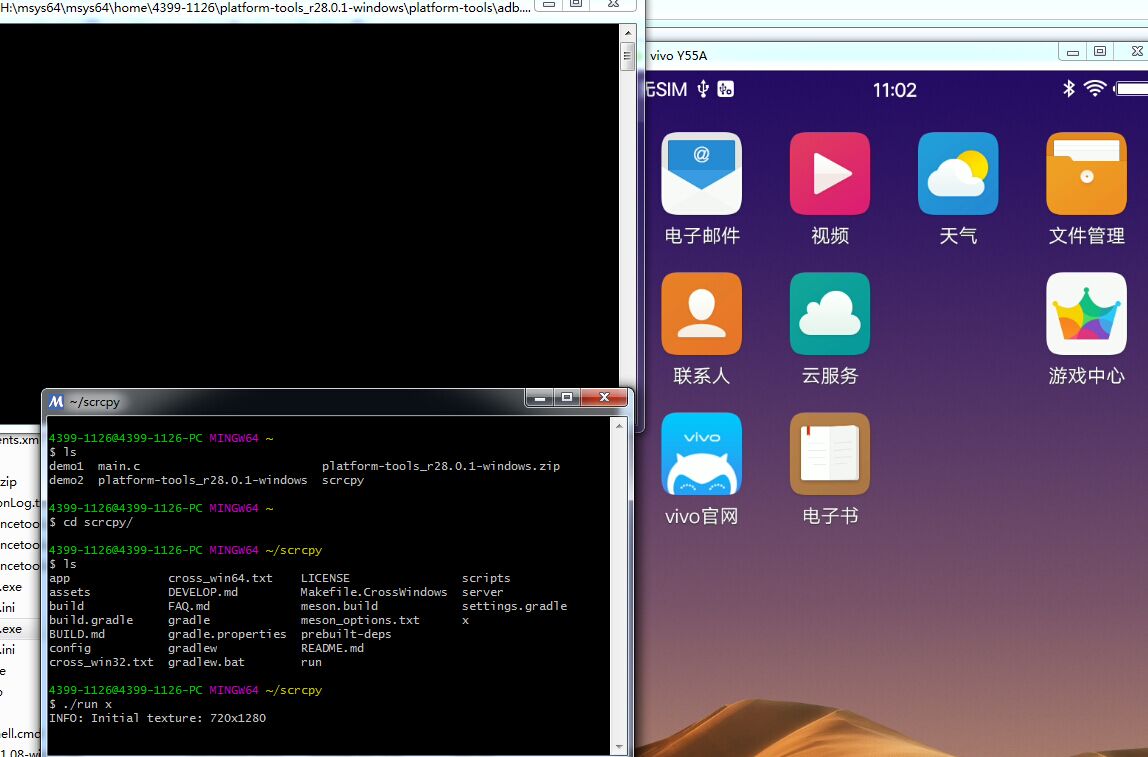
scrcpy的原理
对于这些投屏应用的原理,都是分客户端,服务端的,服务端负责发送界面的内容给客户端显示,客户端负责发送界面上的操作,发送给服务端,服务端响应执行对应的操作
编译的原理
由于我们想要方便的阅读源码,就要有一个方便的调试工具,首先将源码下载下来,发现对应服务端的逻辑是可以直接在Android Studio下面运行的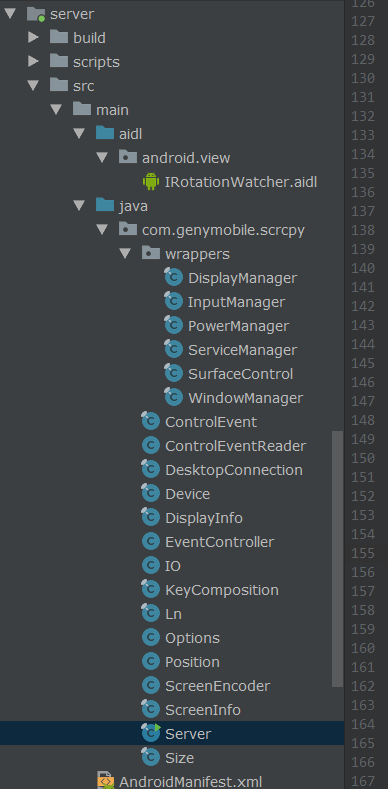
但是对于客户端来说,直接下载下来是不能直接运行的,下面是官网开发人员的说法,采用的是gdb还有vim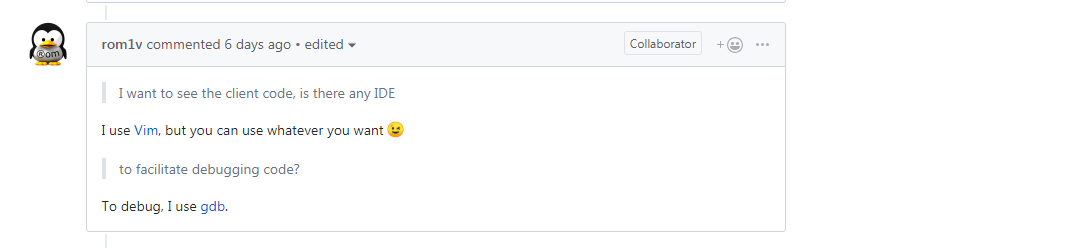
对于gdb来调试,实在是太痛苦了,所以我想自己采用其他的IDE来编译客户端的代码,所以首先要明白 他的编译原理,他是通过执行
meson x --buildtype release --strip -Db_lto=true
可以知道这是 采用一种meson的构建工具,所以接下来就分析下meson的编译过程
Meson编译原理
Meson的官网地址为 http://mesonbuild.com/Tutorial.html 以及基本的语法
比如新建一个main.c 代码如下
#include <stdio.h>

int main(int argc,char ** argv)
{
    printf("Hello There.\n");
    return 0;
}
编写完之后 新建一个meson.build 这个是用来说明怎么样构建,比如内容可以如下
project('tutorial','c')
executable('demo','main.c')
编写完之后,执行 $ meson helloWorld 这会在helloWorld目录下面存放 meson编译的内容,同时会在命令行中打印编译的结果
The Meson build system
version: 0.13.0-research
Source dir: /home/jpakkane/mesontutorial
Build dir: /home/jpakkane/mesontutorial/helloWorld
Build type: native build
Project name is "tutorial".
Using native c compiler "ccache cc". (gcc 4.8.2)
Creating build target "demo" with 1 files.
之后进入到这个helloWorld编译目录,执行
$ ninja
ninja 是跟meson一起构建的工具,如果你没有提前安装ninja的化是会出现错误的,在linux 下面可以通过下面的命令来安装
apt-get install build-ninja
编译完之后,helloWorld编译目录下面就会有最终编译的结果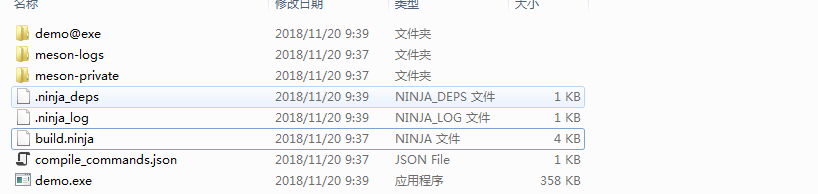
最终执行,就可以打印我们程序的内容了
$ ./demo
对于meson.build 语法的使用,可以在官网中查看,比如想要看executable ,直接搜索就可以看到了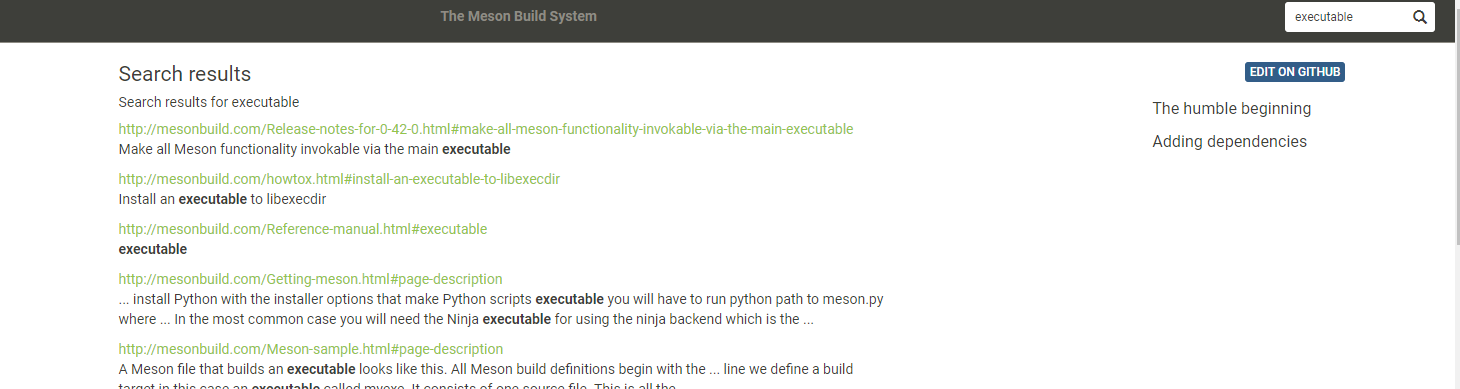
接下来看看scrcpy编译的过程 首先执行
meson x --buildtype release --strip -Db_lto=true
根据前面的demo可以知道 x为存放编译之后的文件目录 –buildtype release –strip -Db_lto=true 为构建的参数 ,这个命令对应的脚本文件为根目录下面的meson.build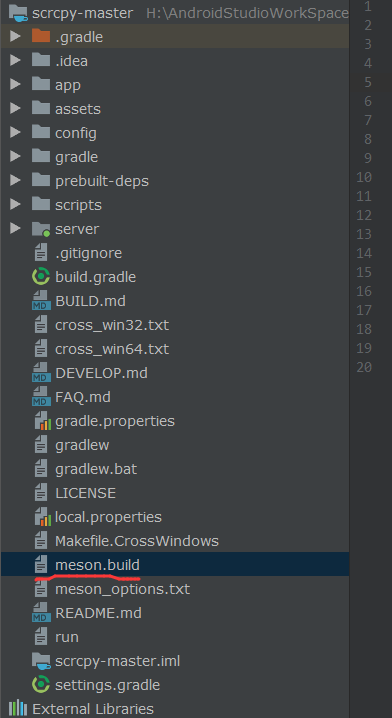
根目录的meson.build文件内容为:
project('scrcpy', 'c',              //c指明了是采用c写的
        version: '1.5',
        meson_version: '>= 0.37',   //指明了meson的版本号要求
        default_options: 'c_std=c11')

if get_option('build_app')
    subdir('app')
endif

if get_option('build_server')
    subdir('server')
endif

run_target('run', command: ['scripts/run-scrcpy.sh'])
接着执行 if get_option(‘build_app’),以及if get_option(‘build_server’) 这俩个选项的配置在 根目录下面有一个 meson_options.txt ,下面为具体的内容
option('build_app', type: 'boolean', value: true, description: 'Build the client')
option('build_server', type: 'boolean', value: true, description: 'Build the server')
option('crossbuild_windows', type: 'boolean', value: false, description: 'Build for Windows from Linux')
option('windows_noconsole', type: 'boolean', value: false, description: 'Disable console on Windows (pass -mwindows flag)')
option('prebuilt_server', type: 'string', description: 'Path of the prebuilt server')
option('override_server_path', type: 'string', description: 'Hardcoded path to find the server at runtime')
option('skip_frames', type: 'boolean', value: true, description: 'Always display the most recent frame')
option('hidpi_support', type: 'boolean', value: true, description: 'Enable High DPI support')
所以会对应的执行 subdir(‘app’) ,subdir(‘server’) 这是添加编译的子目录,跟MakeFile一样,这里先分析 subdir(‘app’),对应的app根目录下面也会有meson.build脚本文件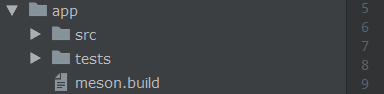
下面为app目录下面的meson.build的关键的脚本内容
#指定编译的源文件
src = [
    'src/main.c',
    'src/command.c',
    'src/control_event.c',
    'src/controller.c',
    'src/convert.c',
    'src/decoder.c',
    'src/device.c',
    'src/file_handler.c',
    'src/fps_counter.c',
    'src/frames.c',
    'src/input_manager.c',
    'src/lock_util.c',
    'src/net.c',
    'src/recorder.c',
    'src/scrcpy.c',
    'src/screen.c',
    'src/server.c',
    'src/str_util.c',
    'src/tiny_xpm.c',
]
默认的配置为 #option('crossbuild_windows', type: 'boolean', value: false, description: 'Build for Windows from Linux'),
if not get_option('crossbuild_windows')

    # native build
    dependencies = [
        #查找外部依赖项(通常是系统上安装的库),也即是查看系统是否有这些库存在
        dependency('libavformat'),
        dependency('libavcodec'),
        dependency('libavutil'),
        dependency('sdl2'),
    ]
else
    # cross-compile mingw32 build (from Linux to Windows)  linux 下面跨平台编译
    ....
endif
#
cc = meson.get_compiler('c')

#如果是window下,添加编译的文件
if host_machine.system() == 'windows'
    src += [ 'src/sys/win/command.c' ]
    src += [ 'src/sys/win/net.c' ]
    dependencies += cc.find_library('ws2_32')
else
    #如果是linux下面
    src += [ 'src/sys/unix/command.c' ]
    src += [ 'src/sys/unix/net.c' ]
endif

#创建一个空配置对象。您应该使用方法调用添加配置,最后在调用时使用它configure_file。
conf = configuration_data()

# expose the build type 设置 BUILD_DEBUG  为 参数配置的值
conf.set('BUILD_DEBUG', get_option('buildtype') == 'debug')

# the version, updated on release 设置 SCRCPY_VERSION 为 meson.project_version()
conf.set_quoted('SCRCPY_VERSION', meson.project_version())

# the prefix used during configuration (meson --prefix=PREFIX)  设置PREFIX 为 get_option('prefix')
conf.set_quoted('PREFIX', get_option('prefix'))

# the path of the server, which will be appended to the prefix
# ignored if OVERRIDE_SERVER_PATH if defined
# must be consistent with the install_dir in server/meson.build  设置PREFIXED_SERVER_PATH 为 /share/scrcpy/scrcpy-server.jar
conf.set_quoted('PREFIXED_SERVER_PATH', '/share/scrcpy/scrcpy-server.jar')

# the path of the server to be used "as is"
# this is useful for building a "portable" version (with the server in the same
# directory as the client)
override_server_path = get_option('override_server_path')
if override_server_path != ''
    conf.set_quoted('OVERRIDE_SERVER_PATH', override_server_path)
else
    # undefine it
    conf.set('OVERRIDE_SERVER_PATH', false)
endif

# the default client TCP port for the "adb reverse" tunnel
# overridden by option --port  设置 DEFAULT_LOCAL_PORT 为27183
conf.set('DEFAULT_LOCAL_PORT', '27183')

# the default max video size for both dimensions, in pixels
# overridden by option --max-size 设置DEFAULT_MAX_SIZE 为0
conf.set('DEFAULT_MAX_SIZE', '0')  # 0: unlimited

# the default video bitrate, in bits/second
# overridden by option --bit-rate 设置 DEFAULT_BIT_RATE 为8Mbps
conf.set('DEFAULT_BIT_RATE', '8000000')  # 8Mbps

# whether the app should always display the most recent available frame, even
# if the previous one has not been displayed
# SKIP_FRAMES improves latency at the cost of framerate  设置SKIP_FRAMES 为 get_option('skip_frames')
conf.set('SKIP_FRAMES', get_option('skip_frames'))

# enable High DPI support 设置 HIDPI_SUPPORT 为 get_option('hidpi_support')
conf.set('HIDPI_SUPPORT', get_option('hidpi_support'))

# disable console on Windows  设置 WINDOWS_NOCONSOLE 为 get_option('windows_noconsole') meson_options.txt中设置为fasle
conf.set('WINDOWS_NOCONSOLE', get_option('windows_noconsole'))

#就会将这些参数配置生成到 config.h中
configure_file(configuration: conf, output: 'config.h')

#要添加搜索路径的目录
src_dir = include_directories('src')

...

#创建一个新的可执行文件。第一个参数指定其名称,其余位置参数定义要使用的输入文件。它们可以是以下类型:
#install,设置为true时,应安装此可执行文件 dependencies用dependency或创建的一个或多个对象 find_library (对于外部代表)或declare_dependency (对于由项目构建的代表)
#include_directories使用该include_directories函数创建的一个或多个对象
executable('scrcpy', src, dependencies: dependencies, include_directories: src_dir, install: true, c_args: c_args, link_args: link_args)
继续分析 subdir(‘server’),对应的app根目录下面也会有meson.build脚本文件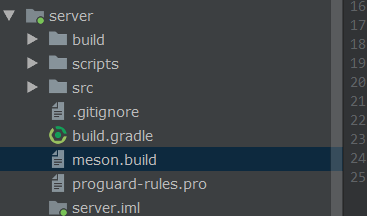
下面是对应的脚本文件内容
# 由于在option.txt文件中 有这样的配置 option('prebuilt_server', type: 'string', description: 'Path of the prebuilt server')
prebuilt_server = get_option('prebuilt_server')
if prebuilt_server == ''
    custom_target('scrcpy-server',
                  build_always: true,  # gradle is responsible for tracking source changes
                  input: '.',
                  output: 'scrcpy-server.jar',
                  command: [find_program('./scripts/build-wrapper.sh'), '@INPUT@', '@OUTPUT@', get_option('buildtype')],
                  install: true,
                  install_dir: 'share/scrcpy')
else
    #自定义目标可以接受零个或多个输入文件,并使用它们生成一个或多个输出文件。使用自定义目标,您可以在构建时运行此编译器以生成源:
    #在@INPUT@那里将会转化成'somefile1.c' 'file2.c'。就像输出一样,您也可以通过索引单独引用每个输入文件。 然后你就把它放在你的程序中就可以了。
    custom_target('scrcpy-server-prebuilt',
                  input: prebuilt_server,
                  output: 'scrcpy-server.jar',
                  command: ['cp', '@INPUT@', '@OUTPUT@'],
                  install: true,
                  install_dir: 'share/scrcpy')
endif
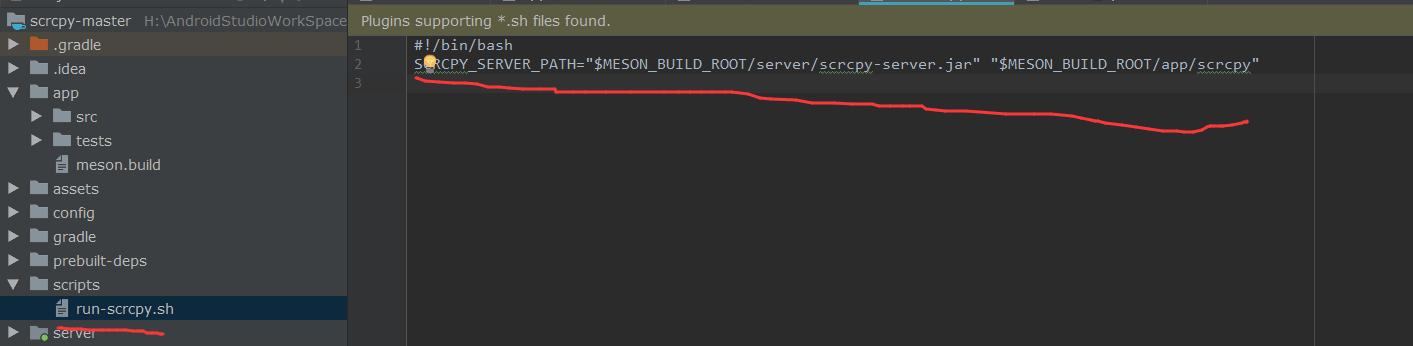
接着根目录的meson.build 继续执行
run_target('run', command: ['scripts/run-scrcpy.sh']) ,这个脚本主要用来定义俩个变量
这样meson.build配置完成,就会生成一个config.h 对应的内容为执行 app目录下面的meson.build 的配置
#pragma once

#undef BUILD_DEBUG

#define DEFAULT_BIT_RATE 8000000

#define DEFAULT_LOCAL_PORT 27183

#define DEFAULT_MAX_SIZE 0

#define HIDPI_SUPPORT

#undef OVERRIDE_SERVER_PATH

#define PREFIX "H:/msys64/msys64/mingw64"

#define PREFIXED_SERVER_PATH "/share/scrcpy/scrcpy-server.jar"

#define SCRCPY_VERSION "1.5"

#define SKIP_FRAMES

#undef WINDOWS_NOCONSOLE
AndroidStudio Cmake编译
从前面的分析meson的编译原理以及编译脚本可以知道,客户端meson.build文件中有这样的依赖
# native build
    dependencies = [
        #查找外部依赖项(通常是系统上安装的库),也即是查看系统是否有这些库存在
        dependency('libavformat'),
        dependency('libavcodec'),
        dependency('libavutil'),
        dependency('sdl2'),
    ]
所以可以知道我们在编译这个库的时候,需要将外部库先准备好,第一个是FFmpeg,这个库的编译,网上一大堆,我之前也有写过编译FFmpeg,这里就不重复了,对应SDL2 官网地址为 https://www.libsdl.org/download-2.0.php将其下载下来,源码目录中,有一个android-project 的目录,我们可以查看是怎么样编译的
JNI目录结构
首先是根目录的Android.mk文件内容为
include $(call all-subdir-makefiles)
接着是src/Android.mk文件
LOCAL_PATH := $(call my-dir)
include $(CLEAR_VARS)
LOCAL_MODULE := main
SDL_PATH := ../SDL
LOCAL_C_INCLUDES := $(LOCAL_PATH)/$(SDL_PATH)/include
# Add your application source files here...
LOCAL_SRC_FILES := YourSourceHere.c
LOCAL_SHARED_LIBRARIES := SDL2
LOCAL_LDLIBS := -lGLESv1_CM -lGLESv2 -llog
include $(BUILD_SHARED_LIBRARY)
可以知道这个mk文件有这样的内容 LOCAL_SHARED_LIBRARIES := SDL2 说明了他需要SDL2 这个so ,而这个目录为 SDL_PATH := ../SDL 而在工程的源码目录中还有一个Android.mk文件
下面是Android.mk文件的关键内容
LOCAL_PATH := $(call my-dir)

###########################
#
# SDL shared library
#
###########################

include $(CLEAR_VARS)

LOCAL_MODULE := SDL2

LOCAL_C_INCLUDES := $(LOCAL_PATH)/include

LOCAL_EXPORT_C_INCLUDES := $(LOCAL_C_INCLUDES)

LOCAL_SRC_FILES := \
    $(subst $(LOCAL_PATH)/,, \
    $(wildcard $(LOCAL_PATH)/src/*.c) \
    $(wildcard $(LOCAL_PATH)/src/audio/*.c) \
    $(wildcard $(LOCAL_PATH)/src/audio/android/*.c) \
    $(wildcard $(LOCAL_PATH)/src/audio/dummy/*.c) \
    $(LOCAL_PATH)/src/atomic/SDL_atomic.c.arm \
    $(LOCAL_PATH)/src/atomic/SDL_spinlock.c.arm \
    $(wildcard $(LOCAL_PATH)/src/core/android/*.c) \
    $(wildcard $(LOCAL_PATH)/src/cpuinfo/*.c) \
    $(wildcard $(LOCAL_PATH)/src/dynapi/*.c) \
    $(wildcard $(LOCAL_PATH)/src/events/*.c) \
    $(wildcard $(LOCAL_PATH)/src/file/*.c) \
    $(wildcard $(LOCAL_PATH)/src/haptic/*.c) \
    $(wildcard $(LOCAL_PATH)/src/haptic/android/*.c) \
    $(wildcard $(LOCAL_PATH)/src/joystick/*.c) \
    $(wildcard $(LOCAL_PATH)/src/joystick/android/*.c) \
    $(wildcard $(LOCAL_PATH)/src/joystick/hidapi/*.c) \
    $(wildcard $(LOCAL_PATH)/src/loadso/dlopen/*.c) \
    $(wildcard $(LOCAL_PATH)/src/power/*.c) \
    $(wildcard $(LOCAL_PATH)/src/power/android/*.c) \
    $(wildcard $(LOCAL_PATH)/src/filesystem/android/*.c) \
    $(wildcard $(LOCAL_PATH)/src/sensor/*.c) \
    $(wildcard $(LOCAL_PATH)/src/sensor/android/*.c) \
    $(wildcard $(LOCAL_PATH)/src/render/*.c) \
    $(wildcard $(LOCAL_PATH)/src/render/*/*.c) \
    $(wildcard $(LOCAL_PATH)/src/stdlib/*.c) \
    $(wildcard $(LOCAL_PATH)/src/thread/*.c) \
    $(wildcard $(LOCAL_PATH)/src/thread/pthread/*.c) \
    $(wildcard $(LOCAL_PATH)/src/timer/*.c) \
    $(wildcard $(LOCAL_PATH)/src/timer/unix/*.c) \
    $(wildcard $(LOCAL_PATH)/src/video/*.c) \
    $(wildcard $(LOCAL_PATH)/src/video/android/*.c) \
    $(wildcard $(LOCAL_PATH)/src/video/yuv2rgb/*.c) \
    $(wildcard $(LOCAL_PATH)/src/test/*.c))

LOCAL_SHARED_LIBRARIES := hidapi

LOCAL_CFLAGS += -DGL_GLEXT_PROTOTYPES
LOCAL_LDLIBS := -ldl -lGLESv1_CM -lGLESv2 -llog -landroid

ifeq ($(NDK_DEBUG),1)
    cmd-strip :=
endif

include $(BUILD_SHARED_LIBRARY)

###########################
#
# SDL static library
#
###########################

LOCAL_MODULE := SDL2_static

LOCAL_MODULE_FILENAME := libSDL2

LOCAL_LDLIBS :=
LOCAL_EXPORT_LDLIBS := -ldl -lGLESv1_CM -lGLESv2 -llog -landroid

include $(BUILD_STATIC_LIBRARY)

###########################
#
# SDL main static library
#
###########################

include $(CLEAR_VARS)

LOCAL_C_INCLUDES := $(LOCAL_PATH)/include

LOCAL_MODULE := SDL2_main

LOCAL_MODULE_FILENAME := libSDL2main

include $(BUILD_STATIC_LIBRARY)

###########################
#
# hidapi library
#
###########################

include $(CLEAR_VARS)

LOCAL_CPPFLAGS += -std=c++11

LOCAL_SRC_FILES := src/hidapi/android/hid.cpp

LOCAL_MODULE := libhidapi
LOCAL_LDLIBS := -llog

include $(BUILD_SHARED_LIBRARY)
从这个MakeFile可以知道,如果我们单纯的想编译出SDL2.so的化,可以去掉 SDL2_main,SDL2_static 这俩个库,剩下的就是要编译的Makefile文件了,之后会编译出俩个so,一个为hidapi,一个为SDL2
外部库准备好了,接下来就是源码的编译了,下面是源码的目录结构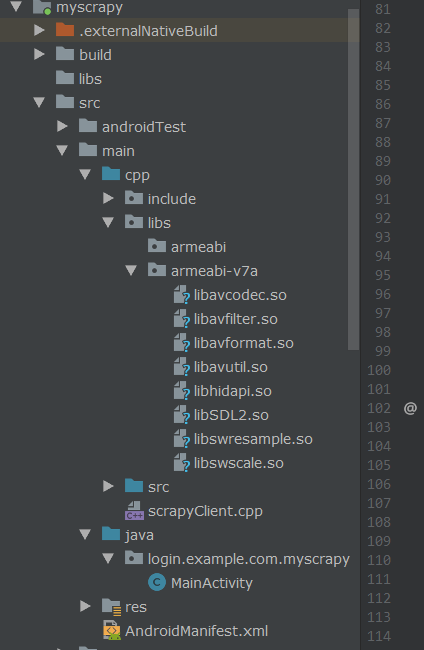
首先是build.gradle的配置
//指定编译的版本
ndk {
    abiFilters 'armeabi-v7a'
}

//指定外部so的路径
sourceSets{
    main{
        jniLibs.srcDirs=['src/main/cpp/libs']
    }
}
//采用CmakeList编译
externalNativeBuild {
    cmake {
        path "CMakeLists.txt"
    }
}
CMakeLists.txt的内容为
cmake_minimum_required(VERSION 3.4.1)

#添加头文件的查找目录
include_directories(${CMAKE_SOURCE_DIR}/src/main/cpp/include
                    ${CMAKE_SOURCE_DIR}/src/main/cpp/include/SDL2
                    ${CMAKE_SOURCE_DIR}/src/main/cpp/src )


#libavcodec
add_library( libavcodec
        SHARED
        IMPORTED)

set_target_properties( libavcodec
PROPERTIES IMPORTED_LOCATION
${CMAKE_SOURCE_DIR}/src/main/cpp/libs/${ANDROID_ABI}/libavcodec.so )

#libavformat
add_library( libavformat
        SHARED
        IMPORTED)

set_target_properties( libavformat
        PROPERTIES IMPORTED_LOCATION
        ${CMAKE_SOURCE_DIR}/src/main/cpp/libs/${ANDROID_ABI}/libavformat.so )


#libavutil
add_library( libavutil
        SHARED
        IMPORTED)

set_target_properties( libavutil
        PROPERTIES IMPORTED_LOCATION
        ${CMAKE_SOURCE_DIR}/src/main/cpp/libs/${ANDROID_ABI}/libavutil.so )


#SDL2
add_library( libSDL2
        SHARED
        IMPORTED)

set_target_properties( libSDL2
        PROPERTIES IMPORTED_LOCATION
        ${CMAKE_SOURCE_DIR}/src/main/cpp/libs/${ANDROID_ABI}/libSDL2.so )

#SDL2 辅助库
add_library( libhidapi
        SHARED
        IMPORTED)

set_target_properties( libhidapi
        PROPERTIES IMPORTED_LOCATION
        ${CMAKE_SOURCE_DIR}/src/main/cpp/libs/${ANDROID_ABI}/libhidapi.so )


#设置变量 自定义变量使用SET(OBJ_NAME xxxx),使用时${OBJ_NAME}
set(My_ARIC_SRC ${CMAKE_SOURCE_DIR}/src/main/cpp/src)
#message( WARNING  "${My_ARIC_SRC}")

set(scraptSrc
        ${My_ARIC_SRC}/main.c
        ${My_ARIC_SRC}/command.c
        ${My_ARIC_SRC}/control_event.c
        ${My_ARIC_SRC}/controller.c
        ${My_ARIC_SRC}/convert.c
        ${My_ARIC_SRC}/decoder.c
        ${My_ARIC_SRC}/device.c
        ${My_ARIC_SRC}/file_handler.c
        ${My_ARIC_SRC}/fps_counter.c
        ${My_ARIC_SRC}/frames.c
        ${My_ARIC_SRC}/input_manager.c
        ${My_ARIC_SRC}/lock_util.c
        ${My_ARIC_SRC}/net.c
        ${My_ARIC_SRC}/recorder.c
        ${My_ARIC_SRC}/scrcpy.c
        ${My_ARIC_SRC}/screen.c
        ${My_ARIC_SRC}/server.c
        ${My_ARIC_SRC}/sys/unix/command.c
        ${My_ARIC_SRC}/sys/unix/net.c
        ${My_ARIC_SRC}/str_util.c
        ${My_ARIC_SRC}/tiny_xpm.c )

add_library( # Sets the name of the library.
        native-lib

        # Sets the library as a shared library.
        SHARED

        ${CMAKE_SOURCE_DIR}/src/main/cpp/scrapyClient.cpp

        # Provides a relative path to your source file(s).
        ${scraptSrc} )


find_library( # Sets the name of the path variable.
        log-lib

        # Specifies the name of the NDK library that
        # you want CMake to locate.
        log )

target_link_libraries( # Specifies the target library.
        native-lib

        libavcodec
        libavformat
        libavutil
        libSDL2
        libhidapi

        ${log-lib} )
scrcpy编译结果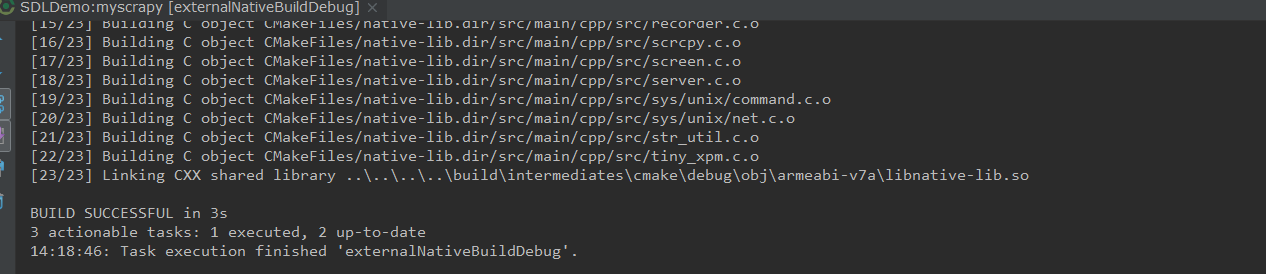
scrcpy 调试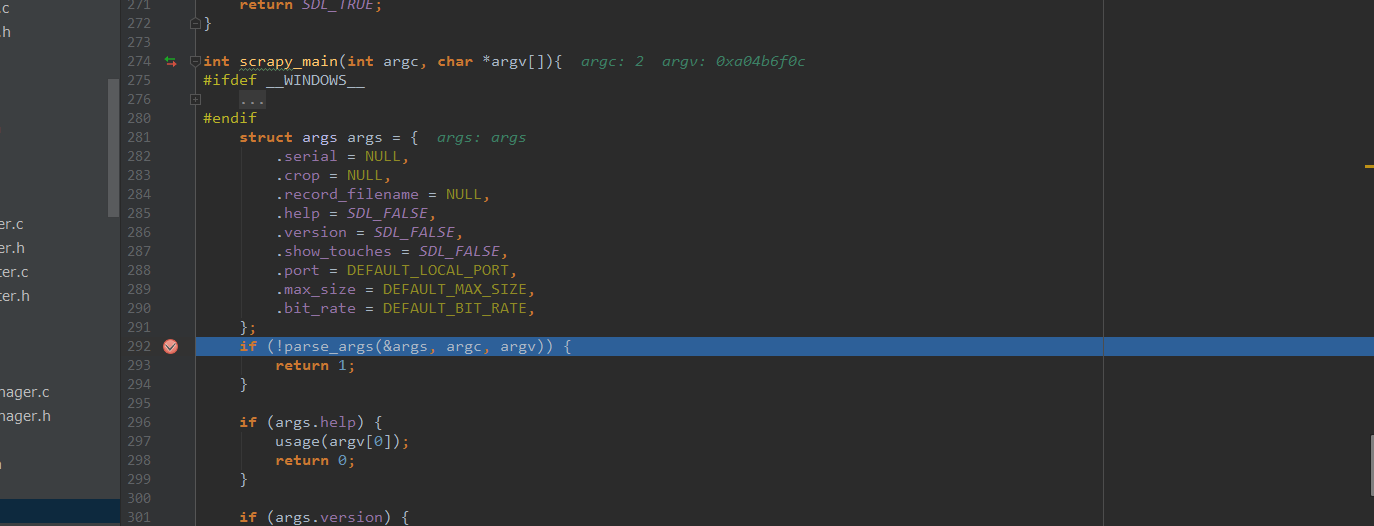
手机并不具备Adb命令
通过上面的配置,这样我们看代码就很方便了,但是在运行代码的时候确会出现问题,由于他内部是通过执行adb命令,而我们的手机根本就没有adb。所以我又换在了linux下面编译
Ubuntu18.04 编译
前面说过,不管在什么平台下面编译,首先要配置sdk, adb的环境变量
首先这里有一个问题很重要,就是我的Ubuntu是放在虚拟机里面的,而我手机是连接在PC上面的,有一个这样的疑问就是在虚拟机下面可以通过adb 连接到手机?,答案是可以的
具体可以参考 https://blog.csdn.net/u013372900/article/details/54862712
配置之后的结果为
接着执行下面的命令,按照对应的环境变量
//runtime dependencies
sudo apt install ffmpeg libsdl2-2.0.0

//client build dependencies
sudo apt install make gcc pkg-config meson ninja-build \
                 libavcodec-dev libavformat-dev libavutil-dev \
                 libsdl2-dev

//server build dependencies
sudo apt install openjdk-8-jdk
之后就是克隆scrcpy项目,然后执行编译,跟window下面编译的命令是一样的,这里就不不重复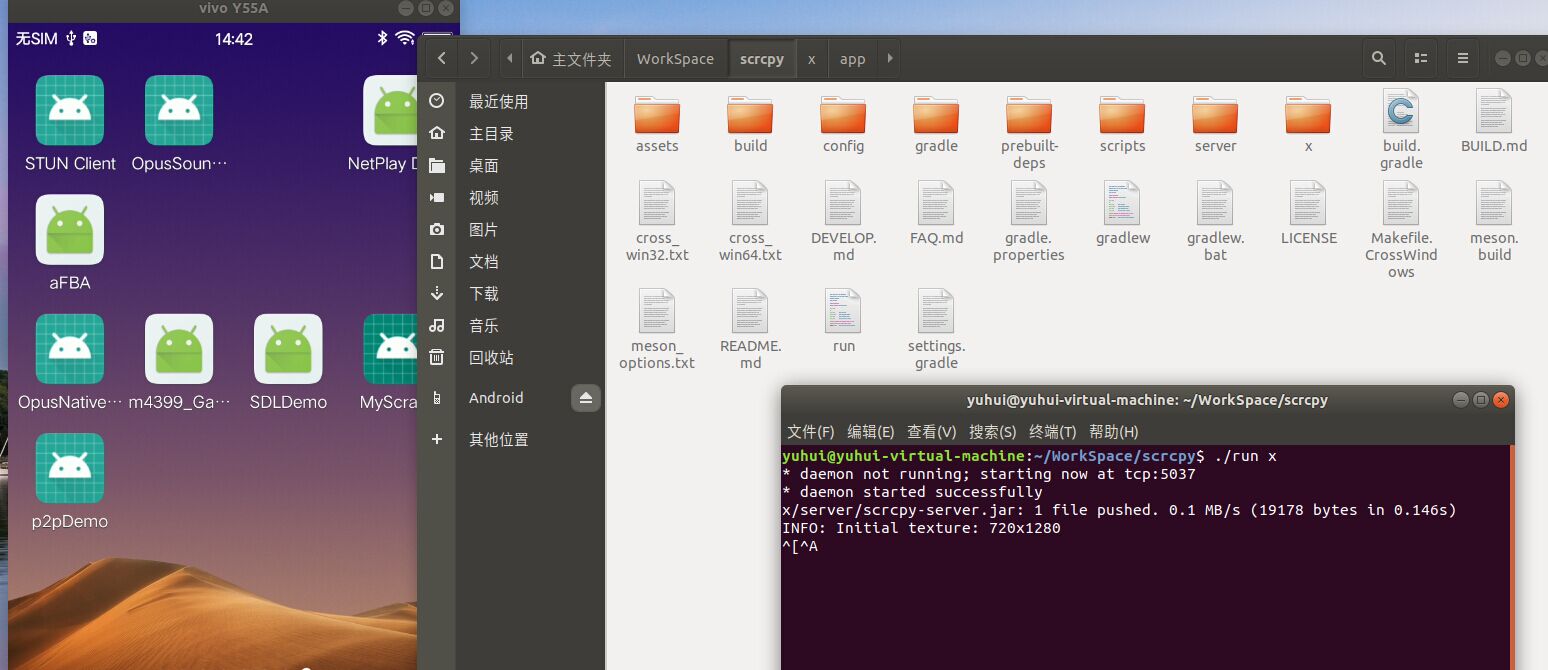
linux 下面的Eclipse For C++ 是非常方便的一款开发C/C++的工具,而且可以识别含有MakeFile的工程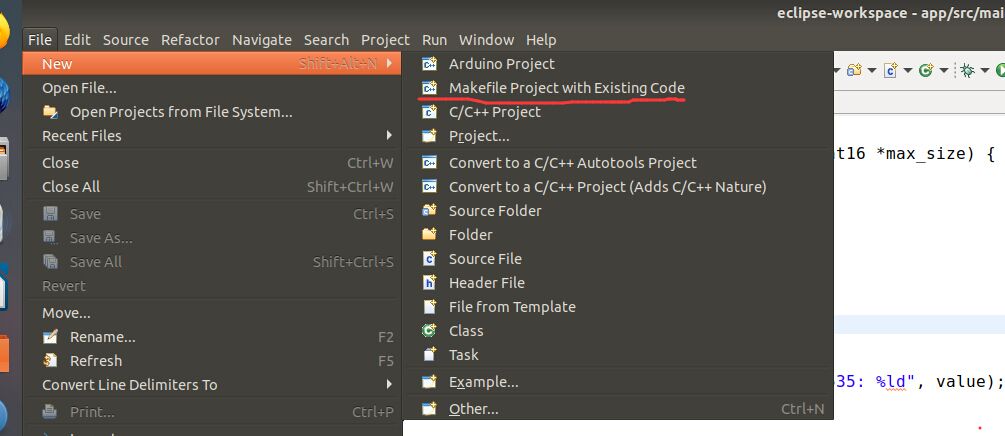
由于这个工程是采用meson构建的,所以我们需要自己写MakeFile文件,关于meson的编译过程前面已经分析过了,所以针对的写MakeFile文件也不会难
对应的MakeFile文件目录为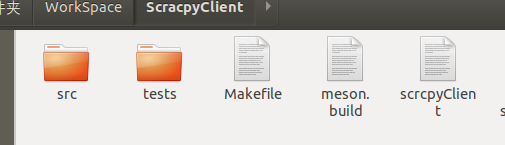
下面是该MakeFile文件的内容
OBJS     = src/main.o src/command.o src/control_event.o src/controller.o src/convert.o src/decoder.o \
src/device.o src/file_handler.o src/fps_counter.o src/frames.o src/input_manager.o src/lock_util.o \
src/net.o src/recorder.o src/scrcpy.o src/screen.o src/server.o src/str_util.o src/tiny_xpm.o \
src/sys/unix/command.o src/sys/unix/net.o

CFLAGS   = -I src/ -I/usr/include/x86_64-linux-gnu -I/usr/include/SDL2 -flto -fdiagnostics-color=always -pipe -D_FILE_OFFSET_BITS=64 -Wall -Winvalid-pch -std=c11 -g3 -O0 -D_REENTRANT

CC       = gcc

LDFLAGS += -flto -Wl,--no-undefined -Wl,--as-needed -Wl,-O1 -Wl,--start-group -lavformat -lavcodec -lavutil -lSDL2 -Wl,--end-group

all: scrcpyClient


#gcc foo.c -L /home/justin/lib -lfoo -o foo

scrcpyClient: $(OBJS)
    $(CC) $(CFLAGS) -o scrcpyClient $(OBJS) $(LDFLAGS)


clean:
    rm -f src/*.o src/sys/unix/*.o scrcpyClient

anyway: clean all
.PHONY: clean all anyway
之后执行make 如果可以生成 scrcpyClient ,就代表没有问题了,然后再通过Eclipse 通过MakeFile的方式导入这个项目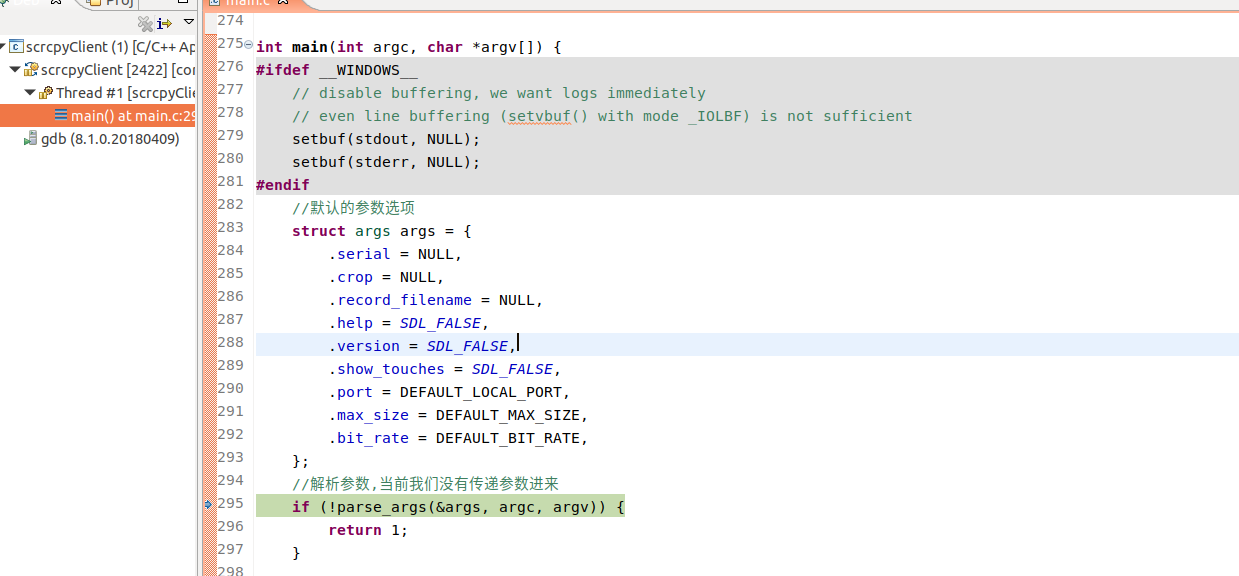
至此我们可以开心的看代码了,接下来一篇会介绍scrcpy的原理