1.简介
在前面一篇文章中,我们分析了Android系统在启动时安装应用程序的过程,这些应用程序安装好之后,还需要有一个Home应用程序来负责把它们在桌面上展示出来,
在Android系统中,这个默认的Home应用程序就是Launcher了,本文将详细分析Launcher应用程序的启动过程。
2.大体的流程
Android系统的Home应用程序Launcher是由ActivityManagerService启动的,而ActivityManagerService和PackageManagerService一样,都是在开机时由SystemServer组件启动的,
SystemServer组件首先是启动ePackageManagerServic,由它来负责安装系统的应用程序,具体可以参考前面一篇文章Android应用程序安装过程源代码分析,系统中的应用程序安装好了以后,
SystemServer组件接下来就要通过ActivityManagerService来启动Home应用程序Launcher了,Launcher在启动的时候便会通过PackageManagerServic把系统中已经安装好的应用程序以快捷图标的形式
展示在桌面上,这样用户就可以使用这些应用程序了
3.源码分析看看Launcher是怎么样被启动的
我们知道在SystemService中有启动很多的服务,其中包括ActivityManagerService,SystemService文件所在的位置为frameworks\base\services\java\com\android\server\SystemServer.java

public static void main(String[] args) {
    new SystemServer().run();
}

private void run() {
    ...
    startBootstrapServices();
    startCoreServices();
    startOtherServices();
    ...
}

private void startBootstrapServices() {
    ...
    //mSystemServiceManager.startService()原理就会构造传递过来的类文件的对象,同时会调用onStart的回调,
    //具体可以查看源码frameworks/base/services/core/java/com/android/server/SystemServiceManager.java
    mActivityManagerService = mSystemServiceManager.startService(
                ActivityManagerService.Lifecycle.class).getService();
    ....
}

也即是会构造LifeCycle的对象,从而构造ActivityManagerService()的对象
public static final class Lifecycle extends SystemService {
        private final ActivityManagerService mService;

        public Lifecycle(Context context) {
            super(context);
            mService = new ActivityManagerService(context);
        }

        @Override
        public void onStart() {
            mService.start();
        }

        public ActivityManagerService getService() {
            return mService;
        }
}

SystemServer 函数的run方法继续执行,当执行到了startOtherServices();函数

private void startOtherServices() {
    ....
    mActivityManagerService.systemReady(new Runnable() {
        .....
    }
    ...
}

也即是执行到了ActivityManagerService 中的systemReady()函数
public void systemReady(final Runnable goingCallback) {

    ....
    // Enable home activity for system user, so that the system can always boot
    if (UserManager.isSplitSystemUser()) {
        ComponentName cName = new ComponentName(mContext, SystemUserHomeActivity.class);
        try {
             AppGlobals.getPackageManager().setComponentEnabledSetting(cName,
                PackageManager.COMPONENT_ENABLED_STATE_ENABLED, 0, UserHandle.USER_SYSTEM);
        } catch (RemoteException e) {
                throw e.rethrowAsRuntimeException();
             }
        }
        startHomeActivityLocked(currentUserId, "systemReady");
    ...
}

startHomeActivityLocked()函数的实现
boolean startHomeActivityLocked(int userId, String reason) {
    if (mFactoryTest == FactoryTest.FACTORY_TEST_LOW_LEVEL
                && mTopAction == null) {
            // We are running in factory test mode, but unable to find
            // the factory test app, so just sit around displaying the
            // error message and don't try to start anything.
            return false;
        }

        Intent intent = getHomeIntent();
        ActivityInfo aInfo = resolveActivityInfo(intent, STOCK_PM_FLAGS, userId);
        if (aInfo != null) {
            intent.setComponent(new ComponentName(aInfo.applicationInfo.packageName, aInfo.name));
            // Don't do this if the home app is currently being
            // instrumented.
            aInfo = new ActivityInfo(aInfo);
            aInfo.applicationInfo = getAppInfoForUser(aInfo.applicationInfo, userId);
            ProcessRecord app = getProcessRecordLocked(aInfo.processName,
                    aInfo.applicationInfo.uid, true);
            if (app == null || app.instrumentationClass == null) {
                intent.setFlags(intent.getFlags() | Intent.FLAG_ACTIVITY_NEW_TASK);
                mActivityStarter.startHomeActivityLocked(intent, aInfo, reason);
            }
        } else {
            Slog.wtf(TAG, "No home screen found for " + intent, new Throwable());
        }

        return true;
}

getHomeIntent(); 函数的实现
Intent getHomeIntent() {
        Intent intent = new Intent(mTopAction, mTopData != null ? Uri.parse(mTopData) : null);
        intent.setComponent(mTopComponent);
        intent.addFlags(Intent.FLAG_DEBUG_TRIAGED_MISSING);
        if (mFactoryTest != FactoryTest.FACTORY_TEST_LOW_LEVEL) {
            intent.addCategory(Intent.CATEGORY_HOME);
        }
        return intent;
}

函数首先创建一个CATEGORY_HOME类型的Intent,然后通过Intent.resolveActivityInfo函数向PackageManagerService查询Category类型为HOME的Activity,
这里我们假设只有系统自带的Launcher应用程序注册了HOME类型的Activity(见packages/apps/Launcher2/AndroidManifest.xml文件):
packages/apps/Launcher2/AndroidManifest.xml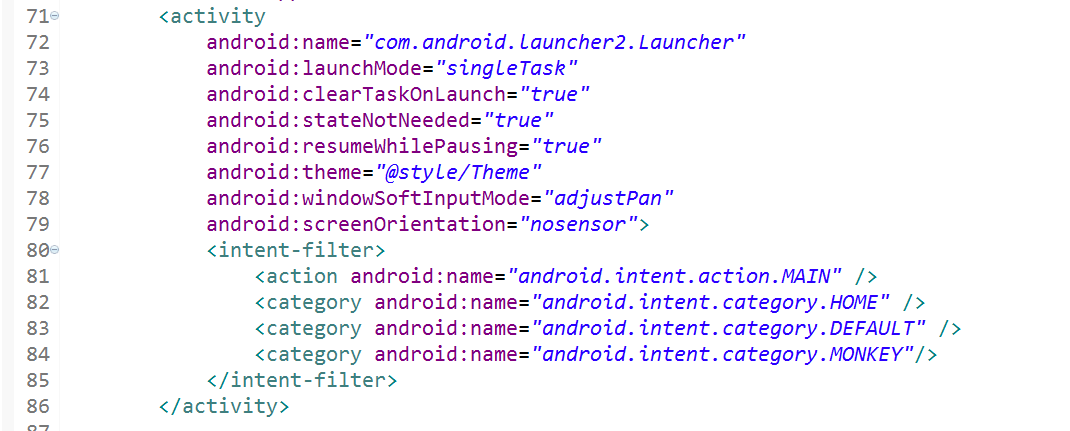
因此,这里就返回com.android.launcher2.Launcher这个Activity了。由于是第一次启动这个Activity,接下来调用函数getProcessRecordLocked返回来的ProcessRecord值为null,
于是,就调用mActivityStarter.startActivityLocked函数启动com.android.launcher2.Launcher这个Activity了,这里的mActivityStarter是一个ActivityStarter类型的成员变量。
源码的路径为 /android-7.1.1_r1/frameworks/base/services/core/java/com/android/server/am/ActivityStarter.java

void startHomeActivityLocked(Intent intent, ActivityInfo aInfo, String reason) {
        mSupervisor.moveHomeStackTaskToTop(HOME_ACTIVITY_TYPE, reason);
        startActivityLocked(null /*caller*/, intent, null /*ephemeralIntent*/,
                null /*resolvedType*/, aInfo, null /*rInfo*/, null /*voiceSession*/,
                null /*voiceInteractor*/, null /*resultTo*/, null /*resultWho*/,
                0 /*requestCode*/, 0 /*callingPid*/, 0 /*callingUid*/, null /*callingPackage*/,
                0 /*realCallingPid*/, 0 /*realCallingUid*/, 0 /*startFlags*/, null /*options*/,
                false /*ignoreTargetSecurity*/, false /*componentSpecified*/, null /*outActivity*/,
                null /*container*/, null /*inTask*/);
        if (mSupervisor.inResumeTopActivity) {
            // If we are in resume section already, home activity will be initialized, but not
            // resumed (to avoid recursive resume) and will stay that way until something pokes it
            // again. We need to schedule another resume.
            mSupervisor.scheduleResumeTopActivities();
        }
}

之后调用startActivityLocked()函数,至于怎么样启动Activity就不分析了,之前有分析过,调用这个函数的最后结果就是把com.android.launcher2.Launcher启动起来,接着调用它的onCreate函数。
源码的路径为 /android-7.1.1_r1/packages/apps/Launcher2/src/com/android/launcher2/Launcher.java
protected void onCreate(Bundle savedInstanceState) {
    ...
    if (!mRestoring) {
        if (sPausedFromUserAction) {
            // If the user leaves launcher, then we should just load items asynchronously when
            // they return.
            mModel.startLoader(true, -1);
        }
    }
    ...
}

这里的mModel是一个LauncherModel类型的成员变量,这里通过调用它的startLoader成员函数来执行加应用程序的操作。
public void startLoader(boolean isLaunching, int synchronousBindPage) {
        synchronized (mLock) {
            ...
            // Don't bother to start the thread if we know it's not going to do anything
            if (mCallbacks != null && mCallbacks.get() != null) {
                ....
                mLoaderTask = new LoaderTask(mApp, isLaunching);
                if (synchronousBindPage > -1 && mAllAppsLoaded && mWorkspaceLoaded) {
                    mLoaderTask.runBindSynchronousPage(synchronousBindPage);
                } else {
                    sWorkerThread.setPriority(Thread.NORM_PRIORITY);
                    sWorker.post(mLoaderTask);
                }
            }
        }
}

这里不是直接加载应用程序,而是把加载应用程序的操作作为一个消息来处理。这里的sWorker是一个Handler,通过它的post方式把一个消息放在消息队列中去,
然后系统就会调用传进去的参数mLoaderTask的run函数来处理这个消息,这个mLoaderTask是LoaderTask类型的实例,于是,下面就会执行LoaderTask类的run函数了。

 public void run() {
            synchronized (mLock) {
                mIsLoaderTaskRunning = true;
            }

            keep_running: {

            // Second step. Load all apps.
            loadAndBindAllApps();
            .....

    }
}
这里调用loadAndBindAllApps成员函数来进一步操作。
private void loadAndBindAllApps() {
            if (DEBUG_LOADERS) {
                Log.d(TAG, "loadAndBindAllApps mAllAppsLoaded=" + mAllAppsLoaded);
            }
            if (!mAllAppsLoaded) {
                loadAllAppsByBatch();
                synchronized (LoaderTask.this) {
                    if (mStopped) {
                        return;
                    }
                    mAllAppsLoaded = true;
                }
            } else {
                onlyBindAllApps();
            }
}
由于还没有加载过应用程序,这里的mAllAppsLoaded为false,于是就继续调用loadAllAppsByBatch函数来进一步操作了。

 private void loadAllAppsByBatch() {

    ...
    final Callbacks oldCallbacks = mCallbacks.get();

    final Intent mainIntent = new Intent(Intent.ACTION_MAIN, null);
    mainIntent.addCategory(Intent.CATEGORY_LAUNCHER);

    for (int p = 0; p < profileCount; p++) {
                UserHandle user = profiles.get(p);
                List<LauncherActivityInfo> apps = null;
                int N = Integer.MAX_VALUE;

                int startIndex;
                int i = 0;
                int batchSize = -1;
                while (i < N && !mStopped) {
                    if (i == 0) {
                        final long qiaTime = DEBUG_LOADERS ? SystemClock.uptimeMillis() : 0;
                        apps = mLauncherApps.getActivityList(null, user);
                        if (DEBUG_LOADERS) {
                            Log.d(TAG, "queryIntentActivities took "
                                    + (SystemClock.uptimeMillis()-qiaTime) + "ms");
                        }
                        if (apps == null) {
                            return;
                        }
                        N = apps.size();
                        if (DEBUG_LOADERS) {
                            Log.d(TAG, "queryIntentActivities got " + N + " apps");
                        }
                        if (N == 0) {
                            // There are no apps?!?
                            return;
                        }
                        if (mBatchSize == 0) {
                            batchSize = N;
                        } else {
                            batchSize = mBatchSize;
                        }

                        final long sortTime = DEBUG_LOADERS ? SystemClock.uptimeMillis() : 0;
                        Collections.sort(apps,
                                new LauncherModel.ShortcutNameComparator(mLabelCache));
                        if (DEBUG_LOADERS) {
                            Log.d(TAG, "sort took "
                                    + (SystemClock.uptimeMillis()-sortTime) + "ms");
                        }
                    }

                    final long t2 = DEBUG_LOADERS ? SystemClock.uptimeMillis() : 0;

                    startIndex = i;
                    for (int j=0; i<N && j<batchSize; j++) {
                        // This builds the icon bitmaps.
                        mBgAllAppsList.add(new ApplicationInfo(apps.get(i), user,
                                mIconCache, mLabelCache));
                        i++;
                    }

                    final Callbacks callbacks = tryGetCallbacks(oldCallbacks);
                    final ArrayList<ApplicationInfo> added = mBgAllAppsList.added;
                    final boolean firstProfile = p == 0;
                    mBgAllAppsList.added = new ArrayList<ApplicationInfo>();
                    mHandler.post(new Runnable() {
                        public void run() {
                            final long t = SystemClock.uptimeMillis();
                            if (callbacks != null) {
                                if (firstProfile) {
                                    callbacks.bindAllApplications(added);
                                } else {
                                    callbacks.bindAppsAdded(added);
                                }
                                if (DEBUG_LOADERS) {
                                    Log.d(TAG, "bound " + added.size() + " apps in "
                                        + (SystemClock.uptimeMillis() - t) + "ms");
                                }
                            } else {
                                Log.i(TAG, "not binding apps: no Launcher activity");
                            }
                        }
                    });
    .....
 }

函数首先构造一个CATEGORY_LAUNCHER类型的Intent:
final Intent mainIntent = new Intent(Intent.ACTION_MAIN, null);
mainIntent.addCategory(Intent.CATEGORY_LAUNCHER);

接着调用了  apps = mLauncherApps.getActivityList(null, user);
mLauncherApps 为LauncherApps 的实例对象,因此会调用对应的方法
public List<LauncherActivityInfo> getActivityList(String packageName, UserHandle user) {
    ....
    activities = mService.getLauncherActivities(packageName, user);
    ....
}
这里的mService为ILauncherApps实例对象,声明为 private ILauncherApps mService;
查看他赋值的地方
/** @hide */
public LauncherApps(Context context, ILauncherApps service) {
    mContext = context;
    mService = service;
    mPm = context.getPackageManager();
}
而LacuncherApps在 LauncherMode中是通过 mLauncherApps = (LauncherApps) app.getSystemService(Context.LAUNCHER_APPS_SERVICE); 这样完成赋值的,所以我们去追踪下是什么时候构建的
这个service

我们知道在SystemService中有启动很多的服务,这里也会启动这个服务
private void startOtherServices() {
    ....
     mSystemServiceManager.startService(LauncherAppsService.class);
    ....
}
上面有分析过mSystemServiceManager.startService的执行原理,就是利用传递进来的class文件,利用类加载器,加载这个类文件,构造这个对象,并且调用了他的onStart函数
public class LauncherAppsService extends SystemService {

    private final LauncherAppsImpl mLauncherAppsImpl;

    public LauncherAppsService(Context context) {
        super(context);
        mLauncherAppsImpl = new LauncherAppsImpl(context);
    }

    @Override
    public void onStart() {
        publishBinderService(Context.LAUNCHER_APPS_SERVICE, mLauncherAppsImpl);
    }

    .....
}
于是就会调用了LauncherAppsService中的构造函数,这里就创建一个对象,LauncherAppsImpl,他是一个内部类

static class LauncherAppsImpl extends ILauncherApps.Stub {
  ....
  public LauncherAppsImpl(Context context) {
            mContext = context;
            mPm = mContext.getPackageManager();
            mUm = (UserManager) mContext.getSystemService(Context.USER_SERVICE);
            mActivityManagerInternal = Preconditions.checkNotNull(
                    LocalServices.getService(ActivityManagerInternal.class));
            mShortcutServiceInternal = Preconditions.checkNotNull(
                    LocalServices.getService(ShortcutServiceInternal.class));
            mShortcutServiceInternal.addListener(mPackageMonitor);
            mCallbackHandler = BackgroundThread.getHandler();
    }
    ....
}
之后回调执行onStart函数,这里就会执行
@Override
public void onStart() {
    publishBinderService(Context.LAUNCHER_APPS_SERVICE, mLauncherAppsImpl);
}

这里的Context.LAUNCHER_APPS_SERVICE, mLauncherAppsImpl跟我们创建这个服务 mLauncherApps = (LauncherApps) app.getSystemService(Context.LAUNCHER_APPS_SERVICE);
是一样的,所以其实我们得到的是LauncherAppsImpl

于是继续执行 activities = mService.getLauncherActivities(packageName, user);,就会调用到LauncherAppsImpl对应的方法
@Override
public ParceledListSlice<ResolveInfo> getLauncherActivities(String packageName, UserHandle user) throws RemoteException {

            final Intent mainIntent = new Intent(Intent.ACTION_MAIN, null);
            mainIntent.addCategory(Intent.CATEGORY_LAUNCHER);
            mainIntent.setPackage(packageName);
            long ident = Binder.clearCallingIdentity();
            try {
                List<ResolveInfo> apps = mPm.queryIntentActivitiesAsUser(mainIntent,
                        PackageManager.MATCH_DIRECT_BOOT_AWARE
                                | PackageManager.MATCH_DIRECT_BOOT_UNAWARE,
                        user.getIdentifier());
                return new ParceledListSlice<>(apps);
            } finally {
                Binder.restoreCallingIdentity(ident);
            }
}

final Intent mainIntent = new Intent(Intent.ACTION_MAIN, null);
mainIntent.addCategory(Intent.CATEGORY_LAUNCHER);
mainIntent.setPackage(packageName);
首先构造一个Category 为Intent.CATEGORY_LAUNCHER 的Intent,然后调用了下面的函数,去查询出
下一步就是通过这个mPm.queryIntentActivitiesAsUser接口来取回所有Action类型为Intent.ACTION_MAIN,并且Category类型为Intent.CATEGORY_LAUNCHER的Activity了。

List<ResolveInfo> apps = mPm.queryIntentActivitiesAsUser(mainIntent,
                        PackageManager.MATCH_DIRECT_BOOT_AWARE
                                | PackageManager.MATCH_DIRECT_BOOT_UNAWARE,
                        user.getIdentifier());

mPm.queryIntentActivitiesAsUser(),这个方法是抽象方法
public abstract List<ResolveInfo> queryIntentActivitiesAsUser(Intent intent, @ResolveInfoFlags int flags, @UserIdInt int userId);

他的具体实现是在ApplicationPackageManager 源码的路径为/android-7.1.1_r1/frameworks/base/core/java/android/app/ApplicationPackageManager.java
public List<ResolveInfo> queryIntentActivitiesAsUser(Intent intent,
            int flags, int userId) {
        try {
            ParceledListSlice<ResolveInfo> parceledList =
                    mPM.queryIntentActivities(intent,
                            intent.resolveTypeIfNeeded(mContext.getContentResolver()),
                            flags, userId);
            if (parceledList == null) {
                return Collections.emptyList();
            }
            return parceledList.getList();
        } catch (RemoteException e) {
            throw e.rethrowFromSystemServer();
        }
}

ParceledListSlice<ResolveInfo> parceledList =mPM.queryIntentActivities(intent,intent.resolveTypeIfNeeded(mContext.getContentResolver()),flags, userId);
这里的 mPM为 private final IPackageManager mPM;这里我们知道是PackageManagerServcie 而且知道他是在什么时候被启动的,这里就直接到他里面查找对应的函数实现
@Override
public @NonNull ParceledListSlice<ResolveInfo> queryIntentActivities(Intent intent,
            String resolvedType, int flags, int userId) {
        try {
            Trace.traceBegin(TRACE_TAG_PACKAGE_MANAGER, "queryIntentActivities");

            return new ParceledListSlice<>(
                    queryIntentActivitiesInternal(intent, resolvedType, flags, userId));
        } finally {
            Trace.traceEnd(TRACE_TAG_PACKAGE_MANAGER);
        }
}

回忆前面一篇文章Android应用程序安装过程源代码分析,系统启动PackageManagerService时,会把系统中的应用程序都解析一遍,然后把解析得到的Activity都保存在mActivities变量中,
这里通过这个mActivities变量的queryIntent函数返回符合条件intent的Activity,这里要返回的便是Action类型为Intent.ACTION_MAIN,并且Category类型为Intent.CATEGORY_LAUNCHER的Activity了。


这里回调之前的loadAllAppsByBatch函数中,从queryIntentActivities函数调用处返回所要求的Activity后,便调用函数tryGetCallbacks(oldCallbacks)得到一个返CallBack接口,这个接口是由Launcher类实现的,
接着调用这个接口的.bindAllApplications函数来进一步操作。注意,这里又是通过消息来处理加载应用程序的操作的。


public final class Launcher extends Activity
        implements View.OnClickListener, OnLongClickListener, LauncherModel.Callbacks,
                   View.OnTouchListener {
    .....
    public void bindAllApplications(final ArrayList<ApplicationInfo> apps) {
        Runnable setAllAppsRunnable = new Runnable() {
            public void run() {
                if (mAppsCustomizeContent != null) {
                    mAppsCustomizeContent.setApps(apps);
                }
            }
        };
    }
    ....
}

这里的mAppsCustomizeContent 的本质是一个PagerView的实例对象

public void setApps(ArrayList<ApplicationInfo> list) {
    mApps = list;
    Collections.sort(mApps, LauncherModel.getAppNameComparator());
    updatePageCountsAndInvalidateData();
}

函数setApps 将传递过来的值给 mApps赋值,有了这些ApplicationInfo实例之后,就可以在桌面上展示系统中所有的应用程序了。
到了这里,系统默认的Home应用程序Launcher就把PackageManagerService中的应用程序加载进来了,当我们在屏幕上点击下面这个图标时,就会把刚才加载好的应用程序以图标的形式展示出来了:
点击这个按钮时,便会响应Launcher.onClick函数:
public void onClick(View v) {
    ....
    onClickAllAppsButton(v);
    ....
}

public void onClickAllAppsButton(View v) {
    showAllApps(true);
}

void showAllApps(boolean animated) {
    if (mState != State.WORKSPACE) return;

    showAppsCustomizeHelper(animated, false);
    mAppsCustomizeTabHost.requestFocus();

    // Change the state *after* we've called all the transition code
    mState = State.APPS_CUSTOMIZE;

    // Pause the auto-advance of widgets until we are out of AllApps
    mUserPresent = false;
    updateRunning();
    closeFolder();

    // Send an accessibility event to announce the context change
    getWindow().getDecorView().sendAccessibilityEvent(AccessibilityEvent.TYPE_WINDOW_STATE_CHANGED);
}

至此全部的应用程序展现出来

点击程序中的应用图标就会执行
mLauncher.startActivitySafely(v, appInfo.intent, appInfo);
这里的成员变量mLauncher的类型为Launcher,于是就调用Launcher.startActivitySafely函数来启动应用程序了,这个过程具体可以参考Android应用程序启动过程源代码分析一文。